Owl Crafts and Learning Activities for Kids
How to Make Owl Crafts and Learning Activities
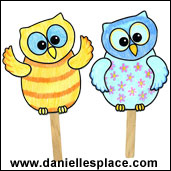
Bobble Head Owl Cup Craft for Kids
What you will need:
Two 9-oz. Party Cups
Color Coding Labels (Dot Stickers, Found at Office Supply Stores)
Brass Brad Fasteners
Stapler or Tape
Paper
Hole Punch
Colored Paper
How to make the bobble head craft:
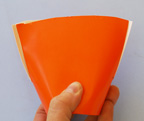
1. To make the head of the owl, measure two inches from the bottom of one cup, draw a line around the cup, and then cut on the line. To add the scallops along the edge, draw them with a pencil first and then cut along the lines.
2. Print out the owl face patterns or make your own and glue it to the cup. Punch a hole in the back of the head about 1/2" from the edge.
Member's ![]()
Free Digital Download ![]()
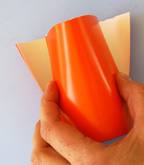
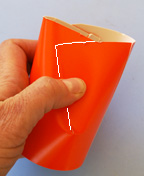
3. To make the wings, cut the rolled up top off of another cup. Place the seam of the cup towards the back and fold the cup in half creasing the sides to find the sides of the cup. Measure 2 1/4" down on each side of the cup and cut slits. Press the front of the cup down rolling the sides in towards the center of the cup. Bring the back sides of the cup over the front and staple the sides down.
4. Punch a hole about 3/4" down from the top edge in the back of the cup.
5. Insert a brass brad into hole in the body cup so that the prongs are facing out. Place the head cup on top of the body placing the hole over the prongs of the brass brad. Spread out the prongs.
6. To finish draw the owl's feet on construction paper, cut them out, and glue or tape them to the bottom of the cup.
7. Stick double-sided tape on the bottom of the cup and stick it to your car dashboard. Watch the head bobble as you drive.
Copyright 2012, Digital by Design, Inc. - See Copyright Information
Types of Owls Printable Coloring Sheet or Activity Sheet
Use this activity sheet to help your children study the different types of owls. They can color the sheets and talk about the differences between the species, or cut them out and write descriptions about each one including their habitat, characteristics, physical attributes.
This pattern comes in both color and black and white and is available to members only.
Member's ![]()
Copyright 2011, Digital by Design, Inc. - See Copyright Information
Owl Puppets Craft and Creative Play
Owl Babies Stick Puppet Skit
Read "Owl Babies" by Martin Waddell or watch the animated version on YouTube. Have your children make three baby owl puppets and a mother owl and then make a puppet skit.
Then have your children make up their own story and skit using the puppets.
The Patterns for these puppets are available to members only.
Member's ![]()
Great Home School Learning Activity!
Use this craft with Owl Babies: Candlewick Storybook Animations by Martin Waddell.
All preschoolers will identify with the separation anxiety the owlets feel in this adorable story. When the owlets wake up in the middle of the night to find their mother is gone the worried owlets wonder where she might be. They are overjoyed when she returns safe and sound.
Flying Owl Stick Puppet Craft for Kids

Glue a craft stick to the owl's tail to make a stick puppet.
These patterns are available to members only.
Member's ![]()
Copyright 2011, Digital by Design, Inc. - See Copyright Information
 This pattern also included the barred owl pattern.
"Wow! Said the Owl" Writing and Art Activity

"Wow! Said the Owl" by Tim Hopgood is a delightful little story about a curious little owl who instead of staying awake all night took a nap so she could stay up during the day to see what it was like. And "Wow!" is what she said over and over when she saw all the wonderful things that show up during the day.
Writing and Art Activity
Read this story to your children then have them think of something else the owl might see and then draw a picture and write a sentence starting with: "Wow!" said the owl, when she saw . . .
When your children are done staple the pages together to make a book.
Visit Tim Hopgood's Web Site to learn more about his books and illustration techniques.
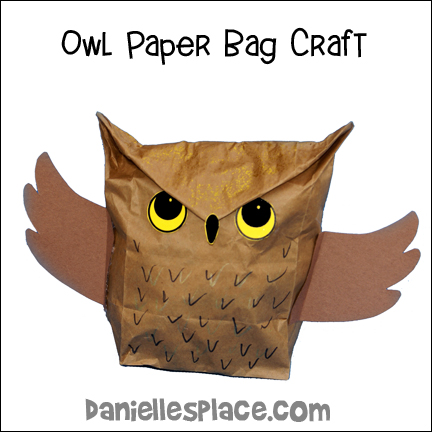
Paper Bag Owl
What you will need:
Brown Paper Lunch Bag for the Body
Brown Construction Paper for the Wings
Black Marker
Yellow Card Stock or Construction Paper for the Eyes
Newspaper Ripped into Quarters (Plastic Grocery Bags also Make Great Stuffing.)
How to make a paper lunch bag owl:
1. Stuff a paper lunch bag with wrinkled up pieces of newspaper or plastic grocery bags about half full.
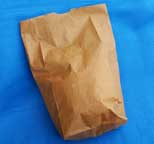
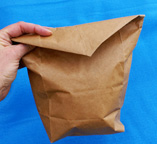
2. Pull the sides of the paper bag out from the top so that you can make a flat surface at the top of the bag.
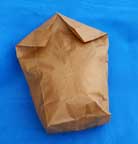
3. Fold down the sides from the middle top of the bag and glue them down. Fold the down the point to the front of the bag making the top of the owls head. Pull up on the sides to make the horns and open them slightly.
4. Draw wings on brown paper and eyes and a beak onto yellow paper using a black Sharpie, and cut them out. Glue them to the bag.
(Printable patterns for the wings, eyes, and beak are available to members.)
Member's ![]()
Copyright 2008, Digital by Design, Inc. - See Copyright Information
No-Sew Sock Owl Craft for Kids

What you will need:
Sock
Brown, Yellow-orange, Tan, and Black Felt
Brown Fun Foam
Hot Melt Glue Gun
Eyes
How to Make a Sock Owl Craft:
1. Cut the bottom part off the sock all the way up to the heal.
2. Stuff the cut off part leaving the top inch empty.
3. Cut brown and orange circles for the eyes and glue them about one in below the cut edge of the sock. Glue eyes to the center of the circles. Cut a long oval shapes for the beak from black felt and glue it to the face as shown.
4. To make the ear tuffs fold the back side of the cut edge of the sock over the front side and glue it to the front of the owl covering part of the eye circles. Poke in the material formed on each side to make the ear tuffs. Use a little glue to keep them closed.
5. Cut wing shapes from felt and glue them to the sides of the owl.
6. Cut claw shapes from brown fun foam and glue them to the bottom or toe of the sock.
To make even more sock animals go to the Sock Crafts and Learning Activities of Kids page.
Copyright 2011, Digital by Design, Inc. - See Copyright Information
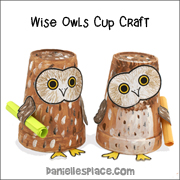
"Be Wise" Owl Crafts and Learning Activities
Great Home School Learning Activity!
Paper cup owls hold "wise quotes" on sheets of rolled up paper. For a writing assignment children can write about what they think each quote means, or if they agree with the quote.
Go to the Ready-for-school Crafts and Activities Page for patterns and directions.
Owl Shape Book with Moveable Wings
This made a great hands-on home school activity. Use this craft for writing assignments about owls or wisdom.
The wings on this owl book move up and down. Children can write facts about owls on the wings.
A pattern for this book is available to members.
Member's ![]()
1. Print out the patterns and make copies.
2. Color the owl and feathers and then cut them out.
3. Attach the feathers to the back owl pattern and then staple the front to the back.
Copyright 2011, Digital by Design, Inc. - See Copyright Information
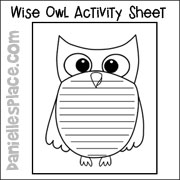
Owl Shape Book with Lined Paper
This owl-shaped book can be used for many purposes: Research and write facts about owls, or write a story about owls.
Children will enjoy writing facts or a story about owls in this owl-shaped book.
A pattern for this book is available to members.
Member's ![]()
Copyright 2011, Digital by Design, Inc. - See Copyright Information Great for home schools!
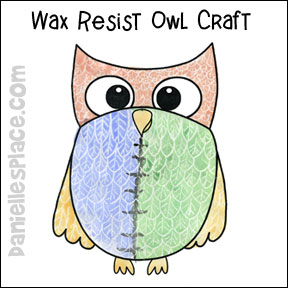
Wax Resist Owl Craft for Kids
Home schoolers can use this craft as an art project and science project. Have your students write facts about owls on the back of the paper or cut out owl-shaped pages to match the owl craft. Wax resist is a great artistic technique to make the texture on the owl.
What you will need:
White Crayon
Water Color Paint
Card Stock or Water Color Paper
How to Make the Wax Resist Owl Craft:
1. Draw an owl on a piece of card stock or water color paper with a dark crayon or permanent marker.
Member's ![]()
2. Draw the feathers in with a white crayon or other light-colored crayon.
3. Paint over the crayon with water color paint. The water color paint will not stick to the crayon and the pattern you drew will show through.
Copyright 2011, Digital by Design, Inc. - See Copyright Information
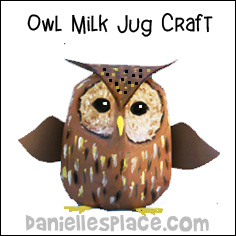
Horned Owl Milk Jug Recycle Craft for Kids
What you will need:
Empty Plastic Milk Mug
Yellow and Brown Craft Foam Sheets
Brown Valspar Plastic Primer Spray Paint or Krylon Clear Plastic Primer Paint - If you are using the Acrylic Patio Paint
How to Make the Milk Jug Owl Craft:
1. To remove the label fill the jug up with hot water and let it sit for a minute. This will loosen the glue. Carefully pull off the label. Do not get the label wet before trying to remove it or it will just disintegrate and you will have a hard time getting it off. Once the label is removed you can wash and dry the plastic milk jug.
2. Cut the top off the jug where the lid screws on with scissors. Fill the jug with a few cups of sand or pebbles to add weight to the owl.
3. Spray the jug with plastic primer paint and then paint it with the acrylic patio paint or use brown spray paint after using the primer paint and add details with acrylic paint.
4. Cut the wings, feet, and horn pattern from fun foam and glue them to the milk jug. To make the horns bend up, slightly stretch the fun foam with your fingers at the points.
Member's ![]()
Free Digital Download ![]()
If you use this craft and put it up on the web, please link back to this web site for the directions.
Copyright 2010, Digital by Design, Inc. - See Copyright Information
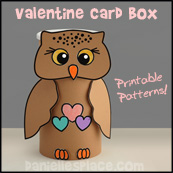
Owl Printable Valentine's Day Card Craft for Kids
These cute little owls can not only be use as valentine cards, but can be used to decorate your home school. Go to Valentine's Day Craft Page 1 for directions and patterns.

"The Little White Owl" Crafts and Activities
Here's another great home school craft for kids. Use the owl puppets to act out the story, and as an art project to study color. This craft is available with "Artistic Design and the Great Creator" lesson series.
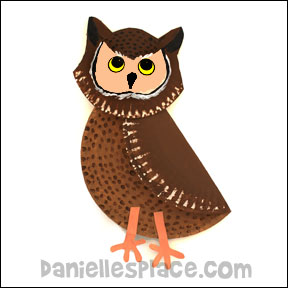
Owl Paper Plate Puppet Crafts for Children
Use this craft with your owl unit studies in your home school!
What you will need:
One Regular-sized
Two Snack-sized Paper Plates
Acrylic Paint
Glue
Scissors
How to Make the Cardinal Paper Plate Craft:
1. Fold down the edges of the large paper plate to make the owls wings. (You can fold down just one side or both.)
2. Paint the body and wings with acrylic paint to match the type of owl you are studying, and let it dry.
3. To make the head trace the head pattern onto the two snack-sized paper plates.
Member's ![]()
Free Instant Download - ![]()
4. Glue the head shapes together top to top at the top and sides but not the bottom.
5. Paint the head and let it dry, then place the head on the body pattern sticking the body into the inside of the head. Children will enjoy moving the head.
6. To finish cut out the feet, paint them, and glue them to the body.
Copyright 2012, Digital by Design, Inc. - See Copyright Information
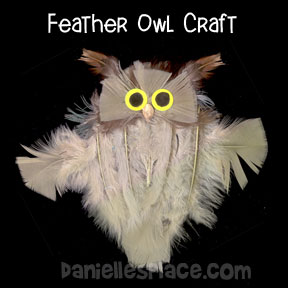
Great Horned Owl Craft Made with Real Feathers
What you will need:
Brown Feathers
Yellow Construction Paper
Black Magic Marker
Sunflower Seed Kernel
Glue
Brown Construction Paper or a Paper Plate
How to make:
1. Draw an egg shape for the owl on to brown construction paper or paper plate and cut it out. The wider end of the egg shape is the owl's head.
2. Glue two feathers on for the wings. Then glue on long feathers for the body.
3. Glue the shaft end of the feathers to the neck area so that the tips of the feathers form the owl's tail feathers (Feathery part).
4. Cut the tips off of some of your feathers and glue them in a circular pattern onto the face area to make the facial disk.
5. Cut yellow circles from the construction paper and use a magic marker to color in the pupils. Glue on a sunflower seed for the beak.
Copyright 2005, Digital by Design, Inc. - See Copyright Information
Pinecone Great Horned Owl Craft
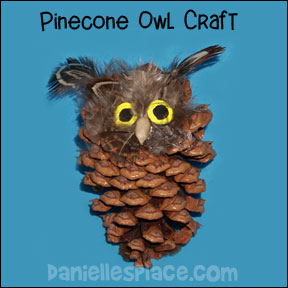
What you will need:
Pinecones (If possible use pinecones that are twisted at the bottom so that the bottom of the pinecone is showing from one side.)
Yellow Construction Paper
Sunflower Seed Kernel
Yellow and Black Paper or Animal Eyes
How to Make the Pinecone Owl:
1. Glue feathers on the pinecones to make the face and horns of the owl.
2. Cut small circles from yellow paper and black paper to make the eyes and glue them on the pine cone.
3. Glue a sunflower seed on for the owl's beak.
Copyright 2000, Digital by Design, Inc. - See Copyright Information
Letter O for Owl Printing and Cursive Writing Worksheets
This Worksheet goes with the ABC series of lessons in which children learn godly concepts and study animals at the same time. They are great for Christian preschools and home school children. They are designed for preschool through third grade. Children can print the letters, trace them, write them in cursive, write the complete Bible verse in cursive or print it, or write the word.
These lessons also include other learning activities to go along with the theme including math, spelling, writing, science, and review games. Lessons and worksheets are available to members only.
Owl Crafts on Other Pages
Owl Caddy Made from an Oatmeal Box
This box cannot only be used for a Valentine Card Holder, but would be great to store words of wisdom, trinkets, or cards with new words your children have learned. Open the box weekly and review all the new words so your child can see how much he is learning.


