Alligator - Crocodile Crafts
Crafts and Learning Activities Relating to Alligators and Crocodiles
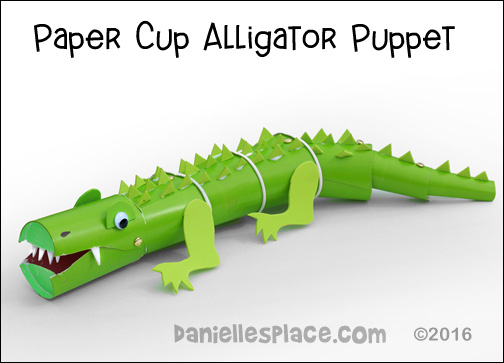
Alligator or Crocodile Puppet Made from Cups
These adorable alligator puppets are not easy to make. Adults can put together the cups and let their children embellish them with stickers and craft foam scales. Children will enjoy playing with the alligators as a toy or puppet.
What you will need:
Scissors
Low Temperature Glue Gun
How to Make the Paper Cup Alligator:
Watch our "View it and Do it! Craft video to see how me made this craft:
1. To make the head and mouth of the alligator cut the edge off a paper cup. Cut the paper cup in half longways curving the cut for the mouth and jaw on both sides of the cup. Also cut a curved line on the top of both halves so that the mouth will open farther when attached to the second cup. Punch holes were the jaw would connect.
2. Paint the inside of the cup halves pink.
3. Cut teeth shapes from white craft foam and glue them to the mouth.
4. Punch a hole in a second cup about 3/4" to one inch from the bottom of the cup with a sharp object.
5. Place a brass fastener through the holes on the upper and lower jaw of one side of the head. Line up a hole on the second cup with the jaw and insert the brass fastener through the hole. Spread out the legs of the fastener inside the second cup.
6. Line up the jaw holes on the other side of the head with the second cup and use a sharp object to punch a hole through the second cup where it should be attached. Place a brass fastener part way through the jaw holes. Line up the brass fastener with the hole on the second cup and insert the brass fastener through all three holes. Open up the fastener inside the cup.
7. Add another cup by punching holes 3/4" from the top of the second cup so that the hole is at the top of the alligator. (See diagram). (You want the holes at the top and bottom so that the alligator moves from side to side.) Insert the cup, punch holes with a sharp object through the cup you inserting and then insert the brass fastener through the holes. Open the fastener up inside the cup.
8. Add another cup in the same manner.

9. To make the first tail cup a little smaller. Cut lines down opposite sides of the cup all the way to the bottom. Attach the cup in the same manner with the cuts at the sides of the alligator and the holes for the brass fasteners at the top and bottom. Do not glue the sides of the cups together yet.
10. The next to tail cups need to be much smaller. Cut the next two cups as follows: Cut off the top edge of the cups and down the side of the cups and then cut off the bottom part. Open up the cups.
Cut 1/4 off the first cup and 1/3 off the second cup. Punch a hole at the top, center of the wide end.
11. Attach the second tail cup to the first tail cup that is already on the alligator. Punch a hole at the top of the first tail cup on the alligator and place the second tail cup under the first one matching up the hole. Place a brass fastener through the hole of both cups and spread out the legs of the fastener. (The last two cups will only be attached at the top and not the bottom.
12. Add the last tail cup in the same manner.
13. Once all the tail cups are attached, glue the sides of the first tail cup into a cone shape making sure the second tail cup is inside the first one. Then glue the second tail cup into a cone shape making sure the last tail cup is inside the second. Glue the last tail cup into a cone same.
14. Print out the alligator legs pattern. (The alligator legs pattern are the same ones on the dragon cup craft.) Use the patterns to cut legs from green craft foam. Glue the legs to the alligator.
Free ![]()
15. Cut triangle shapes from a piece of craft foam. Have your children help you glue them to the top of the alligator's back with tacky glue.
©2016, Digital by Design, Inc. - *See Copyright Information
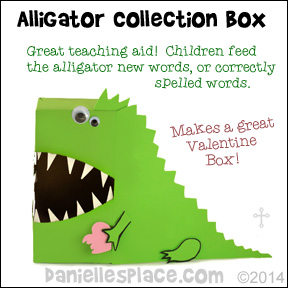
Crocodile or Alligator Word Collection Box
Here's a great Valentine's craft and learning activity to make with your child. Child practice their cutting and gluing skills, and create heart-shaped Valentine's day cards.
What you will need:
Empty Tissue Box
Foam Sheets 12"X18" or Colored Paper
Low Temp Mini Glue Gun or Tacky Glue
White Paper or Craft Foam for the Teeth
White Paper
Scissors
Googly Eyes (Two Different Sizes) One-inch and 1/2" Googly Eyes
Sharpie Markers
How to Make the Tissue Box Alligator or Crocodile Collection Box:
1. Have your children paint a tissue box with acrylic paint.
2. Parents can help children cut the alligator's body, arm, and leg from matching colored paper or craft foam. If you don't have matching paint, you can paint the craft foam to match the box.
3. Glue the body onto the tissue box head. Glue the arm and leg to the body. (Parents should supervise children when using a glue gun. Tacky glue will also work. Tacky glue takes about 1/2 hour to one hour to dry completely.

3. Children can make the teeth by cutting white paper or white craft foam into one-inch strips. Cut lines at opposite angles for each tooth. Glue the teeth inside the mouth.
4. Cut a heart shape from pink paper or craft foam. Cut a half circle out of one part of the heart and cut triangle shapes from the heart circle so it looks like the alligator ate a bite out of the heart. (Show your children how to cut a heart shape from paper. Fold a piece of paper in half and cut only half a heart shape from the paper and then unfold it. If you have young children, have them draw the half heart shape first, or draw it for them, and then cut on the lines. Make lot of heart shapes to make Valentine's day cards.)
5. To finish glue on googly eyes.
6. When your child is finished encourage him or her to make Valentine's day cards out of the extra heart shapes, place them in the alligator's mouth, and then deliver them to their friends and family using the tissue box alligator.
©2015 - Digital by Design, Inc. - 01/06/15 - See Copyright Information - If you make this craft, do not put a copy on Pinterest. Send us a picture of your completed craft and we will publish it here.
Crocodile Creative Writing Activity - Nouns
Read "Solomon Crocodile" by Catherine Rayner and ask your children to pick out words in the story that describe Solomon Crocodile: nothing but a pest, nothing but a nuisance, nothing but a pain and nothing but trouble. Explain that the words the author uses describes Solomon's character.
Ask your children if they can think of other words that describe his character in this story. Use a dictionary to look up the meaning of the words: pest, nuisance, pain, and trouble to find new words. Then use a Thesaurus to discover even more words. When a student finds a new word, have him say the word with "Nothing but . . . " in front of the word to see if it would fit in the story. For example, he might say, "Nothing but a problem, nothing but a tormenter, nothing but bad news, nothing but an agitator, nothing but a troublemaker, nothing but a disrupter, etc.
After making a list of words have your students pick one new word, look up the definition of that word in the dictionary, and then write and illustrate a new page/pages for the story using that word and another animal that Solomon might disturb.
Alligator Spelling or Site Word Review Game
Use this alligator box to as an incentive to teach children spelling word or vocabulary words. Print your child's spelling words or site words on sheets of paper. If your child can spell a word or read the word, he gets to place the word in the alligator's mouth. If he can't spell the word or read the word, go over the word, and then place it at the bottom of the pile of words. Keep playing until the child know all the words and has fed all the words to the alligator.
Learn About Texture
Crocodile Textured Art Project
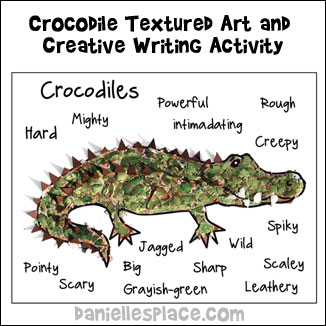
The following art project goes along with the book "Solomon Crocodile" by Catherine Rayner.
What you will need:
Card Stock (Heavy Paper)
Markers, Colored Pencils and Water Color Paint
White Glue
Craft Foam Scraps or Construction Paper
Items to Make the Crocodile Textured such as Egg Shells, Oatmeal, Pebbles, Beans, Rice, etc.
How to Make the Textured Crocodile Picture:
1. Have your child draw a crocodile on a piece of card stock (Heavy Paper) or use the printable pattern.
Member's 
Instant Digital Download
2. Paint or color the crocodiles and let them dry.
3. Have them glue textured items onto the crocodile such as rice, pieces of paper, and egg shells.
4. Paint over the textured items.
5. Help your child come up with words that describe crocodiles and write them on the paper around the crocodile. Use a thesaurus to find even more descriptive words.
©2015 - Digital by Design, Inc. - 01/06/15 - See Copyright Information - If you make this craft, do not put a copy on Pinterest. Send us a picture of your completed craft and we will publish it here.
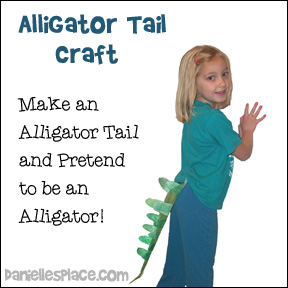
Paper Alligator Tail Learning Activity
What you will need:
Paper
Scissors
Tape or Glue
Green Crayon
How to Make Paper Alligator Tail:
1. Read stories about alligators or crocodiles to your child before you begin this activity.
2. To make the tail, help your child fold a long sheet of paper in half and cut it into a long triangle shape.
3. Help your child cut out smaller triangles for the scales.
Tip: View the video below to see an easy way to cut small triangle shapes.
4. Have your child color the scales and the tail green, or let him pick a color of his choice. As your child works talk the him about what he has learned about alligators. Ask him if he knows the difference between alligators and crocodiles. If you or he doesn't know, research it on the web or get books from the library. Look up any questions your child might have.
5. Show your child how to tape or glue the scales onto the sides of the tail. Tape or pin the tail onto your child's pants.
6. Encourage him to pretend he is an alligator or crocodile.

View a Video to see how a child makes this craft. This will help you decide if your child will be able to make this craft.
©2002 - Digital by Design, Inc. - See Copyright Information - If you make this craft, do not put a copy on Pinterest. Send us a picture of your completed craft and we will publish it here.