Nature Crafts and Learning Activities for Kids
How to Make Crafts Using Objects Found in Nature/Natural Objects
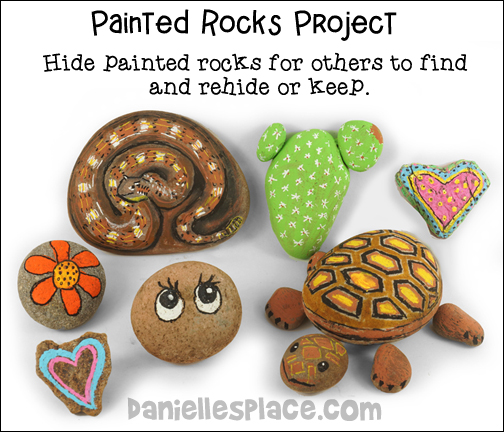
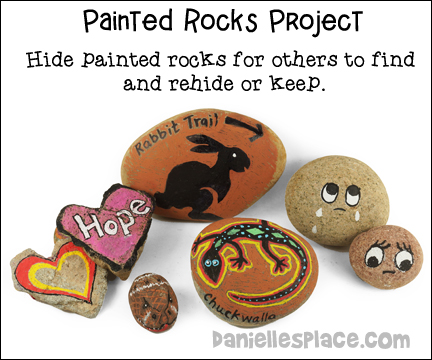
Painted Rocks Craft and Community Activity
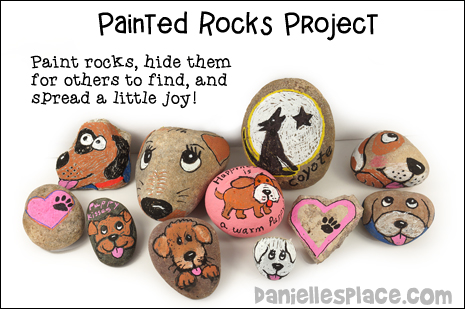
Children and adults personalize small rocks with pictures and words to share with others in their communities and abroad. Spread the joy and build community by hiding your rocks in public places where others can find them. Join your local "Painted Rocks" group and share your creations and the rocks you have found on facebook. If you travel out of state, leave a few rocks behind for others to find to keep or rehide.
Use this projects as learning activity for children. If you find a rock from another state or city, have your children look up the state or city and find out more about where the rocks came from.
Throw your own rock painting party to get others involved in your community.
Find a painted rock group near you on Google Maps.
What you will need:
Posca Paint Markers (Fine Point) - These come in medium, fine and extra fine. Use the medium markers to paint the entire rock and the others to fill in the details and write words.
Acrylic Patio Paint and Paint Brushes - Use this paint if you want to cover the whole rock. This paint is made for the outdoors so you won't have to seal it.
Clear Paint to Seal Your Rocks
Small Smooth River Rocks or Similar Rocks - You can buy these from your local plant nursery, garden shop, landscaping shop, or buy them from Amazon - 3"- 4" River Rocks .
How to make:
1. Purchase smooth river rocks from your local landscaping store, wash them and let them dry.
2. Decide what you would like to paint on your rock and outline it with a pencil. Don't worry if you make a mistake because you can always just paint over it.
3. Use your paint markers to fill in the details.
4. Use a dark markers to outline the larger shapes.
5. Write the link to the Painted Rock group you belong to on the back of your finished rocks.
6. Hide your rocks in a public place such as a park or community center. Make sure you have permission to hide your rocks. Don't place them where someone will trip over them, or someone might get hurt reaching for hem.
7. Hang out a while to see if anyone discovers your creations, or just wait to see if anyone publishes them on your painted rock group.
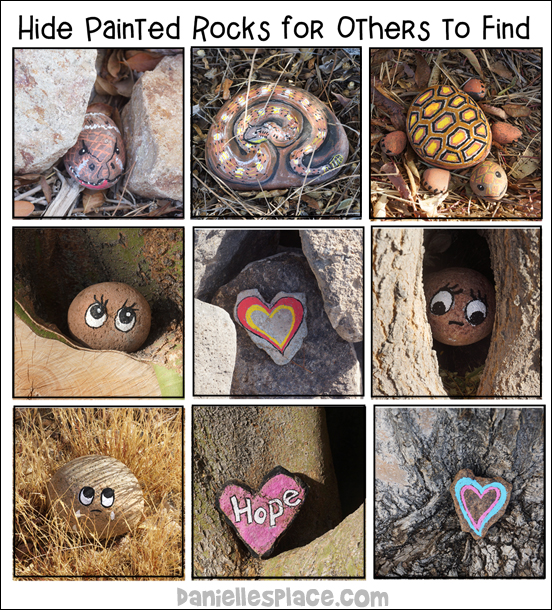
Places to Hide your Creations:
1. Dog Parks
2. Local Parks
3. Outside a hospital emergency room.
Note: Don't hide them too hard, you want people to find them.
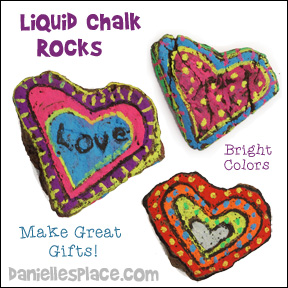
Chalk Rocks
Children will love this craft! Liquid chalk markers are opaque so children can easily add layers of color with no mess. Clean up is a snap!
What you will need:
Rocks - Any size or shape, smooth ones work best. If you don't have smooth rocks were you live, you can buy them at home and garden shops. The rocks pictured are not very smooth, but they worked fine.
Clear Acrylic Spray Paint (Optional)
How to Make the Chalk Rocks:
1. Find smooth rocks of any shape of size.
2. Use liquid chalk markers to decorate the rocks. You can paint over the layers of color because the paint is opaque. Wait several minutes for the chalk to dry before adding another layer of chalk.
3. If you want to use these outside, or if the rocks have a chance of getting wet, spray the finished rocks with clear acrylic paint to seal the chalk.
©2015, Digital by Design, Inc. -*See Copyright Information
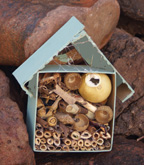
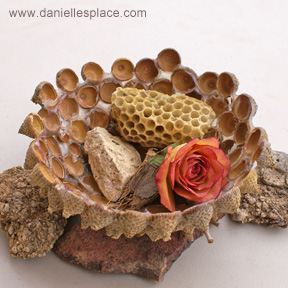
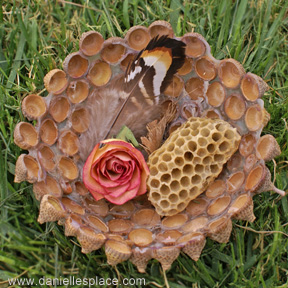
Acorn Cap Bowl Craft Made Using a Balloon
What you will need:
Good Quality Balloon
Duck Tape or Any Strong Tape
Acorn Tops
Scissors
Marker
How to Bake the Acorn Bowl:
1. Blow up a small balloon to the size you would like your bowl. You will be gluing the caps to the bottom of the balloon (the side that is not tied) Draw a line around the bottom of the balloon just above where you want to glue the last acorn caps. This will be the rim of your bowl. Don't worry about it being really straight.
2. Place the balloon, tied-side down, in a cup that has something heavy in the bottom to weigh it down. Tape the balloon to the cup using a few pieces of tape.
3. Glue an acorn cap to the bottom, center of the balloon. Glue acorn caps all around the first acorn. Don't add glue to the balloon, but glue all the way around the edge of the acorn caps as you add them to the first cap.
*Note: Place the bottle of glue upside down in a cup when you are not gluing so that you won't have to wait for the glue to flow down the bottle each time.
Let the first seven or eight acorn caps dry before continuing. Once you know they are stuck together, fill in the cracks between the caps with more glue. You can use a hair dryer set on cool to speed up the process.
4. Once you have completed one area peel the tape off the cup, but don't try to peel the tape off the balloon. Just leave it there. Turn the balloon and retape it to the cup using new pieces of tape. Keep doing this until you have completed your bowl.
5. It will take at least 24 hours for the bowl to dry completely. When it is dry cut a hole in the balloon and peel away the balloon.
©2012, Digital by Design, Inc. -*See Copyright Information
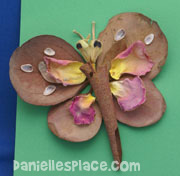
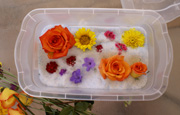
Collect and Dry Flowers
There are three different ways to collect and preserve flowers.
1. Air Drying -The easiest and cheapest way to preserve flowers is air-drying. Cut the flowers while they are at their peak on a warm dry day leaving plenty of stem, tie them together in bunches, and hang them in a warm, dry, shady place for about a week. Many flowers dry very well with this technique such as: statice, roses, baby's breath, yarrow, strawflowers, and any other sturdy flowers. Flowers can take up to a week to dry using this method depending on how dry it is in your area.
2. Silica Gel - The second way is using silica gel. (It isn't a gel, but is more like sand.) It isn't cheap, but it can be used over and over again.
This method is very easy. All you do is place the flowers face up in a little bit of sand and then slowly fill in around the flowers with sand until the whole flower is covered. The silica absorbs the moisture quickly which preserves the flowers without as much fading. Follow the directions on the package. Flowers take only a few days to dry using this method. Spray your dried flowers with a clear paint to keep them from reabsorbing moisture.
Nature Crafts on Other Pages