Octopus Crafts for Kids
Octopus Art and Science Educational Activities
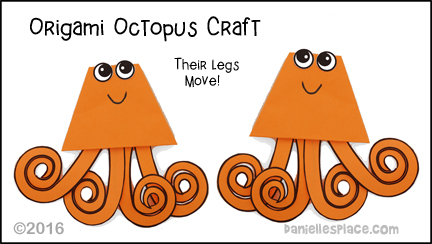
Origami Octopus With Moving Legs Craft
What you will need:
Bright Colored Paper, 1/2" Brass Paper Fasteners, 1/4 Inch Hole Punch
, Scissors, Tacky Glue, Googly Eyes (Optional), Clear Tape, Paint Stick (Optional) and Markers
Watch a "View it and Do it" Craft Video for directions to this craft!
How to Make the Origami Octopus:
1. To make the body of the octopus cut a sheet of paper 8.5” by 8.5”, or fold and then rip the paper.
2. Fold the square piece of paper in half diagonally making a triangle.
3. Turn the triangle so that the folded edge is at the bottom. Fold one bottom corner over to the other side of the triangle so that it meets the other opposite edge of the triangle and forms a straight line across the top of the triangle.
4. Fold the other corner over in the opposite direction so that the point meets the other side of the triangle. It should cover the first folded corner.
5. Fold down the top of the triangle where it meets the folded corners. Tuck the front, top triangle that you just folded into the front side of the triangle.
6. Tuck the back folded triangle into the center of the head shape.
7. Print out the octopus legs and eye patterns and cut them out.
Members ![]()
Instant Download - Eyes and Legs Pattern - ![]()
![]()
Drawing Swirls Practice:
Children can draw and cut out their own octopus tentacles. To draw the tentacles just draw a giant number six but don't connect the line. Keep drawing the line into a swirl making the space between the lines smaller and smaller until you get to the center of the loop. To make tentacles that go in the opposite directions, just draw the number six backwards.
The "How to Draw Octopus Tentacles" Diagram Printable is available to members:
Members ![]()
8. Glue the legs to the half circle so they hang down from the flat side. Punch a hole in the half circle where indicated.
9. Punch a hole in the back of the octopus body piece near the edge of the opening. Attach the legs to the inside of the body piece with a brass fastener.
10. Make your octopus into a hand puppet by placing a paint stick into the center of the octopus. (Paint the stick to match the color of the legs.
"Name Your Octopus" Science and Language Learning Activity:
Hank, in "Finding Dory" is called a septopus because, according to the movie, "he lost one tentacle along with his sense of humor'. But the legs of octopi grow back so in reality Hank would not have been a "septopus" for long. He wouldn't be a septopus at all since they don't really exist. There is a "seven-armed" octopus that has one arm coiled up and hidden beneath the right eye, but it is still an octopus.
Scientists use Latin and Greek words to name animals and plants. Have your children look up the Latin and Greek words for numbers online. Let them decide how many tentacles they want to give their "octopus" and then name them according to the number of tentacles. For example: four legs might be called a quadripus. Quadri is four, and pus is foot in Latin which came from the Greek pous.
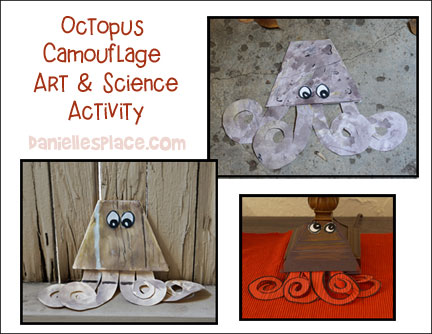
Octopus Camouflage Art and Science Activity:
What you will need: Paint, Colored Pencil, Markers, Paper, and Paint Brushes
How to Make:
1. Before doing this learning activity learn about octopus by reading books (See selection below) about octopuses, and, as a treat, watch "Finding Dory".
2. Explain to your students that like Hank in the movie "Finding Dory", octopuses are masters of camouflage. Tell them that they are going to make an octopus that uses camouflage to blend into its surrounding.
3. Before your children make their octopuses tell them to find interesting places in the room or outside where they want to hide their octopuses. Make sure they are locations that can be seen from most directions and have some details such as lines, different colors, textures, and shapes. Explain that they will not be hiding their octopuses from view, but camouflaging them (hiding them in plain sight).
4. Once they have picked a suitable location have them pick colors of paper, crayons markers, or paint that will help camouflage their octopuses when they place them in the locations they have picked. When they are done have them place their octopuses in the locations they picked and see how well they did at camouflaging them.
©2016 - Digital by Design, Inc. -*See Copyright Information
September 2016 - Amazon Giveaway!
We have selected "Octopus Escapes Again!" a newly published children's book, for our next giveaway. The above origami octopus craft and learning activities make a great supplement to this book.
Through the story "Octopus Escapes Again!" children learn about the many defense strategies octopuses employ to survive.
The book includes educational materials at the end of the story to encourage your children to find out more about octopuses.
How to Hide an Octopus and Other Sea Creatures (Reading Railroad)
Read this wonderful, informative book about the use of camouflage in sea creatures. Ruth Heller's rhyming text, though short, provides a wealth of information with the amazing illustrations of camouflaged animals.
After reading the book have your children camouflage their own octopuses. See the "Octopus Camouflage Activity" above.
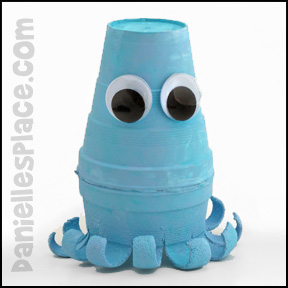
Octopus Melted Styrofoam Cup Craft for Kids
What you will need:
Two-8.5 oz. Styrofoam Cups
Acrylic Paint
Paint Brushes
Googly Eyes
Scissors
Glue
How to Make the Octopus:
1. Cut the bottom off of one cup and cut slits about 1/2" apart from the bottom edge of the cup to about one inch from the rim.
2. Preheat your oven to 250 degrees (convection oven works best).
3. Place the cut Styrofoam cup, rim side down, on an old cookie sheet. Turn on the oven light so you can see inside the oven. You should see the cup start to melt and the sides curl down in about 15 to 30 seconds or maybe a little longer. As soon as you see the legs start to curl down open the oven door and take out the cup. The cup will not be hot, but be very careful not to touch the sides of the oven.
Make sure you turn on your oven vent and you have your windows open because the fumes from the melting cups probably aren't good to breath in.
4. Glue the rim of the melted cup to the rim of another cup the same size to make the octopus.
5. To finish paint the octopus with acrylic paint, let dry and glue on googly eyes.
Painting Camouflage Learning Activity:
Have your children pick a location in the room and then paint their octopus to match the location. Talk about how octopus and other sea creatures use camouflage to protect themselves.
Created by Corrin Burner
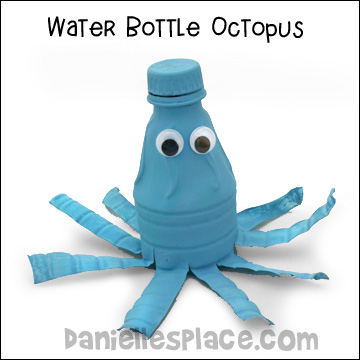
Recycled Water Bottle Octopus DIY Craft
What you will need:
Old Water Bottles with Lids, Acrylic Paint, Googly Eyes, Glue, Scissors
How to Make the Water Bottle Octopus:
1. Cut the bottom off the water bottle with a pair of sharp scissors.
2. Cut 1/2" slits from the bottom of the bottle to about half way up, all the way around the bottle.
3. Bend back the legs. If you would like the legs to curl a little, you can place the bottle in a warm over 200 degrees until the legs start to melt. Take it out immediately.
4. Paint the bottle with acrylic paint or spray paint with paint made for plastic.
5. To finish glue on googly eyes.
©2012, Carolyn Warvel - See Copyright Information
Spotted Drinking Straw Octopus Craft for Kids

What you will need:
How to Make the Spotted Octopus:
1. Fold four polka dot straws in half and glue them together at the fold.
2. Print out the octopus pattern cut it out and use it as a template to cut two pieces from fun foam.
Member's ![]()
Free Digital Download ![]()
3. Glue the pieces together at the sides leaving the bottom open.
4. Glue the folded straws inside the octopus body.
5. Use permanent markers to draw spots on the body. To finish glue on wiggle eyes.
©2013, Digital by Design, Inc. -*See Copyright Information
Good Children's Books About Octopus