Thanksgiving Crafts for Kids
Thanksgiving Crafts and Learning Activities for Children
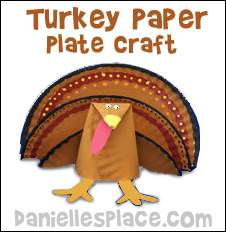
Thankful Turkey Paper Plate Craft and Interactive Activity for Thanksgiving

Celebrate the joyful spirit of Thanksgiving with a delightful paper plate turkey craft that sparks creativity and nurtures gratitude in young hearts! This craft is beautifully simple—just gather some paper plates, paints, colored pencils, and glue, and you’re ready to go!
Once you’ve created your turkey, hang it in a prominent place, inserting feather shapes into its pocket. Encourage your children and Thanksgiving guests to write something they are thankful for on each feather and replace them in the display. During your Thanksgiving meal, take turns reading the messages on the feathers aloud. To make it even more engaging, turn it into a fun guessing game where family members and guests try to guess who wrote each thankful message.
This interactive element not only enhances the festive atmosphere but also helps everyone cultivate and share a wonderful sense of gratitude. Together, you’ll create cherished memories and foster a warm, thankful spirit that brightens your Thanksgiving gathering!
Patterns for this craft are available to members and as an instant digital download below.
Member's ![]()
Instant Digital Download ![]()
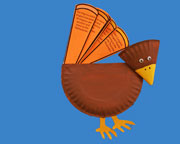
Paper Plate Turkey Craft for Kids
This is a great art project for teachers who teach first grade and older children. Use it to teach children the history of Thanksgiving and how we celebrate the season. Use the crafts to decorate bulletin boards or send them home with your students to decorate their own Thanksgiving tables.
What you will need:
Two Dinner-sized Paper Plates
Paint
Scissors
Colored Paper
Googly Eyes
How to Make a Paper Plate Turkey:

1. To make the turkey's body roll one paper plate into a cone shape and staple it closed. Cut the bottom off the wide end of the cone so that it is even all the way around. See picture to the right.
2. Fold the pointed end of the cone down 2 inches to make the head of the turkey.
3. Cut wing shapes from the left over part of the paper plate you cut off the cone and glue them to the body as shown in the picture above. Paint the turkey's body.
4. Cut the turkey's caruncle from red construction paper and the feet from yellow or black construction paper. Glue the feet to the inside of the cone as shown in the picture. Glue the caruncle to the underside of the turkey's head.
5. To make the turkey's tail feathers fold another paper plate so that one side is about 1 1/2" from the opposite edge of the paper plate. Cut the paper plate at the fold. Paint the paper plates and then glue them together. Then glue them to the back of the turkey.
Turkey Paper Plate Crafts Made by Followers
©2009, Digital by Design, Inc. -*See copyright Information
The Story of Thanksgiving Turkey Craft and Learning Activity

Transform your Thanksgiving celebration into an unforgettable learning experience with an engaging turkey craft!
This fun activity allows kids to dive into the Thanksgiving story while expressing their creativity. By writing sentences on colorful feathers and arranging them in order, children will not only reinforce their understanding but also enjoy a hands-on way to tell the story. Plus, with the option to choose feather patterns that come with or without pre-written sentences, you can encourage them to unleash their imagination and write their own. Don’t miss out on this fantastic opportunity to blend education and creativity this holiday season!
Each feather patterns includes part of the Thanksgiving story including twelve different feathers. Here a a few examples:
1. The Pilgrims leave England because of religious persecution and move to the Netherlands.
2. The Pilgrims leave England and sail to America on the Mayflower.
3. The Pilgrims land in Plymouth, Massachusetts on December 21, 1620.
4. The Pilgrims sign the Mayflower Compact.
Members 
Instant Download Pattern -  Feathers patterns available in color and black and white.
©2009, Digital by Design, Inc. -*See copyright Information
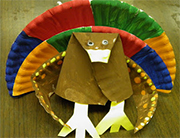
The Story of Thanksgiving Paper Plate Turkey Craft

It is essential for kids to learn that Thanksgiving is more than just fall colors, good food, and family get-togethers, but in this world of ever-present distractions, keeping their attention is no easy task. Use this craft to keep your excitable kids engaged while they are taught its historical significance in a hands-on way that is sure to be retained by both kinesthetic learners and distractible creatives.
Children attach the feathers that contain the story of Thanksgiving to the paper plate turkey they created with a brass brad so that they can move the feathers to reveal the story as they read it.
What you will need: Three Snack-sized Paper Plates, Paper, Glue, Paint, Brass Brad, Google Eyes, and Scissors
Patterns for this craft are available to members and as an instant download.
Members
Instant Download Pattern - Feathers patterns available in color and black and white.
How to Make the Story of Thanksgiving Paper Plate Turkey Craft:
 Children use two snack-sized plates to create the turkey's body and another plate for the head and wing. They paint the turkey and then glue on the head, body, feet, waddle, and wing. To finish, they arrange the turkey's tail feathers in order and attach them to the body with a brass brad, allowing the feathers to move as they read the story.
As an alternative, you can use blank feathers for students to write stories or simply record facts about the stories they have learned.
©2009, Digital by Design, Inc. -*See copyright Information
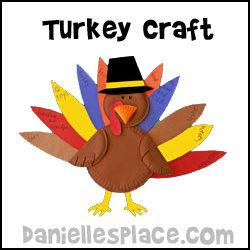
Paper Plate Turkey Craft
If you're eager to bring a festive touch to your home this Thanksgiving without breaking the bank, look no further! This delightful paper craft is not only visually appealing but also budget-friendly, making it the perfect choice for your holiday decor. It’s simple to create, allowing family members of all ages to join in on the fun. Plus, once the festivities are over, these charming decorations are easy to store or dispose of, leaving you with a stress-free cleanup. Embrace the spirit of Thanksgiving by crafting these adorable creations together!
What you will need:
Dinner-sized and Snack-sized Paper Plates
Construction Paper
Glue
Paint
Scissors
How to Make the Paper Plate Turkey Craft:
1. Glue two large plates together and two small plates together top to top. Glue the small plate to the side of the large plate to make the turkey's head. Fold two small plates in half and glue them to the turkey's body for the wings. Cut a small plate in half and then fold it in thirds for the beak and glue it to the head.
2. Paint the turkey's body brown and the beak orange.
3. Cut feet shapes from yellow construction paper. Glue them to the body. Cut a waddle and hat shape from construction paper and glue to the turkey. Cut feather shapes, 3" x 12", from different colors of construction paper and glue them to the body of the turkey.
©2009, Digital by Design, Inc. -*See copyright Information
Thanksgiving Pot Holder Craft for Kids

What a fantastic opportunity to engage your children in the spirit of Thanksgiving! Encourage them to craft a Thanksgiving-themed potholder that will not only serve as a functional item during your celebration but also as a beautiful display piece. By using permanent fabric markers or Sharpie markers, their designs will stand the test of time.
These potholders can become treasured keepsakes that you’ll look forward to bringing out each year, allowing you to reminisce about past Thanksgivings and appreciate the joys of family. This year, why not start a heartwarming tradition of creating a new potholder together each Thanksgiving? It’s a wonderful way to strengthen family bonds while celebrating the holiday!
What you will need:
Design Your Own Customizable Pot Holders
Bold Tip Brilliant Color Fabric Marker Set
or Stained by Sharpie Brush Tip Fabric Markers
Pencils
How to Make the Thanksgiving Pot Holder Craft:
1. Decide what you would like to draw on the pot holder and draw the picture with a pencil.
2. When you have the picture the way you would like it to look, trace over it with permanent markers or fabric paint.
©2005, Digital by Design, Inc. -*See Copyright Information
Count Your Many Blessings Coloring and Activity Sheet
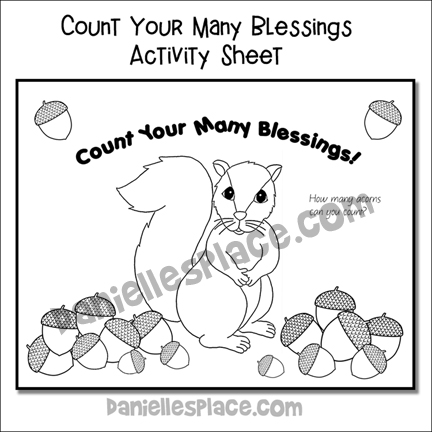
Thanksgiving is about so much more than just getting ready for a big feast or preparing for the lively chaos of nieces and nephews running around your home. It's really a time to count our blessings! To make the most of the excitement before the big dinner, why not have everyone get creative using this adorable squirrel activity sheet? Encourage them to color and then write down the delicious foods they're eager to eat and the wonderful people they're thankful to have in their lives on the acorns and then count them. It's a fun way to celebrate together!
Member's ![]()
Comments:
I used the squirrel color page that says count your many blessings and had my elementary children write a blessing in their life on each of the acorns. They had some incredible answers! Thanks for all the great ideas. Lisa
©2007, Digital by Design, Inc. -*See Copyright Information
Basket Full of Leaves Paper Craft
This is a fun and easy craft for all ages. This craft can be used in many ways:
1. Children can send notes written on the leaves to their friends. They can write one word on each leaf and see if their friends can put the leaves in order to find figure out the message.
2. Children can write their vocabulary, math facts, or spelling words on the leaves and use them to review.
3. They can use them on Thanksgiving, and write thankful things on the leaves.
For directions to this craft go to the Fall Crafts Page.
©2009, Digital by Design, Inc. -*See Copyright Information
Thanksgiving Memory Baskets
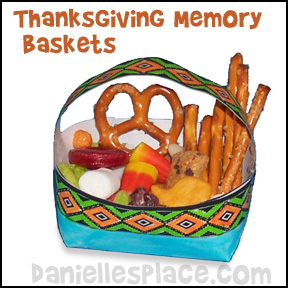
Candy and Crackers are placed in the basket to represent different parts of the Thanksgiving story.
Children color the baskets and then staple the sides together by overlapping the pointed ends. Staple the basket handle to the sides.
Print out the basket patterns.
Members ![]()
Instant Digital Download - ![]()
Introduce each of the following objects and ask your students how they might relate to the First Thanksgiving story.
Chocolate Earth Balls - The pilgrims lived in England where the king made all the laws and the people had to obey them. He told them what church they had to go to and how they had to worship. The pilgrims believed that they should be free to worship God the way they wished. When they heard about the New World in North America they thought it would be a great place where they could go and live in freedom.
Tiny Twist Pretzels - The pilgrims believed in God and felt that they should be free to worship God the way they wanted to. They should be able to pick their own pastors and make their own laws. The pretzels represent praying hands. The pilgrims prayed for a place they could go to be free to worship God the way they wanted to. They prayed for Gods protection on their trip across the ocean and for God to help them in the new land.
Oyster crackers or Other Dried Bread and Jerky - If the weather was bad on the Mayflower, the pilgrims had to eat cold biscuits and salted meat.
Stick Pretzel - The pilgrims cut down trees and used logs to build their homes.
Mini Marshmallows - Reminds us of snow and the first winter in the new land in which only half the pilgrims survived.
Candy Corn and Gold Fish Crackers - Squanto showed the pilgrims how to grow corn by placing four seeds into a little mound of earth and placing fish around the seeds.
Life Saver Candies - God helped the pilgrims survive in the new land. He sent Squanto to help the pilgrims and show them how to find food. He was their life saver.
Maple candies - Squanto showed the pilgrims how to tap the maple trees to get their sap.
Teddy Grahams - The pilgrims had to learn to defend themselves against wild animals like bears.
Trix Fruity Flavors or Other Fruit Shapes or Dried Cranberries - Squanto taught the pilgrims where to find wild berries and fruits and how to dry them for the winter.
©2007, Digital by Design, Inc. -*See Copyright Information
Thanksgiving Treat Gift Baskets

What an excellent opportunity to teach children about the true spirit of Thanksgiving! Sharing our abundance with others is a powerful way to express gratitude. With these delightful Thanksgiving treat baskets, children can prepare treats for their neighbors and friends.
These baskets are the perfect way to appreciate those who have supported you throughout the year. Have your children help you fill the baskets with delicious treats like cookies, candy, and small gifts, and include a personal "thank you" note to make an even bigger impact.
What you will need: Card Stock, Colored Pencils, Paper, Glue, Scissors, Tissue Paper, and Treats - Such as Candy or Cookies
Printable patterns are available to members on The Resource Room and as an instant digital download.
Member's ![]()
Instant Digital Download - ![]()
©2004, Digital by Design, Inc. -*See Copyright Information
Candy Corn Stars Printable Coloring Book for Thanksgiving

Get ready for a fun and creative Thanksgiving activity! In this delightful six-page book, children can use real candy corn or paper cutouts to bring the pages to life. By gluing or coloring the candy corn shapes onto each page, they’ll create a vibrant display that captures the spirit of the season. This book also includes a charming poem that inspires kids to share and express their thankfulness to God for the special treats in their lives. It's not just a craft; it’s a meaningful experience that teaches gratitude and creativity!
Candy Corn Stars
Written by Nancy Foss
"One candy corn just for me.
Two candy corns make me smile with glee.
Three candy corns
of yellow, orange, and white.
What a colorful sight.
Four candy corns I hold in my hand to share.
Five candy corns
I place on my plate with care.
A star, a star of candy corns so sweet.
Thank you, God, for this special treat.

This download is available to members on The Resource Room and as an instant digital download.
Member's ![]()
Instant Digital Download
©2009, Digital by Design, Inc. -*See Copyright Information - It is illegal to copy this poem and place it on another web site even if you include the author.
Sweet Treat Candy Corn Frame with Bible Verse
The Bible Verse in the Frame is - "How sweet are your words to my taste; they are sweeter than honey." (Psalms 119:103) Written on the candy corn shapes. are great tasting words for the soul such as: peace, love, joy, forgiveness, faith, trust, etc.
Go the the Candy Corn Crafts and Activities Page for directions and a pattern.
Member's 
©2009, Digital by Design, Inc. -*See Copyright Information
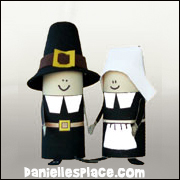
Pilgrim and Indian Paper Dolls
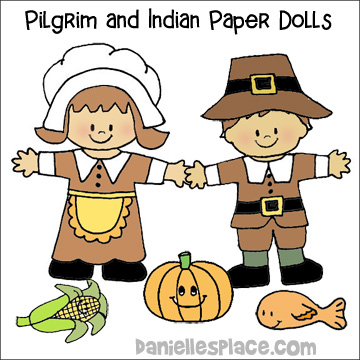
Children will enjoy reenacting the Thanksgiving story with these adorable paper dolls. The patterns include: A woman and man pilgrim with hats, corn, pumpkin, male and female Indian with head dresses and a papoose, horse, fox, fish, and, of course, a turkey.
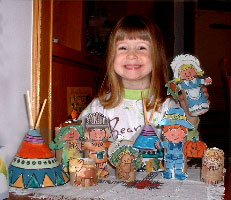
Emma Shows Off her Thanksgiving Display (You can find links to these crafts below.)
Pilgrim and Indian Paper Dolls Available to Members.
Member's
These cute paper dolls come with all kinds of accessories, turkey, hats, head bands, horse, papoose, pumpkins, and more.
©2005, Digital by Design, Inc. -*See Copyright Information
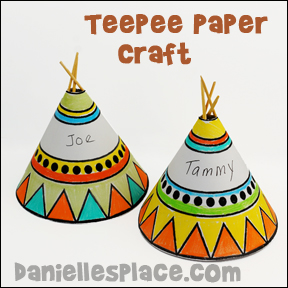
Free Teepee Table Place Holder Printable s for Your Thanksgiving Table
What you will need:
Paper
Tape or Glue
Large Toothpicks
Crayons or Markers
How to make:
1. Print out the pattern or make your own design using the pattern as a guide.
Member's ![]()
Instant Digital Download - ![]()
2. Color the teepee and write the names of the people who will be sharing your Thanksgiving dinner on each teepee.
3. Tape or glue three toothpicks onto the back of the teepee at the top.
4. Curl the pattern into a teepee shape and tape the back closed.
©2005, Digital by Design, Inc. -*See Copyright Information
Craft Spoon Turkey Thanksgiving Art Idea
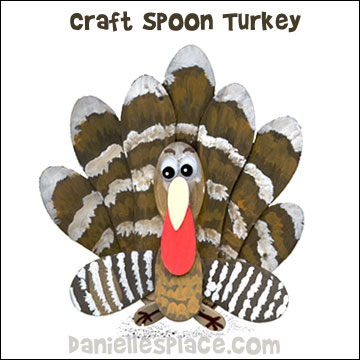
What you will need: Craft spoons, wiggly eyes, wooden shapes for the turkey's wattle and beak, red, brown, black, and white paint, and glue.
How to make:
1. Use the pattern provided to glue the craft spoons together to form the turkey's body. Cut the skinner part off of two craft sticks to form the turkeys wings.
Member's ![]()
Free Digital Download ![]()
2. Glue on wiggly eyes.
3. Paint a teardrop shaped wooden piece red and glue it on to the turkey as shown.
4. Glue on a smaller teardrop shaped piece upside down to form the beak.
5. Glue onto smaller craft sticks on each side of the turkey's head and neck to form wings.
5. Paint your turkey.
©2006, Digital by Design, Inc. -*See Copyright Information
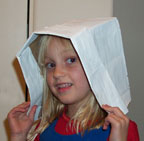
Paper Pilgrim Hat Craft for Kids
What you will need:
Paper Grocery Bags
Scissors
White Paint
White Ties Cut from Material
How to make:
1. Cut the bottom off the grocery bag so that it is about 8" high.
2. Cut one of the short sides out. (One of the sides that has the folds in it.)
3. Fold back the edges of the side that you just cut about two inches. Do it two times. Now paint the hat white and staple or glue on some ties. If you don't have time to make a hat you can just tie a white scarf on the pilgrim.
©2006, Digital by Design, Inc. -*See Copyright Information
The Pumpkin Patch Parable 10th Anniversary Edition: The Parable Series #1
By Liz Curtis Higgs / Tommy Nelson
The Pumpkin Patch Parable is a charming story for children that illustrates how a loving farmer can turn a simple pumpkin into a simply glorious sight. Liz Curtis Higgs weaves a beautiful parable as the farmer picks out a special pumpkin from his garden, and scoops out all the messy "goo" to make room for his light to shine from inside. In the same way, God's transforming love can fill each of our hearts with joy and light. Liz Cutis Higgs originally created this parable as a way to share the Good News with her own precious children each harvest season. After 10 years, she has touched children everywhere! Recommended for children preschool to first grade.
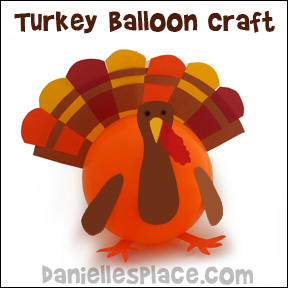
Thanksgiving Balloon Turkey
What you will need:
Round Balloon
Paper
Rubber Cement or Tape
How to make:
1. Print out the patterns and cut them out from construction paper.
Member's ![]()
Instant Digital Download
2. Cut the lines on the tail feather layout pattern by folding the pattern in half and cut two layers at once. Be careful not to cut the ends.
3. Show older children how to weave feathers into the turkey tail pattern. Glue or tape the tail feathers to a balloon.
4. Glue the wattle and beak to the body pattern. Draw on eyes with markers. Tape or glue the turkey's feet, neck and wings to the balloon.
©2000, Digital by Design, Inc. -*See Copyright Information
Thanksgiving Sunday School Bible Lessons and Crafts on The Resource Room
The Resource Room is designed for Sunday School teachers and home school parents. All of the crafts on The Resource Room are biblically based . Most of the crafts go along with one of the Bible lessons found on The Resource Room. All the crafts were designed for preschool and elementary age children. All the crafts are original and inexpensive which are great for home school use and large groups such as Sunday school classes and vacation Bible school.
Use TP Rolls and Styrofoam Cups
Children glue objects in the book to complete each page.
Children decide what the Pilgrims might have taken on their trip
Thanksgiving Games
1. Play a Matching Game - Print thanksgiving pictures such as: pilgrims, Indians, fish, corn, a papoose, dog and pony. Glue them onto cards and play a match game with them.
2. Play a Toss game - Make eight of the teepee place holders shown above and mark them with numbers, 5 points, 10 points, etc. Make rings from pipe cleaners. Have the children throw the rings over the teepees to score points.
3. Play Pin the Tail on the Turkey - Draw a turkey without feathers. Cut out feathers from construction paper. Place double sided tape on the feathers and have the children try to tape them onto the turkey blindfolded.
4. Play a Bean Bag Game - Make no-sew pumpkin bean bags. Just glue them together and then decorate them on the outside. Draw a Thanksgiving theme picture on cardboard and cut holes in it. Children can throw their bean bags at the picture and try to get them through the holes.
5. Fishing Game - Children fish for items they can put into a cornucopia like pictures of apples, corn on the cob, little pumpkins, grapes, etc. Attach a paper clip to the end of the line for a hook so the item cab be attached (and removed) easily. As they lower their line on a pole over a wall, (or some kind of poster board) a person on the other side attaches a picture to the hook. Then the lucky fisherman can place their prize in the cornucopia.
6. Unscramble the Words - (For older kids) Write words related to Thanksgiving such as: pilgrim, turkey, and feast on cards with the letters all jumbled up. The kids try to unscramble the words. Or they can match the scrambled words to the correct counterparts on a list.
7. Write the Word THANKSGIVING on the board and see how many words you can make out of it in a 5-minute relay race.
Sent in by Diana Romberg
8. How Much do You Know About turkeys?
What
is a male turkey called?
What is female turkey called ?
Where will you find the turkey's wattle?
Where will you find the turkey's caruncles?
Where is the turkey's snood?
About how long does it take a domestic turkey to grow from birth
into a turkey that is plump enough for market?
Check your answers at the bottom of this page.
Check Your Answers?
1. A male turkey is called a gobbler.
2. A female turkey is called a hen.
3. The wattle is the flabby skin growth that hangs from the turkey's throat.
4. The caruncle is the growth of skin that dangle from the turkey's chin.
5. The snood is the growth of skin that droops over the gobbler's bill.
6. About 10 weeks.
Also See Back-to-School Crafts and Back to School Crafts 2
©2005, Digital by Design, Inc. -*See Copyright Information
For More Thanksgiving Crafts Go To:
Fall Crafts and Activities for Kids


