Recycle, Reuse, Re purpose Crafts
How to Make Crafts using Recycled Items
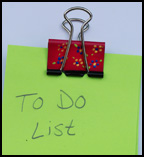
Decorative Clips Made from Binder Clips
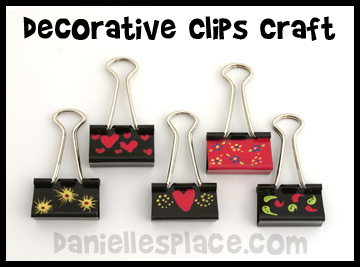
Decorate binder clips with fingernail polish and use them to seal opened food packages or keep papers in order.
What you will need:
Binder Clips (Any size of color)
Bright Colors of Fingernail Polish
Very Thin Paint Brushes
How to Make the Clips:
1. Use a tiny brush or toothpicks to dab fingernail polish onto the binder clips.
2. To make the different shapes dab a blob of fingernail polish onto the binder and then use a toothpick to push the paint outward to make the shapes you want.
How to Print or Copy these instructions.
©2013, Digital by Design, Inc. - *See Copyright Information
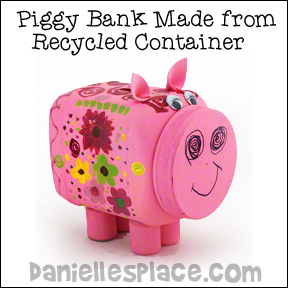
Piggy Bank Made from Recycled Plastic Container
What you will need:
Large plastic container
Acrylic paint
Scissors and Knife
Small cups or plastic lids for the legs
How to Make a Piggy Bank From a Plastic Container:
1. Clean and dry your container and then cut a slit in the one side of the container big enough to insert coins with a knife.
2. Paint the container and legs the color you would like your pig except for where you will glue on the legs. The paint will pull away from the container if you glue the legs onto it.
3. When the paint is dry glue on the legs.
4. Cut ear shapes from fun foam and glue them onto the pig.
5. To finish add a pretty design and glue on eyes.
©2012, Digital by Design, Inc. - *See Copyright Information
Created by Corrin Burner
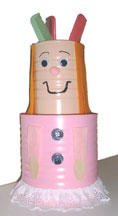
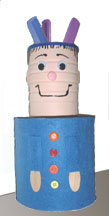
Boy and Girl Can Caddies
What you will need:
A small and large aluminum coffee can, 3/4-inch screw & nut, a hammer and nail, a pink pompom for the nose, Wiggly Eyes, felt for the hair and arms, lace (girl), buttons, Hot Melt Glue Gun and Glue (low temp), and wooden craft spoons.
Acrylic Paint - You will need a flesh color for the face and wooden craft spoon, and any color you would like to paint the clothes. You will also need some black dimensional fabric paint or a black permanent marker to draw in the face.
How to make:
1. Paint the smaller can flesh color and the larger can any color you would like for the clothes. You can also cover the larger can with material or felt instead of painting it.
2. Have an adult hammer a hole into the center bottom of the large coffee can and the small coffee can. Place the can bottom to bottom, lining up the holes, and run a screw through both holes and secure with a nut.
3. Cut felt or material 1" x 2" for the arms and them glue over the wooden spoons leaving one end of the spoon showing for the hand as shown in the pictures. Glue the arms to the sides of the large can.
4. Glue buttons to the front of the can and lace around the bottom of the girl can.
5. Cut felt strips for the hair and glue to the top of the small can. Glue on a pink pompom for the nose.
6. Use black dimensional fabric paint or a black permanent marker to draw in the eyebrows and mouth.
Designed by Tracy Piatt
©2007, Digital by Design, Inc. - *See Copyright Information
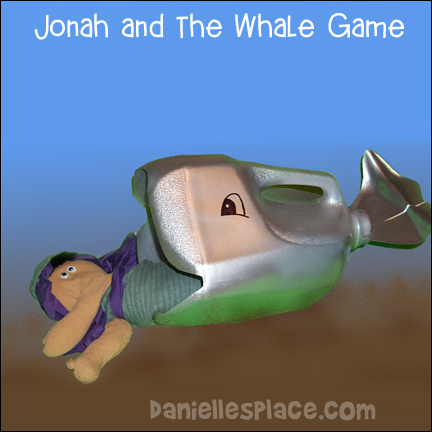
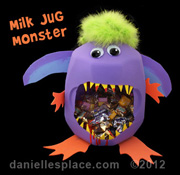
Plastic Milk Jug Whale Craft
What you will need:
Empty Plastic Milk Mug
Large Wiggle Eyes or Permanent Marker
Sharp Scissors
Valspar Plastic Primer Spray Paint or Krylon Clear Plastic Primer Paint - If you are using the Acrylic Patio Paint
Krylon Fusion for Plastic Paint - Or other Spray Paint made for plastic
How to Make the Milk Jug Whale Craft:
1. To remove the label fill the jug up with hot water and let it sit for a minute. This will loosen the glue. Carefully pull off the label. Do not get the label wet before trying to remove it or it will just disintegrate and you will have a hard time getting it off. Once the label is removed you can wash and dry the plastic milk jug.
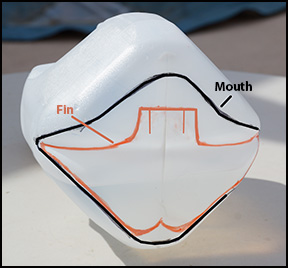
2. Draw the mouth shape as shown around the bottom of the milk jug with a marker (use a marker that will wipe off in case you make a mistake). Poke a whole in the marked line with a knife so that you will be able to insert your scissors. Cut out the mouth in one piece. This piece will be used for the whale's fin.
3. Cut two slits in the screw top so that you will be able to insert the fin.
4. Shape the mouth piece to cut it into a fin shape as shown in the diagram.
5. Insert the fin into the two slits you made on the milk jug and glue it in place.
6. Spray the jug with plastic primer paint and then paint it with the acrylic patio paint or spray paint it with spray paint made for plastic. Spray paint works best because the craft foam sticks better to the spray paint than the acrylic paint.
7. To finish glue on large googly eyes or use a permanent black marker to trace around the mouth, draw in eyes, and lines on the fin.
Nancie Gordom says, "I used the whales yesterday and they were a huge success with both the children and adults. I knew the kidos would like anything that involved 'throw' as Jonah into the whale. I sprayed mine with silver paint which didn't take long and worked well. Not only did the kid have a terrific time I feel sure they will never forget the story of Jonah and the whale."
More Milk Jug Crafts on Other Pages

Good Books about Recycling


Other Website with Recycle Crafts
Planetpals - Plantpals has hundreds or recycled craft ideas and links to other websites with recycled crafts for kids.


