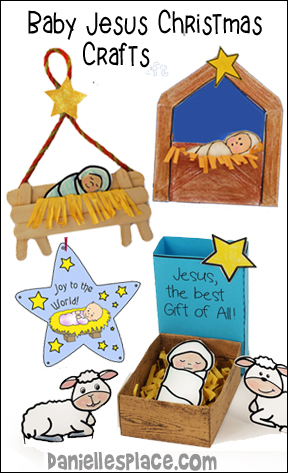
Christmas Crafts For Kids
Christmas Crafts Children Can Make with a Bible Theme
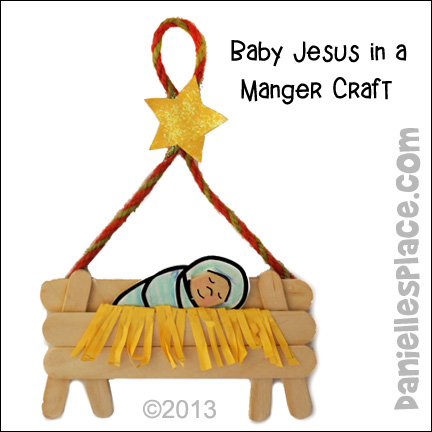
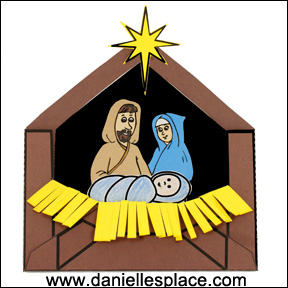
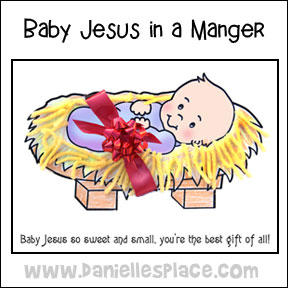
Baby Jesus in a Craft Stick Manger Craft
What you will need:
Woodsies Mini Jumbo Craft Sticks - 4.5"
Yellow Construction Paper or Printer Paper
Colored Pencils or Crayola Crayons
Scissors
Low Temp Mini Glue Gun or Elmer's Tacky Glue
How to Make the Baby Jesus in a Manger Craft:
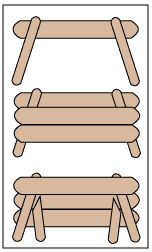
1. Place two mini crafts on top of a mini jumbo craft stick and glue them together as shown in the top picture on the diagram to the right. (A full-size, printable template for this craft is available to members on The Resource Room and as an instant download. The pattern will make it easier for younger children to assemble the craft by themselves.)
Member's ![]()
Instant Digital Download ![]() - Manger Template with one Baby Jesus Pattern
- Manger Template with one Baby Jesus Pattern
2. Place two mini jumbo craft sticks on top of the two mini craft stick legs and glue them down to make the manger shape. (Second picture on the diagram to the right.)
3. Cut two mini craft sticks at an angle as shown in the diagram to the right.
4. Turn the manger shape over and glue the two cut mini craft sticks to the manger. (Bottom picture on the diagram to the right.)
5. To make the straw cut a piece of yellow paper to fit inside the manger and hang over the edge when folded, and then cut slits down one length of the paper. Glue the uncut edge inside the manger and fold the cut edge down over the front of the manger. Glue another piece of paper to the back of the manger so Baby Jesus doesn't fall out.
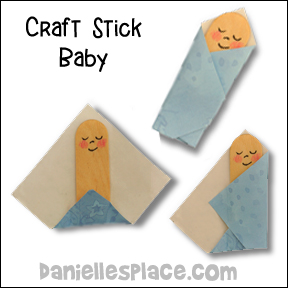
6. To make a Craft Stick Baby Jesus cut a two inch piece off the end of a mini jumbo craft stick or jumbo craft stick. Have your children fold a 2.5" square piece of material or pretty scrap book paper around the lower part of the stick and draw a face on the end (See diagram above). (A printable paper pattern for the baby Jesus is available to members on The Resource Room.)
Member's ![]()
7. Glue a piece of string to the back of the manger. Tie a knot at the top and glue a star to the knot.
©2013, Digital by Design, Inc. -*See Copyright Information
Baby Jesus in a Manger Printable Envelope Craft
New! - Now you can print out the envelope!
What you will need:
Brown and Yellow Construction
Printer Paper
Scissors
Colored Pencils
Star Stickers (Optional)
and Glue
How to Make the Baby Jesus in a Manger Envelope Craft:
1. Print out the Baby Jesus in a Manger Envelope Pattern onto brown paper, and cut it out. Print out the Star and Hay Pattern onto yellow paper, and the Joseph and Mary and Baby Jesus Pattern onto white paper and cut them out.
Member's 
Instant Digital Download - - Includes colored and Black and White Patterns of Mary, Joseph and Baby Jesus
2. Turn the envelope pattern over so that the printed side is on the back. Fold the sides up towards you on the dotted lines so that you see the printed sides. Fold the bottom of the pattern up on the dotted lines. Glue the side flaps of the envelope to the bottom flap.
3. Color the Mary and Joseph picture and place it inside the envelope so that the bottom of the picture is all the way to the bottom of the envelope. Glue it to the inside of the envelope.
4. Cut little slits in the hay pattern just up to the thin line on the pattern and then fold the cut fringe down. Slip the hay pattern into the envelope so that the cut fringes hang out.
5. Color the picture of Baby Jesus and place it in the envelope behind the hay.
6. Add a string to the top of the envelope to use it as a Christmas Ornament. Glue the star over top the string end to cover it up.
©2012, Digital by Design, Inc. -*See Copyright Information
This craft goes along with the Sunday School Lesson "The Best Gift of All" on The Resource Room. In this lesson children learn that the joy we feel when we receive gifts at Christmas is only temporary. There is only one perfect gift that will never disappoint us, the gift of salvation through Jesus Christ. This lesson comes complete with more crafts and activity sheets and games to help reinforce the biblical concepts and the Bible verse.
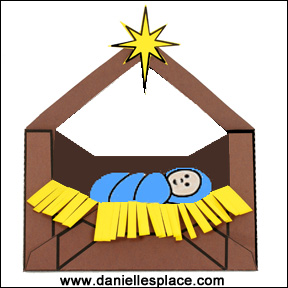
Baby Jesus in a Manger Printable Envelope Craft for Younger Children
This version of the craft was designed for younger children. Children can color the picture of Baby Jesus and place him in the manger. Use the directions above, except cut out the middle shape where indicated on the pattern. Print out the Bigger Baby Jesus Patterns to use in the manger.
Member's
Instant Digital Download -
Includes colored and black and white patterns of Mary, Joseph and Baby Jesus.
To make it more interactive, use pieces of yarn or cut up pieces of felt for the hay. Children will enjoy arranging the "hay" in the manger and then placing Baby Jesus in the "hay".
Instead of using the paper star you can use star stickers to save on preparation time.
This craft can be hung on a Christmas tree as an ornament.
Watch a "View it and Do it!" Video to see how to make this craft:
©2001, 2012, Digital by Design, Inc. -*See Copyright Information
Joy to the World Star Ornament
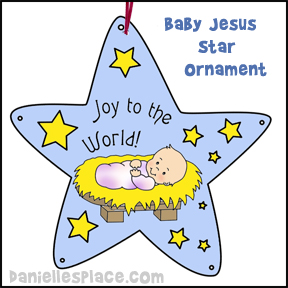

This craft goes along with the Sunday school lesson "Ordinary Baby, Extraordinary Gift " and the book by Gloria Gather by the same name.
Read the book to your children, or listen to the CD and then have your children draw star shapes on card stock and cut them out.
They can draw or glue on pictures of Baby Jesus and then decorate their star ornaments.
Member's
Instant Digital Download - 
Hello I just wanted to let you know that we did the lessons on Jesus King Of Kings. Our ages were from 5yrs to 13 yrs. I want to thank you for all the lessons you offer. We look forward to having a new lesson every Wednesday night. The children love the lessons and stay interested and really enjoy doing the crafts. Thank you.
Christina Penley
Christmas Letter from God Envelope Craft

Children color the pictures, and then fold up the paper to make an envelope. The outside of the envelope says, "From: Your Heavenly Father"
The inside says, "I loved you so much that I gave you my only son, and if you believe in me, you will receive eternal life. Your heavenly father." John 3:16
1. Print out the Inside Card Pattern.
Turn over the pattern and place in back in our printer, and print out the Outside Pattern on the other side.
*If you can't get the pictures to match up on your printer, just use the inside envelope picture and have your children write the "to" and "from" on the outside and decorate it with Christmas stickers.
This craft goes along with the Sunday School Lesson "The Best Gift of All" on The Resource Room. In this lesson children learn that the joy we feel when we receive gifts at Christmas is only temporary. There is only one perfect gift that will never disappoint us, the gift of salvation through Jesus Christ. This lesson comes complete with more crafts and activity sheets and games to help reinforce the biblical concepts and the Bible verse.
Members
Instant Digital Download Pattern -
©2012, Digital by Design, Inc. -*See Copyright Information
I put off joining the resource room for a long time but I finally joined last week and boy! am I glad I did. There are so many wonderful lessons there that I plan to teach my Sunday School kids (aged 3-7 and occasionally an older one) and I can't wait to get started! Thank you so much for this wonderful site! Dana
Little Town of Bethlehem Christmas Ornament Craft for Sunday School

Looking for a fun and easy craft for Sunday School? This project is both beautiful and simple to make! All you need are some old CDs, yellow paper, and a few decorative items. It’s a great way to get creative without breaking the bank—this craft costs just a few pennies! The Bible verse, "For unto you is born this day in the city of David a Savior, which is Christ the Lord." (Luke 2:11) is displayed underneath the nativity scene. It’s a wonderful activity that kids will love, and it helps them connect with the true meaning of Christmas!
How to Make the Little Town of Bethlehem Craft:
1. Print out the Little Town of Bethlehem Ornament Pattern onto bright yellow paper. If you use a printer with water-soluble ink, print out the pattern onto white paper and then use a copy machine to copy it onto bright yellow paper.
Member's ![]()
Instant Digital Download
2. Cut out around the edge of the picture and glue it to the center of the CD. You can glue two CDs or DVDs together, back to back, so the shiny sides are showing and the ornament can be viewed from both sides.
3. Use sequins, decorative lace, ribbon, stickers, beads, etc. to decorate the ornament. The decorative trim used on the ornament pictured above was taped to the back of one CD and then another CD with the same picture was glued to the back to cover up the tape and ribbon.
This craft goes along with the Sunday school lesson "God's Wonderful Gift" on The Resource Room. It comes complete with other craft and activity ideas, including games that help reinforce the biblical concepts and weekly Bible verse. (Available to members only.)
©2012, Digital by Design, Inc. -*See Copyright Information
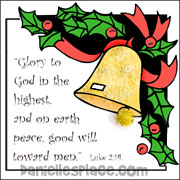
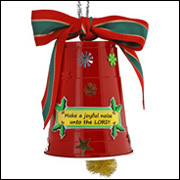
Christmas Bell Crafts for Kids
Go to the Christmas - Ring the Bells Craft Page
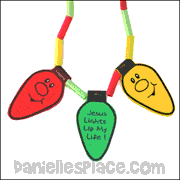
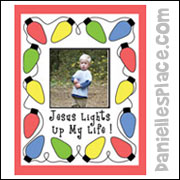
Christmas Crafts - Jesus Lights Up My Life
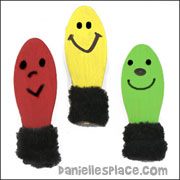
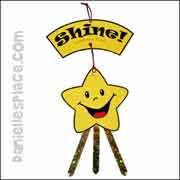
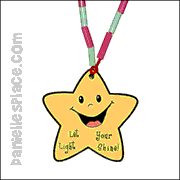
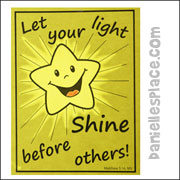
Shine! Christmas Crafts
Go to Let Your Light Shine! Christmas Craft Page
Jesus, God's Gift to the World

This craft goes along with the Sunday School lesson "The Best Gift of All" Bible Lesson Page.
Matchbox Gift Boxes
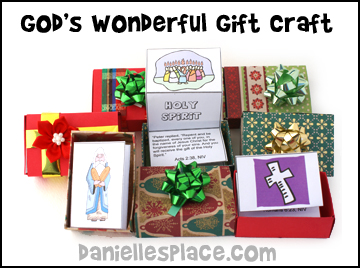
This craft idea comes from the lesson "God's Wonderful Gifts" on The Resource Room.
Each box contains a piece of fan-folded paper that has a picture of a gift from God with a Bible verse and discussion question. (Available to members.) Children take turns selecting a box, opening it, and guessing, by looking at the the picture, what the gift might be. The teacher then reads the verse and question.

What you will need:
Card Stock (Heavy paper)
Ribbon
Bows
Tape
Glue
Other Decorative Items
How to make:
1. Print out the matchbox pattern onto card stock.
Member's ![]()
Instant Digital Download ![]() - KJV
- KJV
Instant Digital Download ![]() - NIV
- NIV
2. Cut out the solid lines.
3. Fold all the dotted lines up.
4. To make the box bottom, glue Flap A over the other Flap A on the same side. Fold down Flap C over the Flap A and Flap B on both sides and glue them down.
5. Fold down Flap E over the F on both sides and glue.
6. To make the sliding top, place glue on the side indicated and stick it over the opposite side.
©2009, Digital by Design, Inc. -*See Copyright Information
Christmas Crafts on Other Pages

Christmas Plays
Mary Remembers by Rev. Ann M. Smith - Page 1 and Page 2
Do you have a Christmas pageant you would like to share? Send it in and we will publish it here for others to enjoy.