Transportation Crafts and Learning Activities for Kids
Planes, Trains, and Automobiles Theme Crafts and Activities
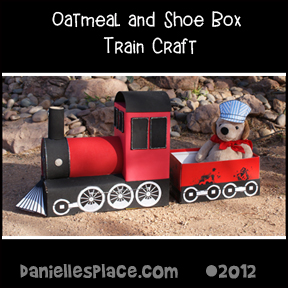
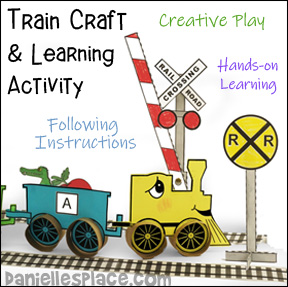
Train Crafts and Learning Activities
Airplane Crafts and Hands-on Learning Activities
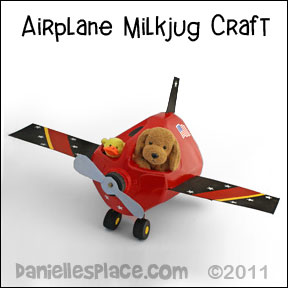
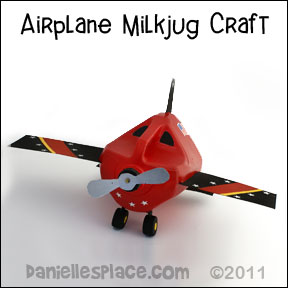
Milk Jug Airplane Craft for Kids
What you will need:
Plastic Gallon Milk Jug
Five Milk Jug Lids
Cardboard
Spray Paint Made for Plastic or Plastic Primer Spray Paint and any Spray Paint for the Main Color
Scissors with a Sharp Point
Acrylic Paint
Stickers, Low Temp. Glue Gun, Hole Punch, Craft Sticks, and a Brass Brad
How to make:
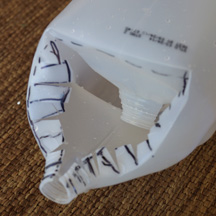
1. Wash and dry the milk jug.
2. Spray paint the jug with spray paint made for plastic. Or use a plastic primer spray paint before using regular spray paint. To get rid of the ink numbers on the top of the jug spray a little bit of paint on the numbers. The spray paint will dissolve the ink. When you see the ink start to run, wipe off the paint.
3. Cut wings, tail, elevator, propeller, and landing gear shapes from heavy cardboard.
Member's ![]()
Instant Digital Download - ![]()
4. Paint the plane parts and let them dry. Paint the five lids - four for the wheels and one to attach the propeller.
5. When everything is dry use the airplane parts to mark where you want to cut slits in the milk jug. Hold the wings, elevators, and tail parts up to the sides of the milk jug and mark with a pen where they should be inserted. Cut slits where you have marked. To attach the parts use a glue gun to spread glue along the slits and insert the parts.
6. Punch a hole in the middle of one cap with sharp scissors and punch a hole in the middle of the propeller. Use a brass brad to attach the propeller to the cap. Screw the cap onto the jug.
7. Fold the landing gear where indicated on the pattern and glue it to the milk jug. Reinforce the cardboard piece with pieces of craft sticks.
8. Glue the pieces of craft sticks to the underside of the cardboard
piece. Cut notches out of two of the caps so that they fit over the cardboard piece. Place a notched cap at the end of one side of the cardboard piece and match up another uncut lid with the first one and glue them together. Do the same thing for the other side of the landing gear.
9. Paint designs on the plane and add stickers to finish.
10. You can cut holes out of the jug to make seats to place stuffed animals in the plane.
© 2011, Digital by Design, Inc. - See Copyright Information
Tractor Crafts and Learning Activity
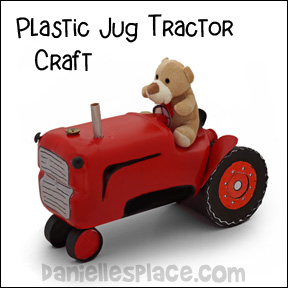
Tractor Made from Plastic Water Jug
What you will need:
Two Squarish Plastic Water Jug
2 lb. Oatmeal Canister
Two Paper Party Cups
Red Spray Paint or Red Acrylic Paint
Black and Silver Acrylic Paint
Low Temperature Glue Gun
Buttons for the Tractor Lights
Sharp Scissors
Card Stock
How to Make the Plastic Jug Tractor Craft:
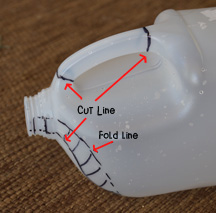
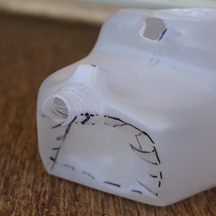
1. Draw lines from the top of the jug along the sides as shown in the picture to the right. Cut along the lines and then fold in the part of the jug opposite the handle between the cut lines. Cut slits along the line and fold in the tabs you made by cutting the slits.
2. Spray paint the jug with red spray paint that is made for plastic.
3. Cut the cylinder oatmeal canister so that it is only 5 1/2" tall. Glue the lid onto the shortened canister. Print out the wheel patterns, color them, and cut them out. Glue them to the ends of the canister.
Member's ![]()
Free Digital Download ![]()
4. Paint the oatmeal canister black and then glue it to the cut out part of the plastic jug. Use a low temperature glue gun and place glue on all the little tabs you folded in. Set the oatmeal canister on the tabs making sure it is centered over the jug.
5. Cut the bottoms off of two party cups so that they are only 1 /2" wide. Paint the cups black on the outside and red on the bottom of the cup.
6. Glue the cups to the water jug.
7.To make the steering wheel cut a circle from another water jug and draw the steering wheel on with a black Sharpie marker. Glue the steering wheel to what is left of the bottom part of the handle.
8. Cut a seat shape from the same jug, paint it, and glue it to what is left of the handle.
9. To finish paint on details with black and silver paint.
10. Cut fender shapes from the extra water jug, paint them, and glue them to the sides of the wheels.
©2014, Digital by Design, Inc. - See Copyright Information
Solar Powered Cars
Solar Powered Race Car Learning Activity
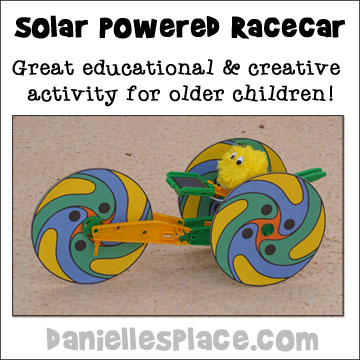
This activity is great for both children who are scientific and visually minded. It is best for children ten and over, but younger children will enjoy making the car with an adult's help. Creative-minded children will enjoy designing wheel covers and other decorative items for their race cars. Children of all ages will enjoy experimenting with and racing the cars.
This is a great science home school activity. Children benefit by learning to follow diagrams, and learning about gears, electricity, and solar power.
This kit also includes other solar powered objects that can be made with aluminium cans and plastic bottles. At less than $20.00 the educational benefits are well worth the investment.
What you will need:
Paper
Markers
Three CDs
Scissors
Side Cutter Diagonal Wire Cutting Pliers
Pompoms and Googly Eyes (Optional)
Elmer's Paper Glue
How to Make the Solar Powered Race Car:
1. Before assembling the race car trace around a CD to make templates including the inside circle of the CD. Create a design for the wheels, color the design, and cut out both the inside and outside of the circle. Spread glue all over the CD and place the designs on the CDs. You can make this a math learning activity be having your child use compass to draw the circle for the wheel. Review diameter and circumference, and how to use a Compass to draw circles.

Five CD wheel patterns in both color and black and white are available to members or as an instant download.
Member's ![]()
Free Instant Download Wheels Patterns - ![]()
2. Follow the directions in the kit on how to make the solar powered car. Children who haven't used similar kits may need some help following the picture instructions. It takes about an hour to assemble the entire car. The only things that don't come in the kit are the CD's and pliers. If you don't have pliers, you can use sharp scissors to separate the plastic parts.
This kit is very well made but it is not for young children. There are very small parts that can be easily lost. The car must be handled with care because it will fall apart if it is dropped or mishandled. It is made so it can be taken apart and re-assembled into other solar powered creations.
© 2012, Digital by Design, Inc. - See Copyright Information
Books about Tractors


