Jesus - I am the Way, the Truth, and the Life Christian Crafts
Bible Crafts and Games about Jesus, the Way, the Truth, the Life
The following crafts and activities come from the Bible Lesson "Where's the Map?" on The Resource Room. In this Backpacking-themed Sunday School lesson children learn that the Bible is our map leading us to Jesus and eternal life.
Member's 
Color Backpacking Paper Dolls and Discover Which Way is North
Print out the hiking people patterns and cut them out. Have the children color them and use them for the compass activity below.
Member's 
Make a compass using a bowl of water and a magnetized needle. Test your compass before class to make sure it is working correctly.
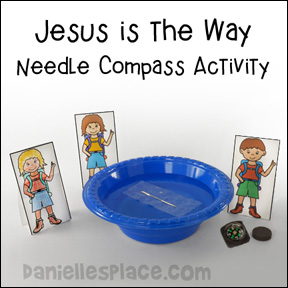
(You can find directions online by typing in "How to make a needle compass" in any search engine.)
Ask the children to place the backpacker paper dolls on the table in the direction they think is north from a bowl of water.
After they have all decided which way they think is north make a compass using a magnet, water, and a needle.
Place the compass in the water to see which direction is north.
Use a real compass to check and see if your compass is pointing in the right direction.
©2016, Digital by Design, Inc. - See Copyright Information
"I Am the Way" Craft Stick Activity Sheet
What you will need:
Four Regular-Sized Craft Sticks Per Project
Three Mini Craft Sticks Per Project
Colored Paper
Colored Pencils or Crayons
Fake Gems
Glue and/or Tape
How to Make the Activity Sheet:
1. Before class print out the activity sheet and the scroll patterns.
Member's
Instant Download Pattern  - KJV and NIV
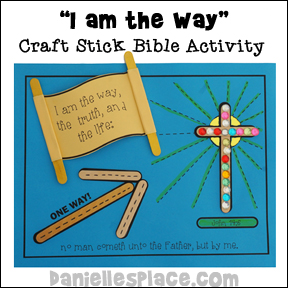
2. In class have your children color the activity sheet and then glue craft sticks on the activity sheet.
3. Children may want to decorate the craft sticks with gems or other decorative items.
4. Show your children how to roll the ends of the scroll pattern around the craft sticks and glue them down.
5. Tape the scroll to the activity sheet as shown in the picture.
©2016, Digital by Design, Inc. - See Copyright Information
Play a Search and Find Game
Place a large map of the United States on the board, the kind that have the states in a lot of different colors. Have two students stand in front of the map. Give them a state to find. The first student to find the state and put their finger on it wins. If a student puts their finger on the wrong state he loses. If you have younger students you can give them clues like the color the state is or if it is at the bottom, right of the map. Play until everyone gets a turn.
Ring Toss Bible Lesson Review Game
What you will need:
Sport Cones or Empty Plastic Bottles
Paper Plates
Scissors
Painter's Tap
Markers
Preparation:
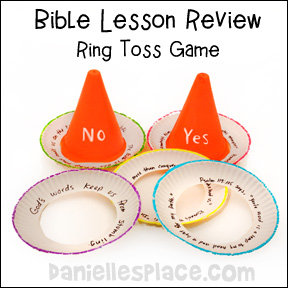
1. Before class print out the Bible lesson questions and write them in a circle around the edge of paper plates. Cut out the center of the paper plates. Make at least one set of questions for every two to three students.
2. Write "Yes" on one sports cone and "No" on another sports cone with a liquid paint marker. Make at least one set of cones for every two to three students.
3. Place a piece of painter's tape across your room for a starting line. Place the sets of cones about four feet from the starting line.
How to Play:
1. In class break your children up into teams of two or three. Give each team a set of paper plate ring questions. On the word "go" the teams should read the questions on the paper plates, decide the answers and then try to get the paper plate ring on the cone with the corresponding answer. If the rings land on the ground, the children may pick up the rings, stand behind the line and try again and again until they get the rings on the cones. When a team gets all their rings on their two cones the game is over.
Count up the amount of rings that were correctly thrown onto the cones for each team. The team that has the most correct rings on the cones wins.
Discuss any wrong answers.
©2016, Digital by Design, Inc. - See Copyright Information
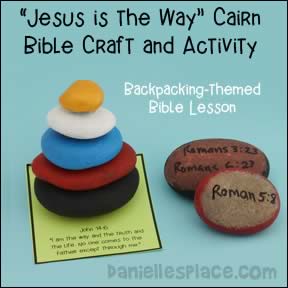
"Jesus is the Way" Cairn Bible Craft and Learning Activity
Each colored stone of the cairn represents a different Bible verse that explains the way to salvation. Children paint the stones and write corresponding Bible verses on the bottom of the stones to help them remember the verses. They can also use them to witness to others.
What you will need:
Smooth Somewhat Flat Rocks - River Rocks Work Great
Card Stock - (Heavy Paper)
Cardboard
Paint - Black, Red, Blue, White, and Gold
Masking Tape
Black Markers
What to do:
Explain that cairns are used to mark trails that might be hard to follow. They keep hikers from getting lost. They tell hikers which way to go. Jesus is a lot like a cairn. He is the way to eternal life. We don't have to be lost in sin because Jesus made a way for us to be forgiven from our sins, live a good life, and to live forever in heaven.
1. Before class print out the Bible verse sheets onto card stock and cut them apart. Prepare a sample cairn. (Printable Patterns available to members below)
2. Have your children pick five stones that they can pile on top of each other to make a cairn.
3. Have them paint the stones according to the "Way to Salvation" printout.
4. When the paint is dry have your children write the corresponding Bible verses on the stones.
5. When your children are finished use the sample cairn to explain the way to salvation. Have your children look up the verses written on the bottom of the stones, and discuss what each verse means. Tell your children to take their stones home and use them to tell others about what Jesus has done for them.
Member's
©2016, Digital by Design, Inc. - See Copyright Information
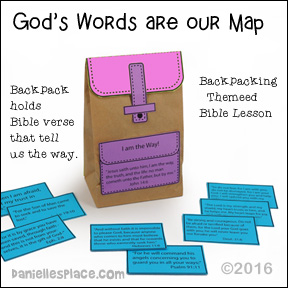
Backpack with Bible Verses Craft
What you will need:
Different Colors of Paper
Paper Lunch Bags
School Glue
Scissors
Tape
How to make a Paper Backpack:
1. Print out the backpack patterns and Bible verse cards onto colorful paper and cut them out.
Member's
2. Cut the top of regular-sized lunch bags so it is 8" high or to match the size of the pattern. Glue the back pattern to the back of the lunch bag and fold over the flap to the front. Glue the rest of the patterns to the bag as shown in the picture.
3. Have your children place the Bible verse cards inside their backpacks. Instead of printing out the Bible verses, you can have your students write their favorite Bible verse on index cards. Give them a list of Bible verse to pick from.
Tell them they can read the verse in their backpacks to help them when they are feeling alone, confused, or lost.
©2006-2016, Digital by Design, Inc. - See Copyright Information


