Arctic Animal Crafts For Kids
Crafts and Learning Activities for Children Relating to Arctic Animals
Eight Arctic Animal Hats
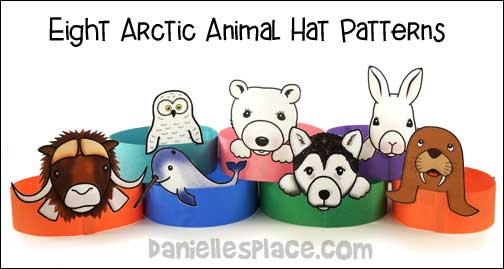
What you will need: Card stock, Colored Paper, Scissors, Colored Pencils or Crayons, Stapler and Glue
How to Make the Arctic Animal Hats:
1. Before class print out the Arctic animal patterns onto Card stock.
Member's ![]()
Instant Download ![]() - Contains 8 different Arctic animals in both color and black and white including: Musk Ox, Snowy Owl, Narwhal, Polar Bear, Husky, Arctic Hare, Walrus, and a Moose (Not Pictured)
- Contains 8 different Arctic animals in both color and black and white including: Musk Ox, Snowy Owl, Narwhal, Polar Bear, Husky, Arctic Hare, Walrus, and a Moose (Not Pictured)
2. Cut pieces of construction paper into two-inch pieces of paper.
3. In class have your children color the animals and then glue the animals on the strips of paper.
4. Place the paper around the child's head and cut the paper to fit his head and then staple it together. You may have to use more than one strip of paper for the hat.
©2017, Digital by Design, Inc. - See Copyright Information
Arctic Animal Playing Cards
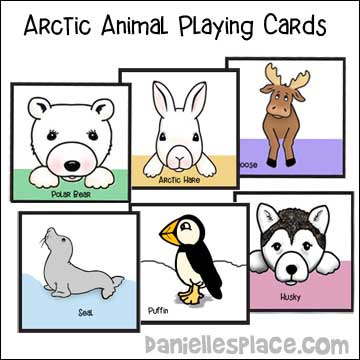
This printable pattern includes twelve different Arctic animals.
Uses for these cards:
1. Teaching Aid - Use the cards as you teach about Arctic animals. Give each student a different card and have him or her research the animal, write about the animal, and then share what he or she has learned about the animal.
2. Review Match Game - After studying Arctic animals have your children play a match game. Print two copies of the animals onto Card stock (Heavy paper).
3. Ice Breaker Game - Print out at least two of each animal. Hand the cards out to your group making sure you hand out at least two of each animal. On the word "go" players should try to find their matching animals by making the animal sounds and movements without saying the name of the animal.
Member's ![]()
Instant Download ![]() - Contains 12 different Arctic animals including: Musk Ox, Snowy Owl, Narwhal, Polar Bear, Husky, Arctic Hare, Walrus, Moose, Puffin, Eagle, Seal and Ermine.
- Contains 12 different Arctic animals including: Musk Ox, Snowy Owl, Narwhal, Polar Bear, Husky, Arctic Hare, Walrus, Moose, Puffin, Eagle, Seal and Ermine.
©2017, Digital by Design, Inc. - See Copyright Information
Bent Plastic Fork Walrus Pocket Buddy Craft for Kids

What you will need:
Cheap White Plastic Forks
Utility Lighter with Long Handle
Printer Paper
Colored Pencils
Scissors
Card Stock (Heavy Paper)
How to Make the Walrus Pocket Buddy Made from a Plastic Fork:

1. Hold a plastic fork in your left hand (if you are right-handed)so that it is parallel to the table with the tines facing down as shown in the diagram to the right.
2. Hold the lighter with your right hand underneath the fork near the top of the handle where the head of the fork meets the handle. (See diagram to the right.) *Do not hold the lighter too close to the fork because it could catch fire. You only want to heat it up. (This part of the craft is for adults only. Children should not use lighters.) When the fork starts to melt and bend remove the lighter and bend the head of the fork down so that it meets the handle. Hold it in place for about ten seconds until the plastic hardens.
3. You can break off some of the times by just snapping them off. Place your fingernail on the tine where you would like it to break off and then bend the tine up until it snaps off.
4. Draw a picture of a walrus as shown above or use the pattern.
Member's ![]()
5. Cut out the walrus, color it and fold it in half. Cut along the mouth with paper folded.
6. Place the tines through the mouth as shown in the picture and glue the head to the fork.
7. Place the handle of the fork in your pocket and let the walrus hang over your pocket.
©2013, Digital by Design, Inc. - See Copyright Information
Bent Plastic Fork and Pom Poms Walrus Pocket Buddy Craft for Kids

What you will need:
Cheap White Plastic Forks
Utility Lighter with Long Handle
Tan Pom Poms
Low Temp Mini Glue Gun, Elmer's Tacky Glue or 3M Scotch Mounting Tape
How to Make the Walrus Pocket Buddy Made from a Plastic Fork:
1. Hold a plastic fork in your left hand (if you are right-handed) so that it is parallel to the table with the tines facing down as shown in the diagram to the right.
2. Hold the lighter with your right hand underneath the fork near the top of the handle where the head of the fork meets the handle. (See diagram to the right.) *Do not hold the lighter too close to the fork because it could catch fire. You only want to heat it up. (This part of the craft is for adults only. Children should not use lighters.) When the fork starts to melt and bend remove the lighter and bend the head of the fork down so that it meets the handle. Hold it in place for about ten seconds until the plastic hardens.
3. Break off the two middle tines by just snapping them off. Place your fingernail on the tine where you would like it to break off and then bend the tine up until it snaps off.
4. Color the bent fork with the Gold Sharpie marker or other permanent marker where the head of the walrus will be.
5. Glue two pom poms just above the bottom of the tines as shown in the picture.
6. Glue on two wiggle eyes.
7. Place the handle of the fork in your pocket and let the walrus hang down over your pocket.
©2013, Digital by Design, Inc. - See Copyright Information
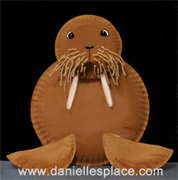
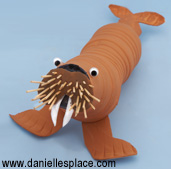
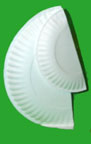
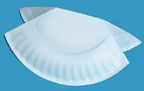
Walrus Styrofoam Bowl and Plate with Toothpick Whiskers Craft for Kids

What you will need:
Styrofoam Bowl
Two 8 3/4" Styrofoam Plates
Toothpicks
Glue
How to Make the Walrus Craft:
1. Cut off the bottom 3" of the paper plate.
2. Print out the pattern.
Member's ![]()
Free Instant Download ![]()
Cut out the pattern. Use them as a template and place them on a plate. Place the tips of the flipper patterns on the edge of the paper plate and trace around the pattern then cut them out.
3. Trace the muzzle and tusk pattern onto the plate and cut them out.
4. Glue the bowl to the top of the cut paper plate and paint them. Also paint the muzzle and flippers. Use only a very small amount of glue. If you use to much, you won't be able to stick the toothpicks whiskers through the dried glue. You really don't need any glue because the whiskers will keep the tusks and muzzle in place. The glue is just to keep them in place while you work.
See More Walrus Crafts
Good Books About Walruses
The World of the Walrus - Biologist Peter Knudtson writes a wonderful book that celebrates the walrus. It expores their habitat, their place in folklore, literature and song. It also touches on their chances of survival in the next century.
Little Walrus Warning - Little Walrus and his mother begin their spring migration. When their herd is in danger of being eaten by a polar bear, Little Walrus must warn the herd. Will he warn them in time? This is a fun and informative book with beautiful illustrations.
Polar Bear Milk Jug Recycle Craft for Kids

What you will need:
Two Milk Jugs
Two Plastic Cups
Pink and White Patio Paint or Spray Paint Made for Plastic
Sharpie Fine-Tip Permanent Marker
Fabric for Scarf
How to Make Milk Jug Polar Bear:
1. Clean and dry the milk jugs. Fill the bottom of one milk jug with sand to give it some weight. Cut the handle off the other milk jug and glue it to the top of the weighted milk jug as shown in the picture.
2. Glue plastic cups to the body milk jug for legs.
3. Cut arms and ears from white craft foam and glue them to the body and head. Spray paint the whole thing with white spray paint.
Member's ![]()
Free Instant Download ![]()
4. Paint the ears and cheeks pink. Draw the eyes, and mouth with a black marker. Cut a nose (included on pattern) from black craft foam and glue to the head. Draw paws on the bottom of the cups.
5. Cut a scarf 5' x 30" from the material. Cut 1/4' slits at each end to make the frill. Tie the scarf it to the bear's neck.
©2012, Digital by Design, Inc. - See Copyright Information
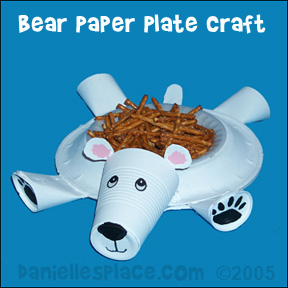
Polar Bear Dessert Dish Craft for Kids
What you will need:
Two Styrofoam Dinner Plates
Styrofoam Bowl
4 - 5 oz. Dixie Cups
1 - 9 oz. Styrofoam Cup
White Patio Paint
How to Make the Polar Bear Dessert Dish Craft:

1. Make the four legs first. Cut the top edge off the cups. Cut a line all the way down the side seam to the bottom of the cups. Roll the cups up so that they are smaller on the tops of the cups as shown in the
picture. Cut off the parts of the cups that hang over. Glue the sides together with a low temp hot melt glue gun. Squeeze the top of
the cup together and glue closed. If you don't have a glue gun, staple them together. Glue or staple the legs to the top of a paper plate. (Glue the front legs on as shown in the picture. Glue the back legs on the opposite way.) Paint the legs white. Use a black marker to draw on the footprints. Cut out a small tail and glue it to the plate.
2. Turn another dinner-sized paper plate upside down and glue or staple it on top of the plate with the feet and tail.

3. To make the head, cut two one-inch slits in the rim of the cup about 2 inches apart so that it fits onto the rim of the polar bear's body. Cut ears from another Styrofoam cup and glue them to the head.

4. To finish, cut a circle in the top plate a little smaller than the rim of your bowl. Place the bowl inside the plates. You can glue it down or leave it so it can be removed.
©2005, Digital by Design, Inc. - See Copyright Information
Folded Paper Polar Bear Craft for Kids

This little bear can be used in an Arctic scene or as a placeholder at the dinner table or winter party.
What you will need:
Card stock (Heavy paper), Scissors, and Tape
How to Make the Polar Bear Craft:
1. Print out the pattern.
Member's ![]()
2. Color the elephant patterns and then cut them out.
3. Fold the polar bear in half.
4. Place a piece of tape on the inside of the top of the head.
©2004, Digital by Design, Inc. - See Copyright Information
"Let it Snow!" Polar Bear Poster Craft for Kids

What you will need:
Color Printer
Paper
Glitter Glue
Foam Self-Adhesive Foam Snowflake Shapes
Tacky Glue
How to make this poster:
1. Print out the picture or use another picture, and glue it to cardboard.
Member's ![]()
2. Glue foam snowflakes around the edge of the picture.
3. Place a dot of glitter glue on each tiny white snowflake in the picture.
©2005, Digital by Design, Inc. - See Copyright Information
Bottle Polar Bear Craft for Kids
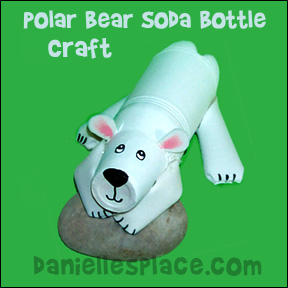
How to make this bottle polar bear craft:
1. Cut the rim off the 3-oz Dixie cup and the top 3" of the soda bottle so that the cup fits snuggly onto the bottle. Glue it to the top of your soda bottle as shown in the picture. Paint the cup and bottle white with acrylic paint. You will have to use at least two coats of paint. Let dry.
2. Roll up pieces of fun foam and glue closed to make the legs and arms. Cut the ends to fit on the bottle. Glue them onto the bottle with a hot melt glue. Cut the paw end rounded and glue closed. Draw on toes, eyes, and nose with a black Sharpie marker.
3. Cut ear shapes from white fun foam and glue to the head as shown. Paint the insides of the ears pink.
©2005, Digital by Design, Inc. - See Copyright Information
Paper Plate Puffin Craft For Kids
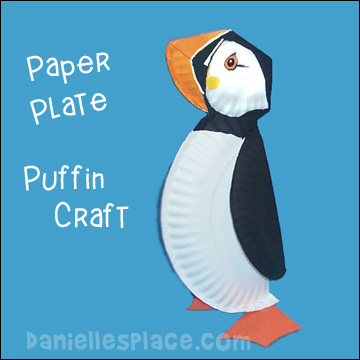
What you will need:
One 9-inch Paper Dinner Plate
Two 6-inch Paper Plates
Orange Card Stock or Cardboard
Orange, Black, White, and Yellow Paint
How to Make this Paper Plate Craft:
1. Print out the patterns for the body, head, and feet.
Member's ![]()
2. Paint one 6-inch plate black and let it dry. Then fold it in half to make the wings.
3. To make the 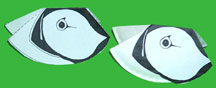 body fold the large paper plate in half and cut a 1/2" slit up one end of the folded side of the plate. (Use the Body Pattern above as a guide.) Fold up the edges as shown in the pattern and the picture above. Glue the paper plate together in the belly area. Glue the wings onto the body just at the top as shown in the picture.
4. Use the head pattern (above) as a guide to fold the head from a paper plate. First fold a 6-inch plate in half. Fold both ends of the plate back and then forth at the fold lines (using the head pattern as a guide). Push the folded center line in on each end of the plate to make pleats as shown in the diagram at the right. Glue the pleats closed. Use the pattern as a guide to paint the puffin's head or you can cut out the puffins head and glue it to the paper plate.
5. Use the feet pattern to cut feet from card board. Fold the feet in half and then fold up both feet. Stick the folded edge of the feet into the bottom of the folded large paper plate and glue them to the paper plate. Glue the rest of the body together along the inside edge of the plate.
6. Glue the head onto the body as shown and then glue the rest closed.
©2004, Digital by Design, Inc. - See Copyright Information
Moose Crafts for Kids
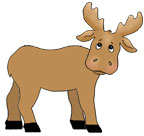
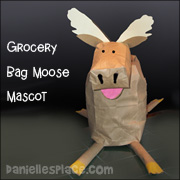
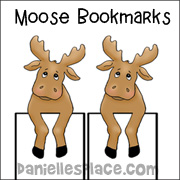
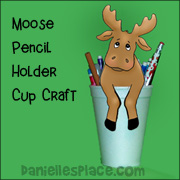
You can find these moose crafts and more on the Moose Craft Page


