Bug and Insect Crafts for Kids
How to Make Bug and Insect Crafts to use in
Your Home Schools and Preschools

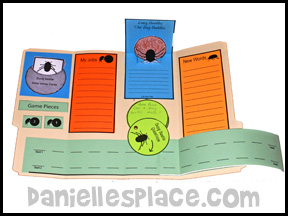
Bag A Bug Printable Board Game - Review Insect and Spiders Game
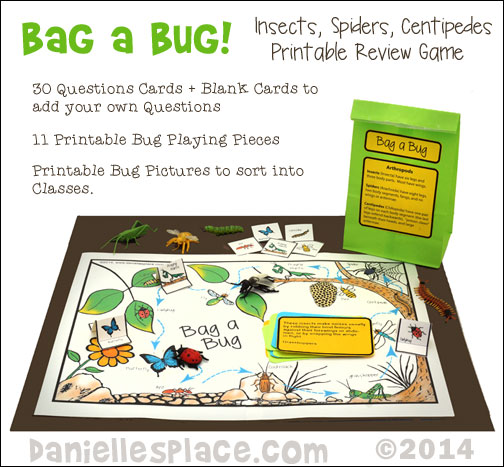
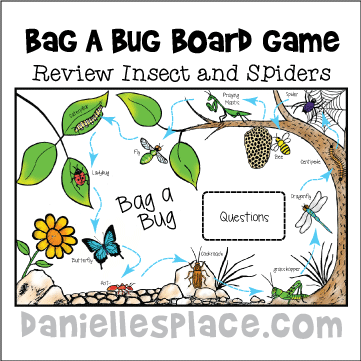
Bag a Bug Printable Game and Sorting Activity - Children throw a die to travel around the bug game board. If they answer a question correctly, they get to collect a bug that matches the space they occupy. The child with the most bugs at the end of the game wins. At the end of the game children sort the bugs they collected into classes.
This game reviews arthropod facts including the following: grasshoppers, dragonflies, centipedes, spiders, bees, praying mantis, flies, ladybugs, caterpillars, butterflies, ants, and cockroaches.
This Game Includes:
1. A Two-Page Printable Game Board. Glue the two sheets together to make a 14" x 10" game board.
2. Thirty Printable Question Cards, blank cards so you can add your own questions, and eight questions about insects in the Bible.
3. Eleven Bug Game Pieces, and Blank Pieces that children can use to make their own game pieces.
4. Bag Labels with descriptions of insects, spiders and centipedes. Children can use the bags to store the bugs they have collected.
5. Collectable Bug Cards. You can use plastic bugs instead of the printable bug cards (not included).
6. Directions on how to play the game.
Member's 
Instant Digital Download - 
We used Safari Ltd Insects from Amazon.com to play this game. The bugs in this set are the same bugs used in our game.
©2014, Digital by Design, Inc. -*See Copyright Information
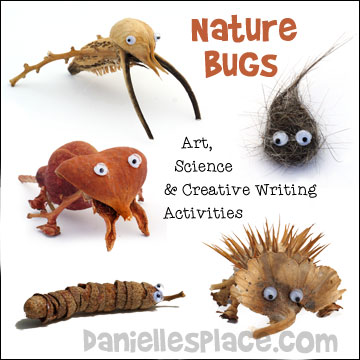
Insect Crafts, Science, and Creative Writing Learning Activities for Home School
Use "nature bugs" in your science class to teach about insects and spiders, in your English class to promote creative writing or technical writing, and in your art class to promote creativity.
What you will need:
Aleene's Tacky Glue - This is the best tacky glue I have found. It even beats Elmer's glue.
Toothpicks - The cheap kind. Used to dip in the glue.
Sharpie Fine-Tip Permanent Markers to add Details (Optional)
Strong Scissors or Clippers (I used Fiskars 5-Inch Premier Micro-Tip Scissors for this project)
Natural items from your environment such as acorns, seed pods, nuts, twigs, dried flowers and leaves to make wings, hair balls, dust bunnies, dried fruit or berries, dried grasses, pine cones, sea shells, pebbles, etc.
How to Make the "Nature Bugs":
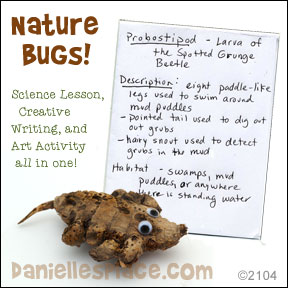
1. Take your children outside to look for natural items to make their bugs. Encourage them to look for items that have already fallen to the ground, or are on dried plant matter. Open up seed pods, and look through piles of dried leaves. Use this exploration as a science lesson. If you can't identify a plant, leaf, or seed pod, look it up on the Internet or in a nature book when you get back inside.
2. Once you have studied classifications of bugs: insects, spiders, and different stages of insects, encourage your children to use the natural materials they found to create their own bugs. Tell them to decide if they want their bugs to be spiders with eight legs or insects with six legs. If they want to get really creative they can make up their own class of bugs.
3. Give each child a piece of paper with their name on it. Place tacky glue in lids or other containers and have your children dip the ends of toothpicks into the glue and then onto their natural items to glue them together. The toothpicks will prevent them from using too much glue.
4. When your children are done making their bugs encourage them to name their bugs and describe them. Tell them to make up both scientific names and common names, and to describe their bug's characteristics, habitat, life cycle, etc.
5. Creative Writing - Have your children write a story about their bugs using as many descriptive words as they can. Have your children help you come up with a list of words before they start their stories: crawl, clamber, inch, slither, flutter, hatch, infest, annoy, infect, pester, teem, swarm, plague, invade, buzz, hum, drone, whir, creature, snout, proboscis, habitat, larvae, larva, creepy, crawlies, attack, squish, squash, stink, squirm, scurry, fly, ewww, creep, dig, critter, wiggling, squirm, wriggle, and twitch
©2014, Digital by Design, Inc. -*See Copyright Information
Web Sites:
Bug Guide is a great web site for children to learn about classification of bugs
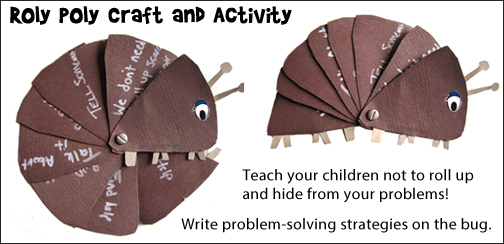
Roly Poly Paper Craft for Kids
This little roly poly curls up into a ball whenever it is scared just like real roly polies. It can be used not only as a toy, but as an educational tool. Have your children study roly polies and then write facts about roly polies on the segments.
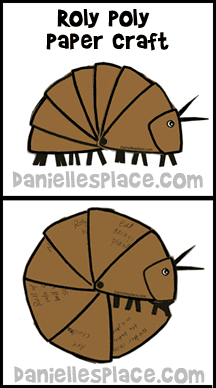
How to Make the Roly Poly Paper Craft:
1. Cut seven triangles 3 1/2" tall by 3" wide from the card stock. (A printable pattern for this craft is available to members.)
Member's ![]()
2. Draw a face shape on one of the triangles at the bottom corner of the triangle.
3. Punch holes in the tops of the triangles. Pile up all the triangles on top of each other placing the head triangle at the top of the pile. Secure all the triangles together with the brass brad.
4. Spread out the triangles to make the roly poly shape. Cut thin strips of black construction paper about two inches long. Fold them in half at an angle to make the pairs of legs. Roly polies have seven pairs of legs. Tape them to the back of the first and last triangles in the pile. Use two more strips of construction paper for the antennae. Glue on wiggle eyes.
5. Have your children write facts about Roly Polies on the sections of the roly polies.
©2013, Digital by Design, Inc. -*See Copyright Information
A-Z Schoolers used this Roly Poly Craft to teach her children not to "roll up in a ball", but to face their problems. She wrote things they can do to face their problems on each section of the roly poly and then discussed it with her children. This blog has lots of other bug-related crafts and activity ideas to help children deal with self-esteem. If you are a home schooler or run a preschool, you will find this blog very helpful.
Fly Crafts and Learning Activities
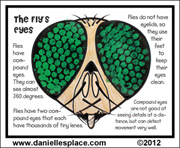
Firefly Crafts for Kids
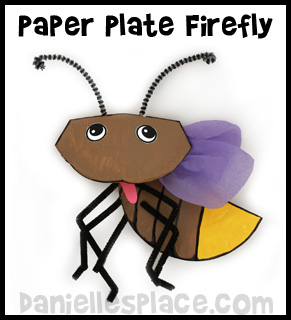
Go to the Firefly and Lightning Bugs Crafts Page
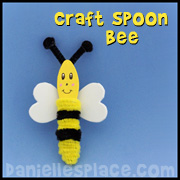
Bee and Ladybug Refrigerator Magnets Plastic Spoon Craft
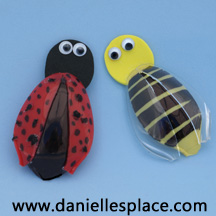
What you will need:
Yellow, red, black, and Clear Plastic Spoons
Scissors
Black and Yellow Craft Foam
How to Make Bee and Ladybug Spoon Crafts:
1. To make the bee and ladybug cut the scoop end off the spoons using a sharp scissors. Cut the red and clear spoon in half lengthwise to make the swings. Use a lighter to melt any sharp edges.
2. Glue the wings to the body spoon with a hot melt glue gun.
3. Cut circles from craft foam and glue to the body. To finish glue on googly eyes.
Created by Corrin Burner
©2012, Digital by Design, Inc. -*See Copyright Information
Ant DIY Craft for Kids Made from Spoons and Pipe Cleaners
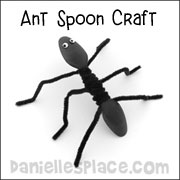
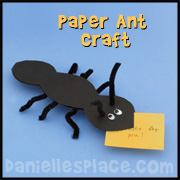
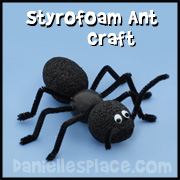
Go to the Ant Craft Page for directions and patterns.
Dragonfly Crafts and Learning Activities


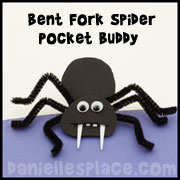
Spider Crafts and Learning Activities
Bug House Craft for Kids
Bugs have to live somewhere. Why not make them their own house to live in. These are great for children who are interested in studying bugs. After leaving them outside for a season, they can take them apart to see how many bugs have taken up residence in their houses.
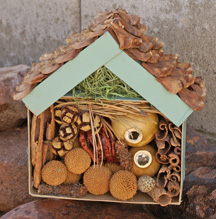
What you will need:
Paper mache or wooden craft boxes
low temp. hot melt glue gun
acrylic paint
natural items that bugs would like
Some items we used: a gourd cut in half, pinecones, reeds, curled up bark, dried apple slices, dried moss, pine needles, Sycamore tree ball, dried berries, and acorn caps.
How to make:
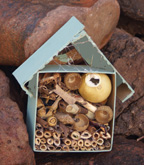
1. Collect the materials you think bugs might like to live in. Bugs like to hide in holes so find things that have lots of holes or can be arranged so that they create cozy spaces.
2. If you would like to make a roof for your house, cut the lid of the box in half and glue it together to make the roof of the house. You don't have to make a roof. You can glue several boxes together to make a condo or apartment building.
3. If you live in a wet area, you may want to paint the box and then cover it with a clear acrylic paint so that it won't fall apart when it rains. Or you can place it in a dry place where it won't get wet.
4. Arrange the materials you have collected in the box. Group similar objects and shapes. Use low temp. glue to secure the objects in place. For a more pleasing arrangement try not to place everything in the same direction, vary the sizes and shapes or your objects, and group similar objects together. Use different colors of objects if you have them.
5. After your house has sat out side for a season, carefully take it apart and see how many different inhabitants there are, or watch to see how many insects or spiders exit and enter it.
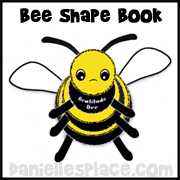
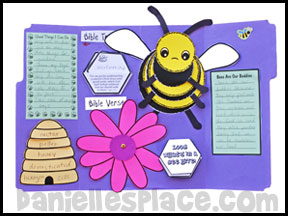
Bee Crafts
Go to the Bee Crafts and Activities Page
Dung Beetle Refrigerator Magnet Craft
What you will need:
Printer Paper
Sharpie Markers or Black Acrylic Paint
How to Make the Dung Beetle:
1. Cut pipe cleaners into 2 1/2" pieces and cut the foam egg in half lengthwise.
2. Give each child half a foam egg, six pipe cleaner pieces, and a black pompom.
3. Have them stick the pipe cleaners into the bottom of the foam egg and bend them up for the legs, and then glue the black pompom on one end of the egg for the head, and glue beads on for eyes.
4. To finish, paint the beetle with black paint or use black Sharpy markers.
Learn more about Dung Beetle with the Bug Buddies Study on Dung Beetles - Go to the Bug Buddies Study Page.
©2008, Digital by Design, Inc. -*See Copyright Information
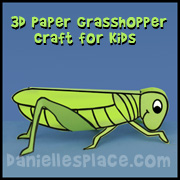
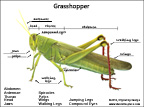
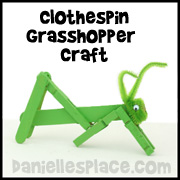
Grasshopper Crafts and Learning Activities
See our Grasshopper Crafts and Learning Activities Page for Home School to find these crafts and learning activities and many more.
Walking Stick Bug Craft for Kids
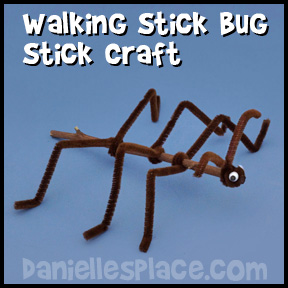
How to Make the Twig Walking Stick:
1. Fold three pipe cleaners in half. Place a pipe cleaner on the stick at the fold. Wind the pipe cleaners around the stick by bringing the ends of the pipe cleaners around each other and twisting. Bend the legs so that one joint comes up over the stick. Make two more bends in the pipe cleaner. Do this for the other two sets of legs.
2. To make the antennae fold a pipe cleaner in half. Place on the head end of your bug at the fold. Wind the pipe cleaner around the tip of the stick from both ends to make the head and antennae.
3. Glue on eyes.
©2008, Digital by Design, Inc. -*See Copyright Information
"All About Walking Stick Bugs" Book Craft
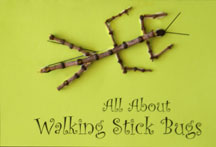
This craft and learning activity is great to use in lap books. Children glue sticks on the cover of the book to make a walking stick bug and then write about walking sticks inside.
This craft is available in the "Bug Buddies Study" - Christian Home School Materials about God's Amazing Little Creatures".
This set of lessons introduces children to amazing insects. Each lesson emphasizes a Biblical concept relating it to a specific bug, and encourages children to learn more about bugs.
©2008, Digital by Design, Inc. -*See Copyright Information
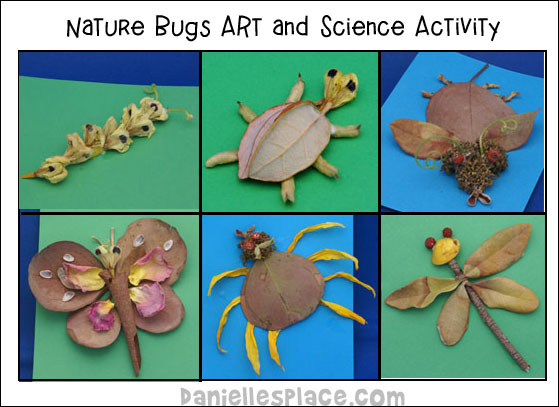
Nature Bugs
Collect dried leaves, flowers, sticks, stones, seeds, shells, acorns, etc. that you can use to make bugs. Glue the pieces together on a piece of 5" x 5" card stock. Aleene's Tacky glue works very well for this project.
©2008, Digital by Design, Inc. -*See Copyright Information
Bug Buddies Studies for Sunday School and Home Schools
Bug Buddies Studies is a Christian-based set of studies that introduces children to a variety of amazing insects.
Praying Mantis Crafts and Leaning Activities for Kids Great for Home Schools!
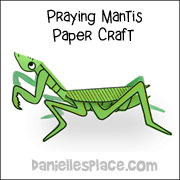

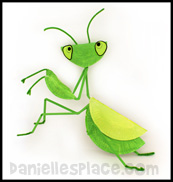
Go to the Praying Mantis Crafts and Learning Activities Page for Praying Mantis Crafts, Learning Activities, and Recommended Books about Praying Mantis.
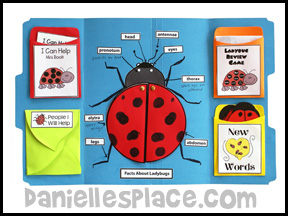
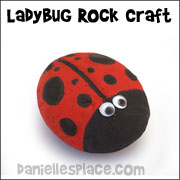
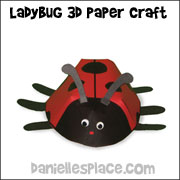
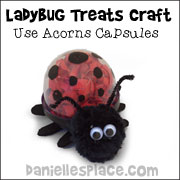
Ladybug Crafts
Ladybug Crafts for Kids - Go to the Ladybug Crafts Page for craft and Activities
3D Paper Goliath Beetle Craft
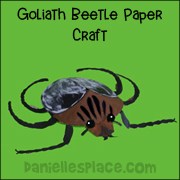
This beetle is fairly simple to make using only 6 parts - a circle for the thorax, two wing patterns, the under part of the beetle and its legs, and then two forelegs. It is made from card stock (Heavy paper) and construction paper. After assembling the bug children can paint it to look like a Goliath Beetle, and add pompom eyes. This craft is available to members only.
Member's ![]()
©2008, Digital by Design, Inc. -*See Copyright Information
Changing Colors Golden Tortoise Beetle Paper Craft
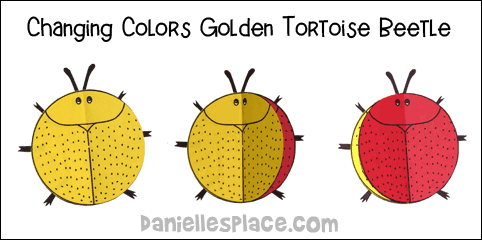
What you will need: Computer paper, glue, gold and red crayons, scissors, and black paper
How to make:
1. Draw a large circle on a piece of paper and add eyes, head, and wings to make a beetle (see picture above). Make an exact copy. Color one beetle red and the other gold. Draw another circle the same size onto white computer paper.
Member's ![]()
2. Cut the beetles and the white circle out.
3. Fold the colored beetle patterns in half so that the right side is inside, then glue the patterns back-to-back, wrong sides together, the right side of yellow beetle to the back of the left side of the red beetle.
4. Cut out antennae and legs and glue them onto the white circle. Glue the left side of the yellow pattern and the right side of the red pattern onto the bottom pattern. When you flip over one side of the beetle it will turn a different color.
©2008, Digital by Design, Inc. -*See Copyright Information
Mosquito 3D Paper Craft and Educational Activity
What you will need:
Card Stock (Heavy Paper)
Pipe Cleaners
Brass Fasteners
Hole Punch
Scissors
Colored Pencils
Glue
How to Make:
1. Print out the pattern onto card stock and cut out the pieces.
Member's ![]()
Instant Digital Download - ![]()
2. After studying mosquitoes have your children color the patterns to look like real mosquitoes.
3. Punch holes in the body on the small circles and "X". Punch holes in the wings.
4. Attach the wings where indicted with two brass fasteners so that the wings can move.
5. To make the legs feed one pipe cleaner through the top left hole from front to back and then into the top right hole from the back to front. Pull the pipe cleaner half way through so that the legs are even. Fold the legs as shown in the picture. Do the same thing with the next to set of holes.
6. Fold half a pipe cleaner in half to form the antennae and tape them to the top of the head. Punch a hole for the proboscis and feed a pipe cleaner through the hole wind it around itself and cut it to the length you would like.
©2000, Digital by Design, Inc. - See Copyright Information
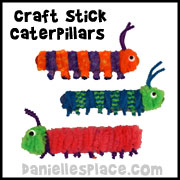
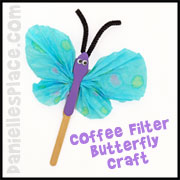
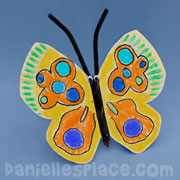
Butterfly, Caterpillar, and Inchworm Crafts for Kids
Go to the Butterfly Craft Page for lots of Butterfly, Caterpillar, and Inchworm crafts .
Buggy Birthday Party Ideas
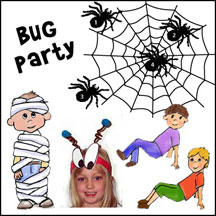
This is a great party theme for both boys and girls. Not only are there some great games and activities but you will also have an opportunity to teach children a little bit about bugs and send them home with educational tools that will spark their interest in bugs.
Children of all ages will enjoy these activities. If you have very young children, four and under, you may want to use just butterflies, bees, or ladybugs for your theme and leave out the scarier bugs.
Go to the Buggy Birthday Party Ideas Page
Praying Mantis Printout from Enchanted Learning.
Insect Crafts on Other Web Sites
Insects Made from Leaves, Sticks and other Natural Items from the University of Kentucky Entomology Web Site.
Eric Carle Web Site - There are lots of craft and activity ideas here that go along with his books such as "The Very Hungry Caterpillar, "The Grouch Ladybug", "The Very Busy Spider", "The Very Lonely Caterpillar, and"The Very Quiet Cricket".