Elijah Bible Crafts and Activities for Sunday School
How to Make Crafts and Activities Relating to the Bible Story of Elijah and God Sending Rain
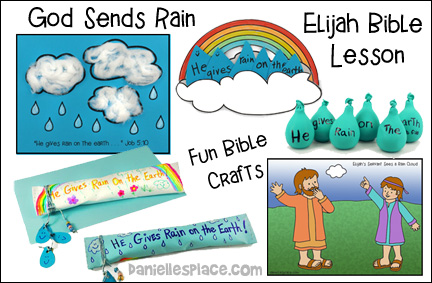
Elijah Prays for Rain on Mt. Carmel Bible Lesson
In this lesson children learn that God is the one and only God, he controls the rain and can do anything. Children participate in telling the story by repeating a rhyme in which the servant comes back to Elijah each time after looking for rain and tells him he sees nothing.
The following Bible lesson including everything on this page is available to members on The Resource Room and as an instant download.
Member's ![]()
Instant Digital Download - ![]()
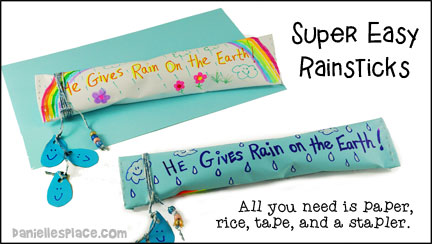
Make a Super Easy Rain Stick
What you will need:
Legal-sized Paper (Any Color)
Clear Tape
Stapler
Markers (We used Sharpie Fabric Markers, Marvy Fabric Markers, and Sharpies) Highlighter Markers also work well.
Newspaper or Scrap Paper
Dry Rice
Watch a "View it and Do it" video on how to make these rains ticks:
How to Make the Super Easy Rainstick:
1. Roll one legal-sized piece of paper up into a tube that is about two inches wide.
2. Roll a second piece of paper over the first one to make the tube stronger.
3. Press one end together, fold it up 1/2" and staple it closed.
4. Cut newspaper into long strips that are about 5" wide.
5. Crinkle up the newspaper to make a long skinny snake shape. Twist the newspaper starting from one end. Place the twisted end against a large maker and start winding it around the marker as you twist the paper. Wind and twist as you go. (It may be easier for younger children to just twist the entire length of the paper and then twist it around the marker.)
6. Remove the twisted paper from the marker trying not to let it unwind.
7. Place the twisted paper into the tube. Do this three times to fill up the tube.
Tip: If you have very young children, you can just have them crinkle up small sheets (3" x 3") of newspaper and place them in the tube.
I have loved the whole Elijah series. I found the rain stick worked best for me with only 4 - 4x4 pieces of newspaper crimped diagonally and filled with 1/3 cup of lentils. Thanks again for the years of wonderful ideas! Cathy
8. Add 1/2 cup of rice to the tube and close up the other end. (You can also use very small pebbles.)
9. Write the Bible verse on the rainstick and then have your children color or decorate the sticks.
10. If you have time, add raindrops and beads. Cut raindrop shapes from card stock and punch holes at the tops of the raindrops. Tie the raindrops to yarn and then wind the yarn around one end of the rainstick. Tie the yarn and then add beads to the other end of the yarn. Tie the end of the yarn so the bead don't fall off.
Member's ![]()
Instant Digital Download - ![]()
©2016, Digital by Design, Inc. -*See Copyright Information
Use Objects to Reinforce your Lesson
When teaching about how God brings rain use a thunder tube and rains ticks. Thunder tubes produce a great loud thunder sound that will impress your children and help them remember the lesson. After the lesson let your children experiment with the toys.
Make a Cloud Picture
This is a great craft for preschool children.
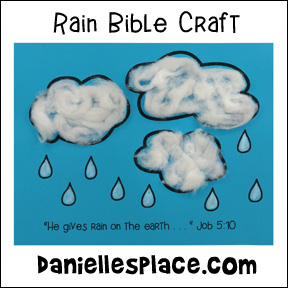
What you will need:
Cotton Balls
Glue
Blue Card Stock (Heavy Paper)
White Colored Pencils
What to do:
1. In class give your children a cloud and raindrops printout and some cotton balls.
Member's ![]()
Instant Digital Download - ![]()
2. Show them how to pull the cotton balls apart to make smaller balls.
3. Place glue on the cloud shapes and instruct your students to place the cotton balls on the cloud shapes.
Discover How Many Drops of Water Will Fit on the Top of a Quarter Review Game
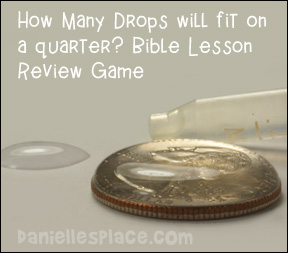
What you will need:
Quarter
Eyedropper (You may also want to have extra eyedroppers available for the children to experiment with later.)
Container for Water
Paper Towels
Preparation:
1. Before class practice dropping drops of water on a quarter. Discover how many drops a quarter will hold before it runs off. It is really interesting to watch as the water begins to bulge over the sides of the quarter. You will be amazed at how much water a quarter actually holds. I counted about 40 drops. You can use this activity as a review game or just use it as an experiment.
Experiment - Ask the children how many drops of water they think will fit on the top of the quarter without running off. Drop a drop of water on the quarter using the eyedropper. Add a few more drops. Keep adding drops until the water runs off the quarter.
Review Game - Ask the children how many drops of water they think will fit on the top of the quarter without running off. Drop a drop of water on the quarter using the eyedropper. Add a few more drops. Divide the children into teams. Tell the children that you will add one (Use two if you don't have a lot of questions or a lot of time.) drop of water for every correct answer they give. Take turns asking the teams questions about the lesson. Add a drop for every correct answer. The team whose turn it is when the water runs off wins.
©2006, Digital by Design, Inc. -*See Copyright Information
Play Bible Verse Review Games with Balloon Raindrops
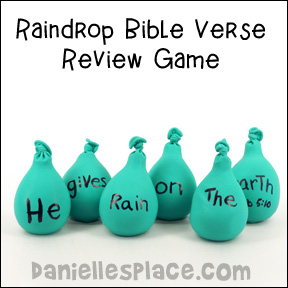
What you will need:
Large Blue Balloons
Flour
Funnel
Pencil
Preparation:
1. Make some raindrops by filling some balloons with flour. Use a funnel to fill the balloons with flour.
2. Place the balloon on the end of the funnel. Pour about 1/4 cup of flour in the funnel and then use the end of a pencil to push the flour into the pencil through the funnel.
3. When the balloon is full pull it off the funnel and tie the balloon closed.
4. You will find games and Bible verse review activities on The Resource Room using these cute raindrops.
A. Pick a Bible Verse from a Puddle
Make seven balloon raindrops before class. Write the Bible verse, one word per raindrop, on the raindrops with a permanent ink marker. Write the Bible verse on the board and review it. Place some water in a large container so that the raindrops will float. Have the children stand around the tub. Place the raindrops in the tub so that the words are facing down. Flatten out the raindrops so that they don't turn over in the water. Mix up the raindrops. Have the children take turns reaching in the tub and picking a raindrop. You can have the children place the raindrops in order to spell out the Bible verse by matching up the words on the board to the words on the balloons, or you can have the children keep picking raindrops until they pick them in order. For example, have the children take turns pulling out a raindrop. If the raindrop is the first word of the Bible verse, it is placed under the word or first in line. (Each time a new word is added to make the verse, the children should repeat the verse.) If the raindrop that was picked is not the first word of the Bible verse, it is put back in the "puddle" and the next child picks a raindrop. Keep playing like this until all the raindrops have been picked in the correct order.
B. Bible Verse Review Game
(For children who can read.) Make seven balloon raindrops before class. Write the Bible verse, one word per raindrop, on the raindrops with a permanent ink marker. Write the Bible verse on the board and review it. Make sure the children can read the words. Have the children stand in a circle. Give the children the raindrops. Tell them to pass the raindrops around the circle while you play some music. When the music stops, the children who are holding the "raindrops" should say the Bible verse. The child holding the word "He" would start, the child holding the word "gives" would say his word, etc. Start the music again and keep playing until all the children have had a chance to say a word of the verse.
C. Raindrops in a Puddle Review Game
(For children who can not read.) Have the children stand in a circle. Tell them that the center of the circle is a puddle. Give one child a balloon raindrop. Start some music and have the children pass the raindrop around the circle until the music stops. The child holding the raindrop when the music stops says the Bible verse and jumps into the puddle. Keep playing until all the children jump into the puddle. If you have lots of children, use more than one balloon raindrop.
* Do not use balloons with preschool children. Do not give them to young children who might put them into their mouths. They could puncture them with their teeth. These raindrops are very sturdy and will tolerate a lot of abuse.
©2006, Digital by Design, Inc. -*See Copyright Information
Raindrop Roundup Review
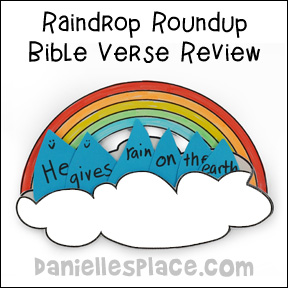
Preparation:
Before class cut out a lot of raindrop shapes from blue paper. Write the Bible verse, one word per raindrop, on each raindrop shape.
Make enough sets of raindrops so that you have one set for every child in your room. It is okay to have extra.
To Play:
1. In class write the Bible verse on the board and go over the verse several times.
2. Have the children sit in a circle around the room. Ask the children if they have ever seen it rain inside. Throw all the raindrops up and let them fall to the floor. Tell the children on the word go, they should go and look for one raindrop with the word "He" written on it. Show them the word.
3. Once every child has found a raindrop with the word "He" on it, tell them to find a raindrop with the word "gives" on it. Keep going until the children have found all the words to the Bible verse.
4. Make cloud-shaped pockets by gluing two cloud shapes together.
Member's ![]()
Instant Digital Download - ![]()
Have the children place their raindrops in the cloud pocket in order to spell out the verse. Have them take them home and study the Bible verse. (This activity can be done with nonreaders. Write the words on the cloud so they can just compare the words written on the clouds to the words written on the raindrops and place them in order).
©2006, Digital by Design, Inc. -*See Copyright Information
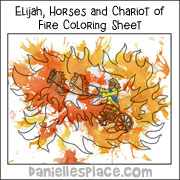
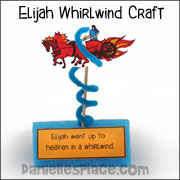
Other Elijah Lessons
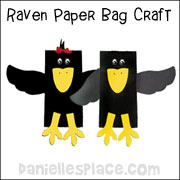
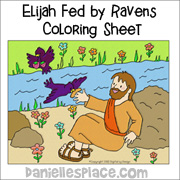
Elijah and the Ravens Bible Lesson
See the free Sample Lesson from The Resource Room for Elijah and the Raven!
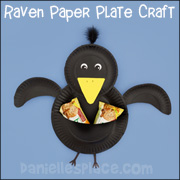
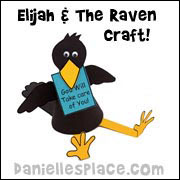
Children make a paper plate raven, place treats in the pocket, and give it to someone.
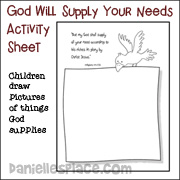
Children draw pictures of things that God has given them using the raven holding a picture printouts.
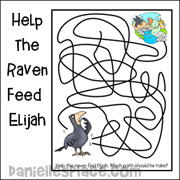
Help the Raven Feed Elijah Activity Sheet
Children follow the lines to find he way to Elijah.
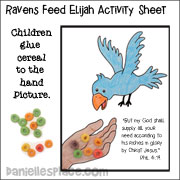
Children color the picture of Elijah and the Raven and then glue food (dry cereal) to the hand and the raven's beak.
A pattern and directions are available on the Free Sample Lesson page.
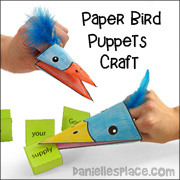
All you need to make this cute little puppet is printer paper, tape, and crayons.
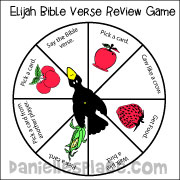
Children collect food cards by spinning the raven and landing on "Pick a card" spaces.
You can find even more ideas on the free Elijah and the Ravens! Bible Lesson.
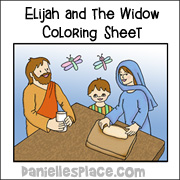
The Widow Makes Elijah Bread
See Elijah and the Widow Bible Lesson Ideas.

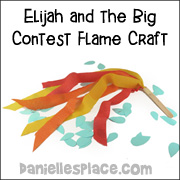
Elijah in The Big Contest
See Elijah and the Prophets of Baal Bible Lesson Ideas.
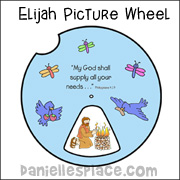
Elijah - God Sends Rain Bible Lesson
See Elijah God Sends Rain - Bible Crafts and Activities Page - Above
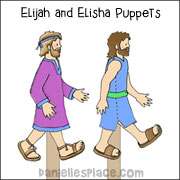
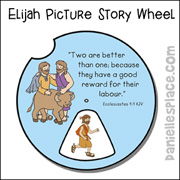
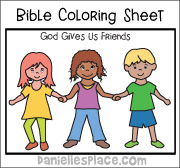
Elijah and Elisha - God Gives Us Friends
Elijah - God Gives Us Teachers