Lion Crafts and Learning Activities for Kids
How to Make Crafts and Activities Relating to Lions
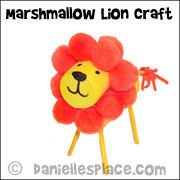
Lion with Moveable Head Paper Craft for Children
Children will enjoy moving the head back and forth on this adorable lion craft. Children color the body and head patterns, cut them out and attach the head to the body pattern with a brass brad.
A printable pattern for this craft is available to members on The Resource Room and as an instant digial download.
Member's ![]()
Instant Digital Download ![]()
©2012, Digital by Design, Inc. -*See Copyright Information
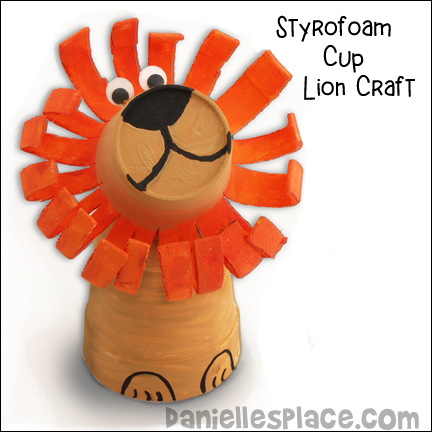
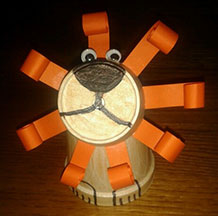
Lion Melted Styrofoam Cup Craft for Kids
What you will need:
Two Large Styrofoam Cups, Acrylic Paint, Paint Brushes, Googly eyes, Scissors, and Glue
How to Make the Lion Melted Styrofoam Cup Craft:
1. Cut slits about 1/2" apart from the rim of a large styrofoam cup to about 2 1/2 from the bottom of the cup.
2. Preheat your oven to 250 degrees (convection oven works best). Make sure you turn on your oven vent and you have your windows open because the fumes from the melting cups probably aren't good to breath in.
3. Place the cut Styrofoam cup, right-side up, on an old cookie sheet. Turn on the oven light so you can see inside the oven. You should see the cup start to melt and the sides curl down in about 15 to 30 seconds or maybe a little longer. As soon as you see the sides start to curl down open the oven door and take out the cup. The cup will not be hot, but be very careful not to touch the sides of the oven.
4. Use another cup for the body of the lion. Paint both cups and let them dry.
5. To finish glue on googly eyes. The ones on this lion are standing on end. Glue the head to the body.
Created by Corrin Burner
©2012, Digital by Design, Inc. -*See Copyright Information

Made by Aditi Gupta
Variation made by Laura
Klassen
- Instead of placing
the cup in the oven just cut
off the top and use paper
for the mane.
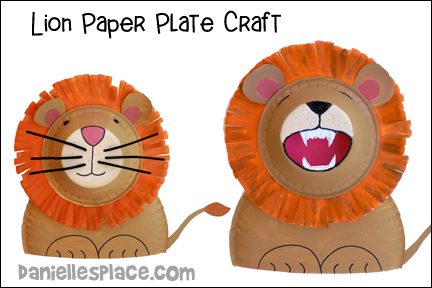
Roaring Lion Paper Plate and Bowl Craft for Kids
What you will need:
Two Banquet-sized Paper Plates
One Large Styrofoam Bowl
Scissors
Paint
Construction Paper for the Ears
Glue
How to Make the Roaring Lion Paper Plate and Bowl Craft:
This pattern can be made in two different ways. You can glue the mouth pattern onto the bottom of a bowl or you can use the pattern as a template to cut the mouth out so that things can be inserted in the lion’s mouth.
1. Draw an open mouth with teeth or a closed mouth on the bottom of the bowl and cut it out. Printable patterns with tails, ears and three different sized mouths with teeth are available to members and as an instant download.
Member's ![]()
Instand Digital Download ![]()
2. Color the ears and tail pattern. If you are going to glue the mouth pattern to the bowl, color the mouth pattern.
3. Use the mouth pattern to draw an open mouth with teeth on the bottom of the bowl or just glue the pattern to the bottom of the bowl.
4. If you are using the pattern as a template, cut out the open mouth so that the red of the paper plate below can be seen through the hole when attached.
5. Cut one quarter off of the large paper plate to make the body and paint it brown. Draw on paws.
6. Paint the head paper plates orange around the outside and pink or red in the middle.
7. Cut slits all the way around the edge of the head paper plate. Glue the ears to the back of the bowl and then glue the bowl to the head paper plate.
8. Glue the head to the body plate as shown in the picture. Glue the tail to the body and draw on feet.
©2010, Digital by Design - See Copyright Information
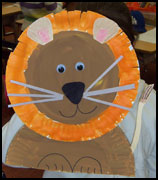
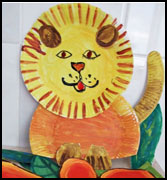
Lion Paper Plate Variations Made by Followers

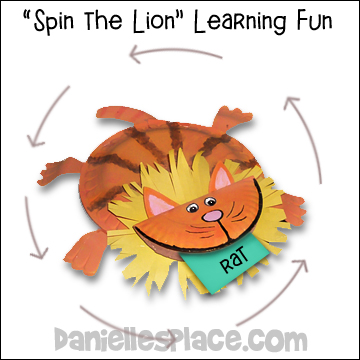
Free Flat Cat Craft and Learning Activity for Children
Use this cute little cat to play a word game that teaches your children words that rhyme with "cat". Children will love making their own flat cats to take home and help them learn to read.
What you will need:
Three Styrofoam Dinner Plates or Heavy Duty Paper Plates
One Small Paper Plate
Acrylic Paint
Glue and/or Staples
Sticky Note Paper
How to Make the Flat Cat Craft:
1. Cut out legs, ears, and a tail from one paper plate. Cut the feet from around the rim of the paper plate so that they naturally bend down.
Free ![]()
2. Glue or staple the legs and tail to the top of one plate. Try not to have the feet and tail stick out too far. This makes it harder to spin because the tail and legs keep bumping on things.
3. Cover that paper plate with another paper plate to form the cat's body. The plates should be glued or stapled top to top.
4. Fold the small plate in half to form the cats head. Glue ears to the head at the fold. Glue the head to the body.
5. Paint the cat.
6. Write words that rhyme with cat on small sticky note paper and place them in the cat's mouth.
7. In class have your students sit in a circle. Spin the cat with the note papers in it's mouth. The child who is facing the cat's face when it stops spinning should remove one of the sticky notes and read the word. Keep playing until all the words are gone.
©2007, Digital by Design, Inc. -*See Copyright Information
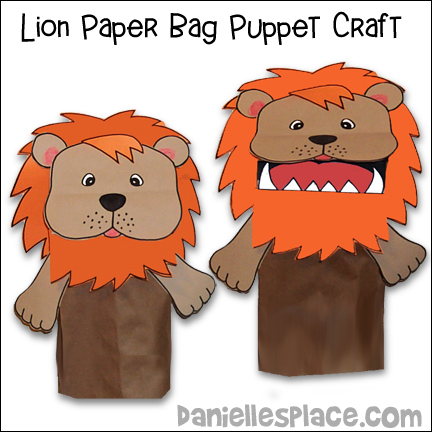
Lion Paper Bag Puppet Craft
What you will need:
Brown Paper Bags
Orange and Tan Paper
Glue, Scissors, and Crayons
How to Make the Lion Paper Bag Puppet:
1. Print out the Patterns and cut them out or draw a lion's face, mane, mouth, and feet.
Member's ![]()
Instant Digital Download ![]()
2. In class have your children color the patterns and glue them onto the lion as shown in the picture.
©2007, Digital by Design, Inc. -*See Copyright Information
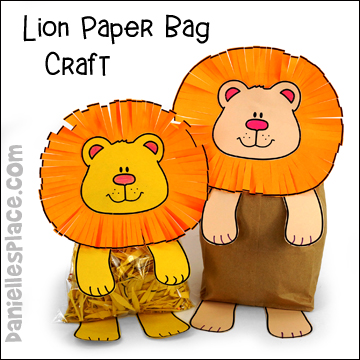
Stuffed Lion Craft for Kids
What you will need:
Colored Pencils, Crayons, or Markers
Orange and Yellow or Tan Paper
Small Plastic Sandwich Bags or Brown Paper Lunch Bags
Tissue Paper Scrunched-up Balls or Shredded Paper
Yellow and Orange Construction Paper
Tape, Glue, and Staplers
Kids' Scissors
How to Make the Stuffed Lion Craft:
1. Before class print out the lion mane onto orange paper, and the head, arms, and leg patterns onto yellow or tan paper.
Member's ![]()
Instant Digital Download ![]()
2. If you are using clear sandwich bags, cut up pieces of paper or tissue paper to be used as stuffing. If you are using brown lunch bags, collect material to be used as stuffing. You can use scrap paper, plastic grocery bags, or tissue paper.
3. In class have the children color the patterns and then glue the head to the mane pattern. Have them use kid's scissors to cut slits all the way around the mane pattern.
4. To assemble the craft have your children fill the bags with cut-up paper, or plastic bags and then staple the top corners back. Glue the head of the lion to the top of the bag. To finish glue on the arms and legs.
©2007, Digital by Design, Inc. -*See Copyright Information
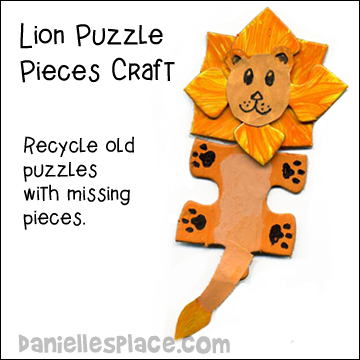
Lion Puzzle Piece Craft for Kids
What you will need:
Puzzle Pieces, Blank Puzzles Pieces or Larger Puzzle Pieces, Googly Eyes, Acrylic Paint, Permanent Markers, Magnet or Pin, and Glue
How to Make the Lion Puzzle Piece Craft:
1. Use two puzzle pieces for the face. Glue one on top of the other. Paint the puzzle pieces with acrylic paints and then outline the painted shapes with permanent marker.
2. Cut a face shape and tail from cardstock, paint it and glue it to the puzzle pieces.
3. Use a permanent marker to draw in the mouth, eyes, and other details.
4. Glue a magnet or tape a pin to the back of the pieces to make refrigerator magnets or brooches.
©2012, Digital by Design, Inc. - See Copyright Information
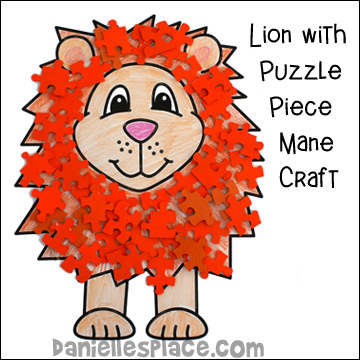
Lion with Jigsaw Puzzle Piece Mane
What you will need:
Puzzle Pieces from an Old Puzzle (the one-inch pieces work well), Florescent Orange Spray Paint, Newspaper, Drawing Paper, Colored Pencils, and Glue
How to Make the Jigsaw Puzzle Pice Lion:
1. Place all the puzzle pieces picture-side down on a piece of newspaper so that no pieces are overlapping.
2. Paint the pieces with spray paint. You will probably have to do at least three coats of paint. Let each coat dry before spraying another coat.
3. Draw a picture of a lion with a large mane. Glue the orange puzzle pieces over the mane.
Member's ![]()
Free Instant Digital Download ![]()
©2010, Digital by Design - See Copyright Information
Lion Face with Noodle Mane Craft for Kids
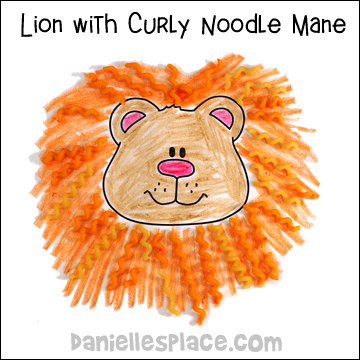
Use this craft goes with the lesson on Daniel and the Lion's Den.
What you will need:
Card Stock (Heavy Paper)
Crayons
Dry Uncooked Long Curly Noodles
Red Food Dye and Rubbing Alcohol
White glue
How to Make the Lion Face with Noodle Mane Craft:
1. Before class print out the lion head pattern onto card stock and make copies.
Member's ![]()
Instant Digital Download ![]()
2. If you would like the noodles to be orange, place some red food dye in a large Ziplock bag, add about a 1/4 cup of rubbing alcohol, and place the noodle inside. Lightly shake the bag until the noodles turn orange. Remove the noodles and place on a paper towel to dry.
3. In class have the children color the lion face and mane and then glue on noodles.
©2003, Digital by Design, Inc. -*See Copyright Information
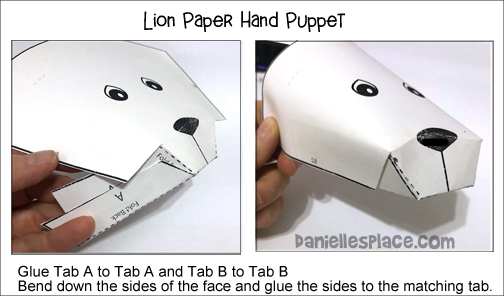
Lion Paper Hand Puppet Craft for Kids
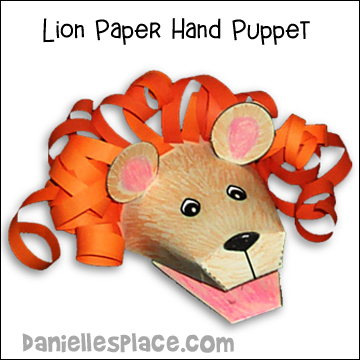
Children will love playing with their own lion paper hand puppet. You can pre-make the puppets and have younger children glue on strips of orange paper for the mane. This is a great craft to teach older children how to follow directions, both written and diagrams
A printable pattern is available to members and as an instant digital download.
Member's ![]()
Instant Digital Download ![]()
©2002, Digital by Design, Inc. -*See Copyright Information
Lion Crafts on Other Pages