Armadillo Crafts and Learning Activities for Kids
How to Make Armadillo Crafts and Learning Activities to Reinforce your Armadillo Unit Studies Great Homeschool Resources for Teachers!
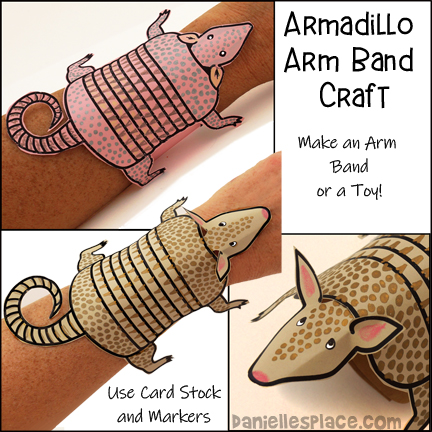
Armadillo Arm Band Craft for Kids
Use this craft with your armadillo homeschool unit study to reinforce your lessons.
3D Armadillo Arm Band Craft - Member's ![]()
Armadillo Arm Band Craft (Flat) - Member's ![]()
Instand Digital Download ![]() - Includes the Armadillo 9-Banded Toy Craft below.
- Includes the Armadillo 9-Banded Toy Craft below.
This craft comes in two different styles and three different sizes. The first style consists of two parts; the head and body. The ears and head are folded and glued to the body to make it standout from the arm. The second pattern has only one part and sits flat on the arm.
The armadillo pattern is attached to a band that is fastened around the arm. You can also glue the pattern to a paper towel or TP tube to make an armadillo toy.
What you will need:
Card Stock (Heavy Paper), Markers, Glue, Tape
How to Make the Armadillo Arm Bands:
1. Print out the patterns onto card stock by clicking on the links below the pictures.
2. Cut out the patterns. To make the 3D armadillo cut out the head and fold the ears up. Fold the sides of the head down. Glue the neck to the armadillo body.
3. Cut long strips of paper for the band and glue the armadillo to the band. Tape the band to the child's hand.
4. To make the band removable punch holes in the band and secure with a string, or use Velcro tabs.
©2013, Digital by Design, Inc. - See Copyright Information
Nine-Banded Paper Armadillo Craft and Toy
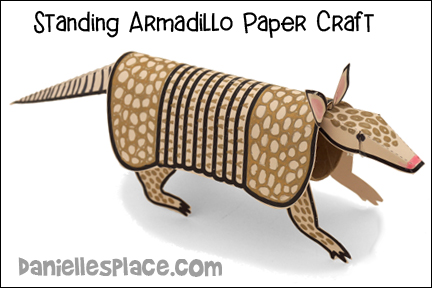
This is a great craft to use with your homeschool unit studies about armadillos. Read books about armadillos and then make the armadillo to reinforce what your children have learned.
What you will need:
Four-Inch TP Roll or Paper Towel Tube, Card Stock (Heavy Paper), Glue, and Colored Pencils or Markers
Member's ![]()
Instand Digital Download ![]() - Includes Armadillo Arm Band Craft
- Includes Armadillo Arm Band Craft

Kelly French used these patterns to make an adorable armadillo.
©2013, Digital by Design, Inc. - See Copyright Information
Use this craft to learn about armadillos. Have your children draw nine bands in the center of the armadillo to make a nine-banded armadillo famous in Texas and other US states. Read Armadillo Rodeo by Jan Brett about an armadillo named Bo and his great adventure in the Texas countryside and at the rodeo.
Have your children study the pictures and discuss how the landscape differs from their own.
Visit the author's web site, to see a great Armadillo Made from a Milk Carton.
Three-banded Armadillo Paper Craft
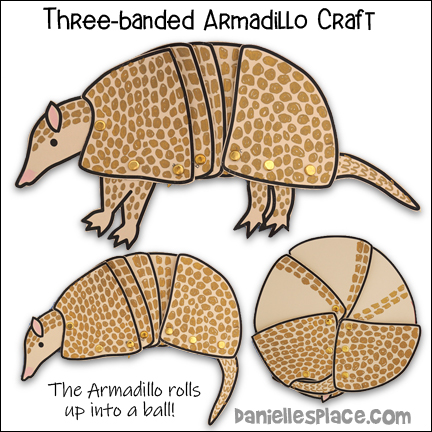
Did you know that not all armadillos can roll into balls? The three-banded armadillo is the only armadillo that can do this.
Your children will love learning about armadillos using this moving armadillo craft. The head, tail, and legs tuck in to form a ball just like real armadillos.
What you will need:
Card Stock, Colored Pencils or Markers, Scissors, Seven Short Brass Paper Fasteners, Fiskars 1/4 Inch Hand Circle Punch
Member's ![]()
Instant Digital Download ![]()
©2013, Digital by Design, Inc. - See Copyright Information
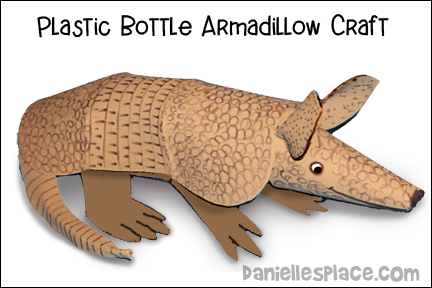
Free Plastic Bottle Armadillo Craft for Kids
Read books about armadillos (See below) and then make this craft to reinforce your homeschool lesson about Armadillos.
What you will need:
Tan, Brown, or Gray Craft Foam, Hot Melt Glue Gun and Glue, Markers, 20 oz. Plastic Bottle, Scissors
How to Make the Plastic Bottle Armadillo Craft:
1. Print out the shell, head, leg and ear patterns. (If you have a smaller bottle print the patterns using a percentage less than 100%.)
Member's ![]()
Free Instant Download ![]()
2. Cut out all the patterns. Place the shell, head, and ear pattern on craft foam. Trace the patterns onto the craft foam and cut them out. Place the leg pattern on a piece of paper that has been folded in half. Trace the pattern onto the folded piece of paper and cut it out. Unfold the paper and place it on a piece of craft foam. Trace it and cut it out.
3. Glue the leg pattern around a 20 oz. plastic bottle so that the legs are hanging down on the sides of the bottle (See the picture.).
4. Cut the four slits on the shell pattern. Make four darts in the shell by placing glue along the underside edge of each slit. Bring the edge of the slit over the meet the dotted lines. Press until the glue sticks.
5. Glue the shell over the legs so that just the legs show. (See picture.) The front of the shell, the part that has the curve that goes inward, should be glued to the top of the bottle where the head will be attached.
6. Glue the head pattern together to make a cone shape. Cut the slits by the nose. Push the craft foam under the nose in towards the center of the cone and bring the nose down over the craft foam that you pushed in. Glue it down. Glue the head to the top shell.
7. Place a tiny bit of hot melt glue in the bottom center of each ear. Fold the ears in half and hold the fold down until the glue holds. Glue the ears to the head where marked.
8. Glue the tail to the bottom of the bottle under the shell.
9. Use a marker to draw on the mouth and eyes. To finish, draw stripes and circles on the shell and head.
©2007, Digital by Design, Inc. - See Copyright Information