
Australian Crafts for Kids
Australia Day Crafts and Learning Activities for Homeschool Unit Studies
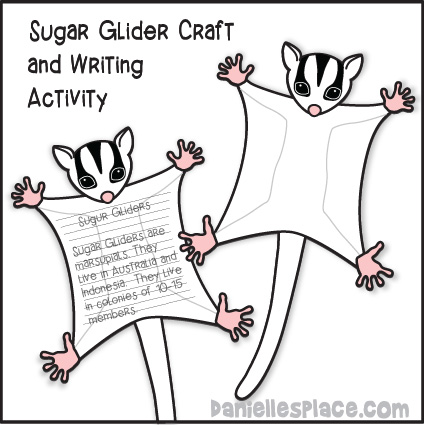
Sugar Glider Craft and Writing Activity
What you will need:Card Stock (Heavy Paper), Colored Pencils, Scissors and Glue
How to Make Sugar Glider Craft and Writing Activity:
1. Print out the sugar glider patterns onto card stock and make copies.
Member's 
Instant Digital Download - three pages - ![]() - Includes body patterns without lines and with lines for writing.
- Includes body patterns without lines and with lines for writing.
2. Have your research sugar gliders, look at pictures and then color the patterns to match the pictures they studied.
3. If you are using the lined sugar glider pattern, have your children write facts about sugar gliders.
4. Tie a string on the back of the sugar glider bodies and hang them from the ceiling so it looks like they are gliding through the air.
©2017, Digital by Design, Inc. -*See Copyright Information
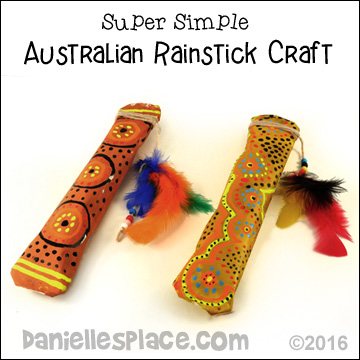
Super Simple Australian Rainstick Craft for Kids
What you will need:
8-1/2 X 14 - Legal-sized Paper (Any Color)
Clear Tape
Stapler
Acrylic Paint and/or Paint Marker Pen
Paint Brushes
Newspaper or Scrap Paper
Dry Rice
Watch a "View it and Do it" video on how to make these rainsticks:
How to Make the Paper Rainsticks:
1. Roll one legal-sized piece of paper up into a tube that is about two inches wide. Tape it closed in the middle and ends.
2. Roll a second piece of paper over the first one to make the tube stronger. Tape it closed with clear tape.
3. Press one end together, fold it up 1/2" and staple it closed.
4. Cut newspaper into long strips that are about five inches wide.
5. Crinkle up the newspaper to make a long skinny snake shape. Twist the newspaper starting from one end. Place the twisted end against a large maker and start winding it around the marker as you twist the paper. Wind and twist as you go. (It may be easier for younger children to just twist the entire length of the paper and then twist it around the marker.)
6. Remove the twisted paper from the marker trying not to let it unwind.
7. Place the twisted paper into the tube. Do this three times to fill up the tube.
Tip: If you have very young children, you can just have them crinkle up small sheets (3" x 3") of newspaper and place them in the tube.
8. Add one half cup of rice to the tube and close up the other end. (You can also use very small pebbles.)
9. Have children paint the rainsticks and then use liquid paint markers or paint brushes dipped in paint to paint a dotted design on the rainsticks.
©2016, Digital by Design, Inc. -*See Copyright Information
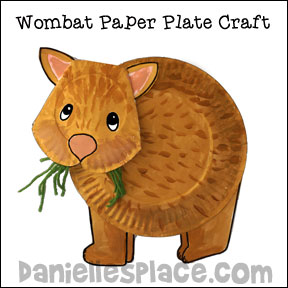
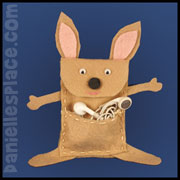
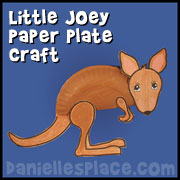
Wombat Paper Plate Craft for Kids
What you will need:
Two Regular-sized Paper Plates
Two Snack-sized Paper Plates
Card Stock (Heavy Paper)
Green Yarn
Tacky Glue or Low Temperature Glue
Paint or Crayons
How to Make a Wombat Paper Plate Craft:
1. Draw legs and ears on a piece of card stock, color them and cut them out. (A printable pattern for the ears, and legs are available to members and as an instant download.
Member's 
Instant Download Pattern - One Page - ![]()
Watch a "View it and Do it! Video for this Craft on Youtube:
2. Fold back the sides of two snack-sized paper plates so that they match and glue them together at the sides. Cut a mouth shape out of the bottom of the plates. (Or use the pattern above as a template.)
3. Glue the ears to the head. Glue the legs on to the top of one of the paper plates and then glue the two large paper plates together. And then glue the head to the body.
4. Cut yarn into six inch pieces and glue them inside the mouth.
©2013, Digital by Design, Inc. -*See Copyright Information
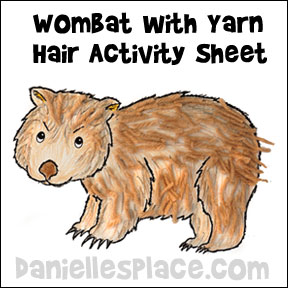
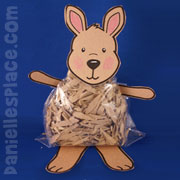
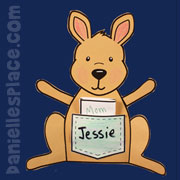
Wombat with Yarn Hair Activity Sheet for Kids
Use this craft to reinforce your homeschool unit studies about Wombats or Australia.
What you will need:
Card Stock (Heavy Paper)
Colored Pencils or Crayons
Tan or Brown Yarn
Scissors
Tacky Glue
How to Make the Hairy Wombat:
1. Read stories about wombats (see above) and look at pictures of them online.
2. Have your children draw their own pictures of wombats or use the Printable Activity Sheet.
Member's ![]()
3. After they have colored their wombats have the cut up yarn into one-inch pieces and glue them to the body.
4. You can also have them write interesting facts about wombats on the sheet.
©2013, Digital by Design, Inc. -*See Copyright Information
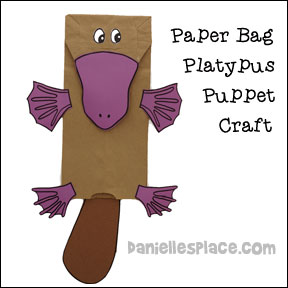
Platypus Paper Bag Puppet Craft for Kids for Australia Day
Use this Platypus Puppet Craft with your homeschool unit studies about Australia. Great preschool or elementary craft. See the suggested platypus books to go along with the craft.
What you will need:
Brown Paper Lunch Bag
Purple and Brown Construction Paper
Tacky Glue
White Paper for the Eyes
Scissors
Markers or Crayons
How to Make a Paper Bag Puppet:
1. Print out the platypus pattern and make copies onto construction paper.
2. Cut a tail shape (pattern not included) from the same color construction paper.
3. Fold in the bottom corners of the bag as shown in the picture.
4. Cut out the patterns and glue them to the bag as shown in the picture to the left. Glue the bottom beak to the bag underneath the top beak.
Member's
Instant Download Pattern - One Page - ![]()
DLTK's Growing Together Web site has a Platypus Toilet Paper Roll Craft that preschool age kids will enjoy making to go along with this paper bag craft.
©2005, Digital by Design, Inc. -*See Copyright Information
Puggles the Sock Platypus Craft for Kids for Australia Day

This cute little critter is made from a child's sock and one finger cut from a glove.
It takes only minutes to make.
Stuff the sock, secure with rubber bands, and glue the tail closed.
You can find complete directions for this craft on the Sock Crafts Page.
©2010, Digital by Design, Inc. -*See Copyright Information
"Facts About Platypus" Itty Bitty Printable Book
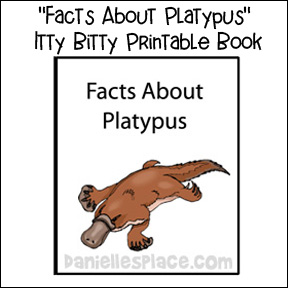
Did you know that a baby platypus is called a puggle?
You and your children will learn all kinds of interesting facts about platypus in this Itty Bitty Book about Platypus including:
*Platypus live in only Australia in bushland and rainforest.
*They eat bugs, shrimp, and small aquatic creatures.
*Platypus detect their
food with the help
of electric signals
from their prey's
bodies, with sensors
on their bill.
Member's ![]()
Kangaroo Crafts for Preschoolers and Children- Great for Australian Unit Study
See the Kangaroo Crafts on other pages.
©2010, Digital by Design, Inc. -*See Copyright Information
Golf Tee Echidna Craft for Kids
Echidnas are spiky little animals that live in Australia that look like a cross between an anteater, porcupine, and a hedgehog. Children will enjoy making a replica of these spiny anteaters and increase their knowledge of Australian animals in the process.
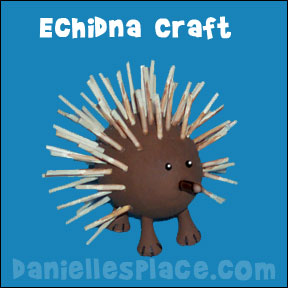
How to make an Echidna craft:
1. Cut the top part of four golf tees so that they are about 1 1/2" long. Press the cut tees into the egg to make the Echidna's legs as shown in the picture.
2. Paint the body and legs brown.
3. Break toothpicks in half and stick them in the Echidna's body as shown in the picture. Stick one of the cut off tee in the front of the egg to make the Echidna's pointy snout. Paint it brown and draw on eyes with a permanent marker.
Children can Learn More about Echidnas on the San Diego Zoo web site.
©2004, Digital by Design, Inc. -*See Copyright Information
Australian Dot Art with Natural Paint
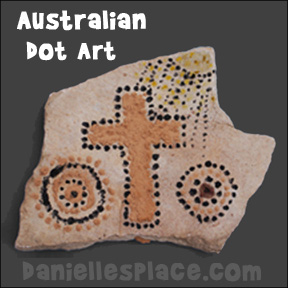
The Aborigines painted things that had meaning to them, to tell stories, and teach. Show your children the different symbols the Aborigines used (Links below) and ask them what symbols we use today. Have your children paint things that have meaning to using dot art techniques.
Videos of Aboriginal Dot Paintings
1. Aboriginal Dot Painting - Students make dot paintings of natural forms and animals that reflects their personalities. Shows how they did a lot of pre-planning before starting their paintings.
2. How to Do Dot Painting - Detailed demonstration on how to make a dot painting.
3. Aboriginal Dot Art by Kurun Warun - Kurum Warun demonstrates dot painting and explains the meaning of his painting. He also demonstrates how to play the didgeridoo.
4. Aboriginal Artist Judy Watson Napangardi - Judy demonstrates her dot painting 4. techniques using a series of dots to make thick lines. She makes very large paintings and sits on her canvas while she works.
5. Aboriginal Art William Sandy - Paints very large canvases with bold lines and dots.
6. Arte Aborigen Australiano (Aboriginal Art) - Pictures of Aboriginal Art
Australian Dot Art Paper Weight
Make Your Own Dot Art Pictures. Study Aboriginal art and then make your own dot painting by dipping a stick, handle end of a paint brush, or your finger into tempera paint and place dots on your paper to make designs.
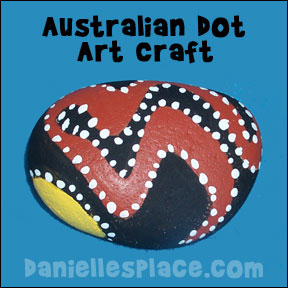
Australian Aboriginals used sticks, Echidna quills, or spikes to paint traditional "dream time stories". Their paintings depicted stories from their lives. They usually used traditional symbols in their paintings such as: fish, turtles, crocodiles, snakes, kangaroos and other animals. They also painted pictures of weapons, boomerangs, and other tools they used.
What you will need:
Smooth River Rock, Acrylic Paint (Earth Tones), and Paint Brushes
How to Make Australian Dot Art:
1. Study Australian dot art designs. Decide what type of design and colors you would like to use.
2. Start by painting the lightest background colors. Fill in with the darker colors. Then add dots.
Example 1 of aboriginal dot painting on Art.com
Example 2 of aboriginal dot paint on Art.com
Many samples of student dot art on Aboriginal Art Project web site
©2005, Digital by Design, Inc. -*See Copyright Information
Stenciling
Aboriginal's used common objects such as boomerangs, their own hands or other's hands, feet, tools, spears, as stencils to make art.
Make your own stenciled pictures. Add food coloring to small spray bottles filled with water. (Wear old clothes because food coloring stains.) Place your hand on a sheet of construction paper, trace around it with a pencil and then cut it out. This is your stencil. Place the "stencil" on another sheet of paper. Use the spray bottle to spray painting around the handprint. When you lift the handprint stencil the hand shape will stand out.
You can find out more information about stenciling at Aboriginal Art Online.
©2005, Digital by Design, Inc. -*See Copyright Information


