Polymer Clay Crafts for Kids
Using Polymer Clay to Make Gifts, Ornaments and Works of Art
Dog Key Chain Clay Craft for Kids
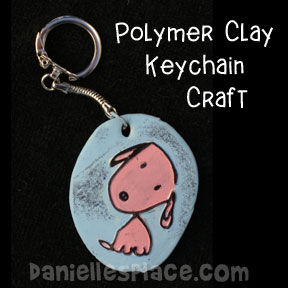
How to Make Dog Key Chain Clay Craft:
1. Form your clay into a ball and press it down to flatten
it. Use a rolling pin to roll it out to about 1/4" thick.
2. Stamp the clay with the rubber stamp and let the ink dry. Punch a hole at the top of the picture with a small straw.
3. Bake the clay piece in your oven according to the directions on the clay. When the piece is cool paint it with acrylic paint and then spray clear glossy paint over the surface to protect the picture.
4. To finish attach the key chain. If the loop in the key chain is too small, remove the loop with needle nose pliers and add a bigger loop.
Copyright 2007, Digital by Design, Inc. - See Copyright Information
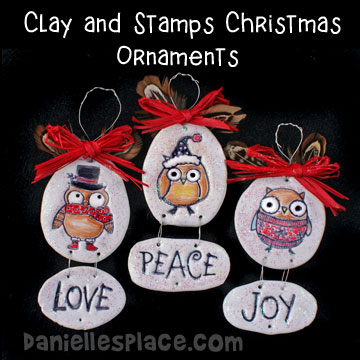
Clay Love, Peace, Joy Owl Ornaments
What you will need:
Polyform Sculpey III Polymer Clay
Rolling Pin
Knife
Straw
Prismacolor Premier Colored Pencils
Owl Rubber Stamps or other Stamps
How to Make Clay Love, Peace, Joy Owl Ornaments:
1. Form your clay into a ball and press it down to flatten
it. Use a rolling pin to roll it out to about 1/4" thick.
2. Stamp the clay with the rubber stamp and let the ink dry. Punch a hole at the top of the ornament for hanging.
3. Do the same thing to make the words that will hang at the bottom of the ornament. Punch holes at the bottom of the owl ornament and at the top of the word pieces with the end of a straw .
4. Bake the pieces according to the directions for your clay,
let them cool, and then color them with colored pencils.
5. When you are finished coloring, use thin craft wire to attach the two pieces. Place another wire at the top of the ornament to hang it. To finish glue on small feathers and a red bow made from raffia.
*The Owl stamps are from Hero Arts - Clear Design Owl Christmas - #1848
Copyright 2007, Digital by Design, Inc. - See Copyright Information
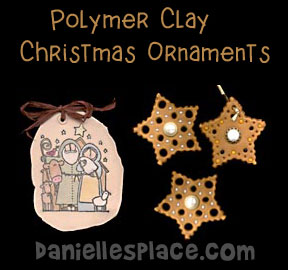
Clay Star Ornament Craft
What you will need:
Rolling Pin
Star Cookie Cutter
Beads
Pretty Buttons
How to Make Polymer Clay Star Ornament:
1. Roll out the clay very thin, about 1/4" thick.
2. Use a star cookie cutter to cut out the shapes. I used
a pen cap and hole punch to punch out holes in the stars (This
technique would work really well with a snowflake cookie cutter
also.)
3. Press beads and buttons into the clay to make patterns. (I cut the backs off of my buttons with some wire cutters) (You can find inexpensive buttons at used stores on old clothing. Look for sales where you can fill a bag for a dollar and just fill the bag with clothes that have pretty buttons.)
4. I cooked the clay according to the directions on the package with the beads in the clay. The buttons and bead did not melt. (Be very careful when doing this! Keep an eye on your ornaments and only cook them in a well ventilated room.) If you don't want to take the chance of melting the bead or buttons you can take them out before cooking the stars and then glue them in when they are cooled.
5. Glue in any beads that don't want to stay in the ornament.
Copyright 2007, Digital by Design, Inc. - See Copyright Information
Clay Gift Tags and Christmas Ornament Craft
What you will need:
Rolling Pin
Rubber Stamp of Your Choice
Prismacolor Premier Colored Pencils
Waxed Paper
Hole Punch or Straw
How to Make Clay Gift Tags and Christmas Ornament:
1. Form your clay into a ball and press it down to fallen it. Use a rolling pin to roll it out to about a 1/4" thickness.
2. Stamp the clay with the rubber stamp, let the ink dry and then turn it over (if you are making an ornament) and stamp the other side. Punch a hole at the top for hanging.
3. Bake the clay according to the directions for your clay, let cool, and then color it with colored pencils.
Copyright 2007, Digital by Design, Inc. - See Copyright Information


