
Valentine's Day Crafts Page 3
How to Make Crafts for Valentine's Day
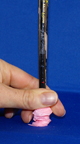
Tootsie Pop Valentine Flower Craft for Kids
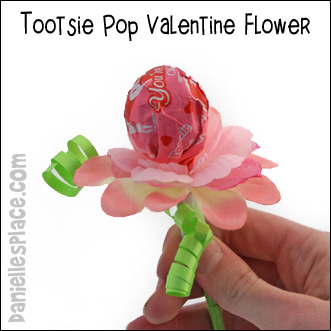
What you will need: Tootsie Pops, Green Ribbon, Hole Punch, Scissors, and Silk Flowers Petals from Old Flowers. Pull the flowers apart discarding what you don't need. You can buy these very cheap at second-hand stores. Lakeshore Learning has collage flowers in packages of 500.
How to make:
1. Decide which silk petals you would like to use. String them onto the end of the Tootsie Pop. You may have to make the hole in the middle of the flower a little bigger to get them over the wrapper.
2. Tie about twelve inches of green ribbon below the silk flower petals to keep them from falling off. You can also tie a small card with a Valentine message on with the ribbon. Curl the ends of the ribbon with the scissors by pulling the ribbon over the edge of the scissors quickly.
©2011 - Digital by Design, Inc. - See Copyright Information
"You Make My Heart Flutter" Valentine's Day Card Craft
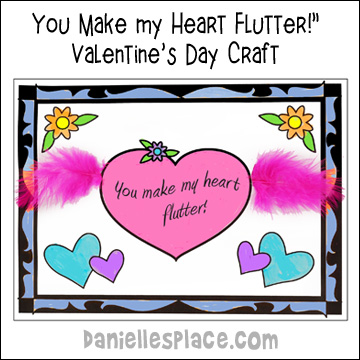
What you will need: Paper,Tape, Feathers, Highlighter Markers, and Scissors
How to make:
1. Print out the pattern.
Member's ![]()
Free Digital Download 
2. Color the heart if you are using the black and white pattern.
3. Glue feathers onto the sides of the heart.
4. Give it to your sweetheart!
©2010 - Digital by Design, Inc. - See Copyright Information
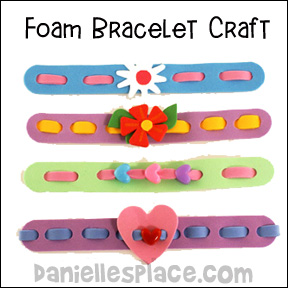
Valentine Bracelets
What you will need:
Craft Foam Sheets in Different Colors
Craft Foam Shapes (Hearts, Flowers, etc.)
Heart Pony Beads (Optional)
Hole Punch
Scissors
Glue
Ruler
Self-stick Velcro Tabs
How to make:
1. Cut a piece of craft foam 3/4" - 1" thick by 7" to make the band.
2. Place the band around your wrist to make sure it fits. It should overlap about one inch. Cut off any extra length.
3. Use your ruler and mark a line down the center of the band.
4. Fold the band in half so that the line is on the outside. Use a hole punch to punch holes down the center of the band about 3/4" of an inch apart. Use the line you drew to position the hole punch in the center each time you punch a hole.
5. Cut a strip of craft foam 1/4" wide and a little longer than your band. Weave the strip in and out of the hole from one side to the other. Glue the ends down.
6. Decorate the top of the bracelet (the side without the line) with pretty foam shapes. You can also add beads by stringing them onto the foam strips as you weave, or punch holes in your foam shapes and add them to the strip as you weave (see picture above).
7. To finish place Velcro tabs on the ends of the bands.
©2009 - Digital by Design, Inc. - See Copyright Information
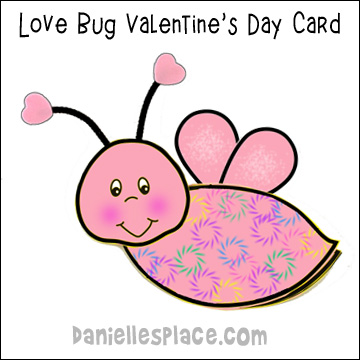
Love Bug Valentine's Day Card
What you will need:
White Card Stock (Heavy Paper), White Printer Paper, Tape, Crayons or Markers, and Chenille Stems
How to make:
1.Draw a bug body and head onto card stock, and cut them out. Use the body part as a template to draw another body part. (A black and white and color pattern for this craft are available to members.)
Member's ![]()
2. Color the bug parts.
3. Staple the two body parts together and then glue the head to the body. Glue the wings to the back of the bug.
4. Fold half a chenille stem in half and tape it to the back of the head. Glue heart shapes to the ends of the chenille stems.
5. Open the bug body and write a message such as "Bee Mine" on the inside.
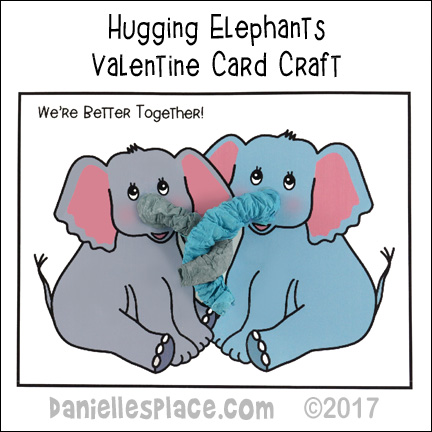
Elephant Valentine's Day Card Craft
What you will need:
White Cardstock, Colored Tissue Paper, Colored Pencils or Markers, Glue, Jumbo Straw, and Candy
How to Make The Valentine Elephant Card:
1. Print out the pattern for the elephants or draw an elephants without a trunks as shown in the picture.
Member's
Instant Download Pattern - 
2. Color the elephants with crayons, markers, or colored pencils.
3. To make the trunk pick out a matching tissue paper color. Cut the tissue paper into a 6" x 6" square.
4. To make the trunks loosely roll the tissue paper around the jumbo straw. Wet the exposed edge with your tongue or damp sponge and press it to the rolled tissue to secure. Do not make it too wet.

5. Scrunch the tissue paper down the paint brush to the end so that it is all scrunched up at the bottom of the straw just like you would to get the paper off a drinking straw.
6. Glue the tissue paper trunks to the faces of the elephants, and then wind the trunks around each other and glue them together.
©2009-2017 - Digital by Design, Inc. - See Copyright Information
Bunny Love Valentines Day Card
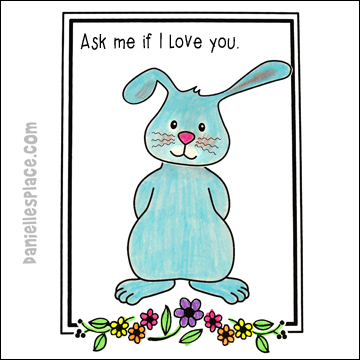
This little bunny shakes its head up and down to answer the question "Do you love me?"
Member's
You can make this card without a pattern. Just draw a picture of an animal or person without a head. Write at the top, "Ask me if I love you." Draw a head on a separate piece of paper and cut it out.
Attach the head to the body pattern with a small piece of paper 2" x 3/4". Fan fold the piece of paper before attaching it to the back of the head and the neck on the background page.
©2012, Digital by Design, Inc. - See Copyright Information
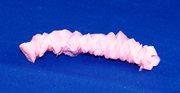
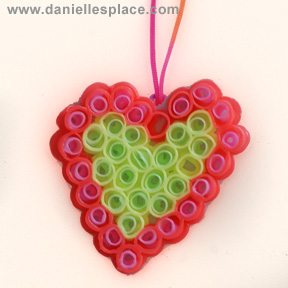
Drinking Straws Heart Necklace
What you need:
Plastic Drinking Straws - Experiment with different sizes and color combinations. The straws will get darker when you melt them and may change color slightly.
Wide Sticky Tape - Blue Painter's tape works very well. You can also use sticky double-sided tape.
Containers Such as Bottle Caps - You can also place the drinking straw perler beads in containers so they will keep their shape.
Iron
Waxed Paper or Parchment Paper
Scissors and a Ruler
How to Make Drinking Straw Perler Bead Crafts:
1. First decide what shape you want to make and pick out the straws you would like to use. It may help to draw out the shape or pattern before you start.
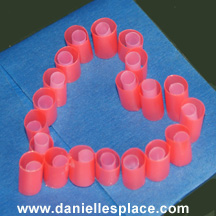
2. Cut your straws up into 1/2" pieces. Try to keep them all the same length as much as possible. If you are using a bottle cap as a container for your beads cut the straws so that they protrude from the cap about 1/4".
3. Roll up a piece of painter's tape (or use double-sided tape) and flatten it out onto a piece of card board. Make sure it is big enough to hold your design. If it isn't, use another piece of tape and place it along side the first piece. If you are using a container, you can pour a small amount of white glue to cover the bottom of the container. Let it dry a little before starting so that it is sticky.
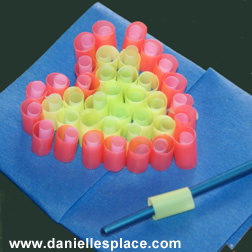
If you have two different sizes of straw beads you can place the smaller straw beads inside the larger ones. This is how the heart pendant above was made. Don't place a smaller straw bead in the middle bead so that you will have a larger hole to place a string through if you are making a pendant.
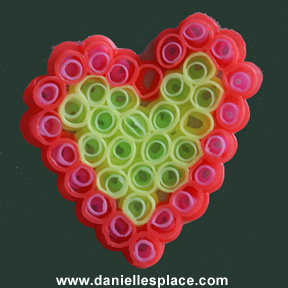
5. Once all your beads are in place heat up your iron. The cotton setting works well. Place a piece of waxed paper or parchment paper over your design just to cover all the beads. Place the iron evenly on top of your design and let it set until the beads start to melt. You don't have to press down. You can lift the iron to check your progress. When all the bead are melted together remove the iron.
Let the beads cool and you will be able to pull away the paper easily.
Turn your design over and melt the other side a little. The picture of the heart pendant above is actually the side that was melted very little. The other side was melted so that all the beads ran together.
©2012, Digital by Design, Inc. - See Copyright Information
Valentine Box Card Holder Crafts for Kids
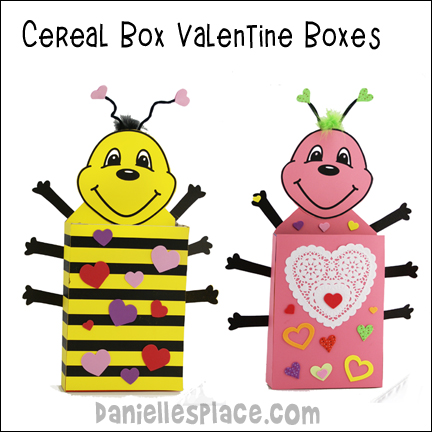
What you will need: Cereal Box, Card Stock (Heavy Paper), Glue, Scissors, Tape, Decorative Items such as Craft Foam Hearts, Stickers etc., and Chenille Stems
How to make:
1. Fold down the front, top flap and the two, top side flaps and tape them down.
2. Cover the box front and sides with colored construction paper or card stock by gluing the paper to the box.
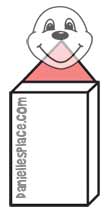
3. Cut a triangular shaped piece of paper to cover the back, top flap that is still sticking up to make the bugs neck.
4. Cut arm shapes from black paper and tape or glue them to the back of the box.
5. Cover the back of the box with the same paper you used for the front and sides.
6. Draw a head shape on paper and cut it out using two thicknesses of paper. (A pattern for the head, eyes, arms, and nose are available to members and as an instant download.
Member's
Instant Download Pattern -
7. Glue Chenille stems (pipe cleaners) to the back of the head for antenna and then glue on the other head shape to cover the ends of the Chenille stems.
8. Glue the head to the top of the box as pictured.
9. Decorate the box with Valentine hearts.
©2011 - Digital by Design, Inc. - See Copyright Information
Valentine Crafts on Other Pages
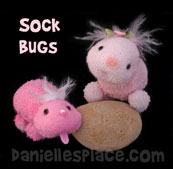
No-sew Sock Love Bugs
Go to Sock Crafts Page 2 for the directions for these cute little Sock Love Bugs.


