Valentine's Day Crafts for Kids
Valentine's Day Crafts Kids Can Make Including: Cards, Card Holders, Valentine's Day Treats, Printable Valentine's Day Cards and a Sock Love Bug
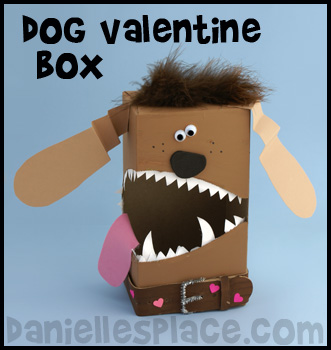
Dog Tissue Box Valentine's Day Box Kids Can Make
What you will need:
Tissue Box
Craft Foam or Colored Card Stock
Acrylic Patio Paint
White Paper or Craft Foam for the Teeth
Silver Chenille Stem
Brown Feather Boa
White Paper
Scissors
Googly Eyes
How to Make the Dog Valentine Box:
1. Paint the tissue box with acrylic paint and let it dry.
2. Cut the dogs ears from brown paper, the nose from black craft foam and the tongue from pink craft foam and glue to the tissue box.
3. To make the teeth cut white paper into one inch strips. Cut notches down one side of the strip of paper for the teeth. Glue the other side to the inside of the tissue box around the opening.
4. Cut a 1 1/4" craft foam strip for the collar. Use a silver Chenille stem for the collar buckle.
5. To finish glue on googly eyes and part of a brown feather boa to the head.
©2013 - Digital by Design, Inc. - See Copyright Information - If you use this craft and put it on Pinterest please give Danielle's Place Credit for the Craft.
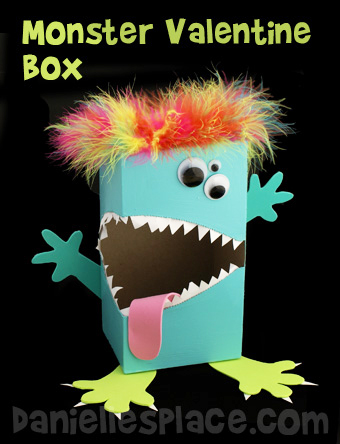
Monster Tissue Box Valentine Box Craft Kids Can Make
What you will need:
Tissue Box
Craft Foam or Colored Card Stock
Acrylic Patio Paint
White Paper or Craft Foam for the Teeth
Multi-colored Feather Boa
White Paper or Craft Foam for the Teeth
Scissors
Googly Eyes
How to Make the Monster Valentine Box:
1. Paint the box and fins with acrylic paint and let dry.
2. Cut the arms feet and tongue from craft foam or colored card stock and glue them to the tissue box.
3. To make the teeth cut white paper into one inch strips. Cut notches down one side of the strip of paper for the teeth. Glue the other side to the inside of the tissue box around the opening.
4. To finish glue on googly eyes and part of a feather boa on the head.
©2013 - Digital by Design, Inc. - See Copyright Information
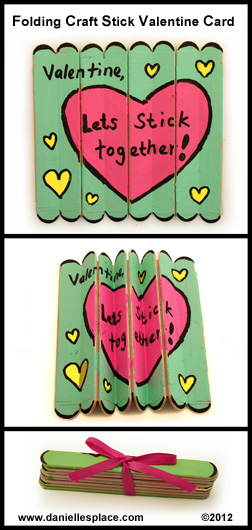
"Let's Stick Together" Folding Craft Stick Valentine Card
The craft sticks are taped together so that when the craft sticks are pushed together from the top and bottom of the stack they fan fold up into a compact stack of sticks.
What you will need:
Woodsies Mini Jumbo Craft Sticks -4.5" 50/Pkg - Use good quality craft sticks that lay flat. The 5/8" work perfect with the one-inch tape. *You can use the Woodsies Jumbo Craft Sticks with the 1.5 Inch - 3M Scotch Masking Tape for a bigger Canvas.
3M Scotch Masking Tape, 1-Inch - Other brands will work, but this tape works great! It is the exact color of the craft sticks. (Staple's Tape works better with the washable markers, but it is lighter than the stick and more transparent and doesn't cover the stick as well.)
Acrylic Patio Paint
Permanent Markers and a Pencil
Ribbon
How to Make the Folding Craft Stick Valentine's Day Card:
1. If you are using the mini-jumbo craft sticks, cut the one-inch masking into 4-inch pieces.
2. Place two sticks together, side by side, and tape them together covering both the sticks with the tape.
3. Turn the two sticks over so that they are diagonal to you.
4. Place another craft stick next to and below the two sticks that you taped together. Use another piece of tape to tape the bottom two sticks together.
5. Turn all three sticks over diagonally and place another stick at the bottom of the row and tape the last two sticks together. Keep going until you have a whole row of sticks.
6. You can also cover the first and last stick in the row by placing tape over the stick and then folding it back over the stick. It is easier to write on the tape than the craft stick. The ink soaks into the sticks and blurs.
7. Draw out your design on the craft stick canvas with a pencil. If you make a mistake, you can erase it. When you are happy with your design paint it with the acrylic paint. When the acrylic paint is dry use a black marker to outline your shapes and write the words.
View a video on Youtube with instructions on how to make this craft:
©2012, Digital by Design, Inc. - See Copyright Information - Bloggers, if you use this craft idea or an adaptation, and link back to this page for the complete directions, let us know and we will put a link to your blog. You must follow copyright regulations.
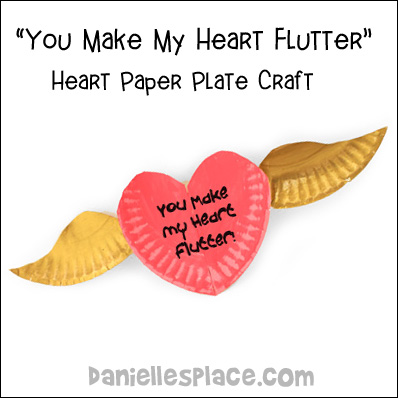
Paper Plate Valentine Heart with Wings Craft Kids Can Make
What you will need:
One 9-inch Paper Plate (Regular-sized)
Paint - (any type)
Glue
Scissors
Markers
How to Make the Paper Plate Heart with Wings:
1. Draw the heart shape and wing shapes onto the top of the paper plate as shown in the diagram to the right. (A printable pattern is available to members.) To make it easier to draw the patterns find the middle of the plate by folding it in half first. The wings and the center of the heart should meet in the middle of the plate.
Member's ![]()
If you are using the pattern, print it out, cut out the shapes, and tape them to the plate so that the patterns are at the edge of the plate. Use a pencil to trace around the patterns.
2. Draw a line down the center of the heart as shown in the diagram. Fold up on the two lines to the right and left of the center line. Fold the two outside lines back, and then bring the outside folds to the center line and glue it closed to make the heart shape.
3. Paint the heart shape and wings and then glue the wings to the back of the heart shape.
4. To finish write a valentine message on the heart.
©2013 - Digital by Design, Inc. - See Copyright Information
Paper Plate Valentine Boxes Crafts for Kids

These paper plate valentine boxes are cheap and easy to make.
Two paper plates are glued together top to top to form the pocket. The foam heart stickers used in these crafts come from Hobby Lobby.
Fish - Cut fin shapes from a paper plate and glue them to one of the paper plates. Glue the two paper plates together leaving one side open for the mouth.
Mouse - Cut a U-shape out of one paper plate and glue it to the top of another paper plate. Paint the plates. Cut the head, ears, and feet from brown construction paper and glue them together. Glue a heart on the head for a nose. Glue the mouse to the top paper plate.
Cat - Cut a mouth shape out of the center of one of the paper plates. Cut ear shapes from card stock. Glue the ears to one of the paper plates and glue the plates together. Punch holes where the whiskers go and thread Chenille stems through the holes. Wind the ends around a pencil to curl them. Cut out a tongue shape and glue it to the inside of the paper plate. Bend the tongue down and glue it to the front of the paper plate.
Pig - Cut a slit in one paper plate. Cut leg shapes from card stock and glue them to the other paper plate. Curl a Chenille stem around a pencil to make the pig's tail and glue it to the paper plate. Glue the two paper plates together and paint the pig. Cut the pig head, ears, and snout from card stock, paint them and glue them to the paper plates.
Pocket - Cut one paper plate in half and glue it to the other paper plate to form a pocket. Use a heart paper punch, stickers and other decorative items to decorate the pocket.
Angler Fish - Cut fin shapes from a paper plate and glue them to one of the paper plates. Twist two Chenille stems together to make the lure and stick heart stickers to the end. Glue Chenille stems to the paper plate. Glue the two paper plates together all the way around the edge. Cut a mouth shape out of the paper plates and then glue foam teeth shapes to the inside of the mouth
©2013 - Digital by Design, Inc. - See Copyright Information
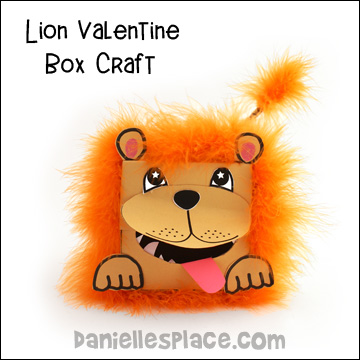
Lion Valentine Box Craft Kids Can Make
What you will need:
Small Tissue Box
Brown or Tan Paper
Two Chenille Stems
Pink and White Paper
Glue
Pink Colored Pencil
How to Make the Valentine Box:
1. Cover the box with brown paper. Cut out the oval shape at the top for the mouth.
2. Glue a feather boa around the edge of the box for the lion's mane.
3. Cut an oval shape from brown or tan paper to cover the mouth opening and draw a nose and mouth on it. (A pattern for the face is available to members.)
Member's ![]()
4. Glue the muzzle over the cut out oval just at the top.
5. Cut out paws, ears, and a mouth from brown paper and glue them to the box.
6. Draw eyes on white paper, cut them out, and glue them to the box.
7. Wind two Chenille stems together for the tail and glue it to the back of the box. Glue part of a feather boa onto the end of the tail.
8. Cut out eye shapes and a tongue and glue them to the mouth.
©2013 - Digital by Design, Inc. - See Copyright Information
Dragon Valentine Box Craft Kids Can Make
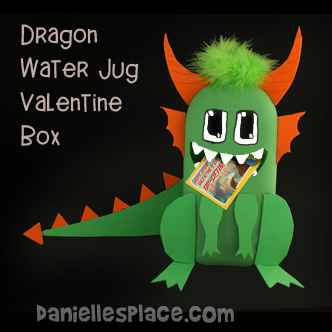
What you will need:
Plastic Water Bottle
Spray Paint Made for Plastic or Acrylic Patio Paint
Scissors with a Sharp Point
Large Googly Eyes or Paper
How to Make the Milk Jug Frog:
1. To remove the label from the milk jug fill the jug with hot water and let it stand for a few minutes. Do not get the label wet or it will just fall apart. Carefully peel off the label from all four corners. Then wash and dry the milk jug. To remove the inked numbers color over the numbers with a dry erase marker. The dry erase marker will dissolve the ink so you can wipe it off with a paper towel.
2. Draw a mouth on the jug with a dry erase marker on the opposite side from the handle. Cut out the mouth with a pair of sharp scissors.
3. Spray paint the jug and let it dry.
4. Cut the dragon's tail, feet, arms, horns, and frills from craft foam and glue them to the milk jug.
Member's ![]()
5. Cut teeth shapes from craft foam and glue them to the inside of the mouth. Paint or glue on eyes, and glue a piece of feather boa around the top of the jug.
©2013 - Digital by Design, Inc. - See Copyright Information
Fish Valentine Box Craft Kids Can Make
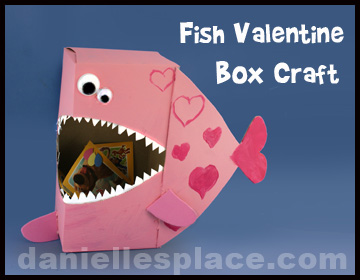
What you will need:
Tissue Box
Craft Foam Sheets
Acrylic Patio Paint
White Paper for the Teeth
How to Make the Fish Valentine Box:
1. Cut the fish fins from craft foam or colored card stock and glue them to the tissue box.
2. Paint the box and fins with acrylic paint and let dry.
3. To make the teeth cut white paper into one inch strips. Cut notches down one side of the strip of paper for the teeth. Glue the other side to the inside of the tissue box around the opening.
4. To finish glue on googly eyes.
©2013 - Digital by Design, Inc. - See Copyright Information
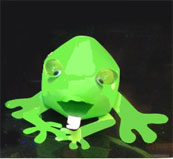
Frog Valentine Box Made from a Milk Jug
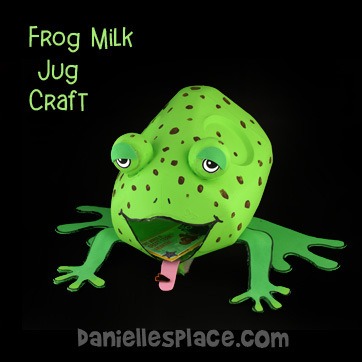
What you will need:
Plastic Gallon Milk Jug
Spray Paint Made for Plastic or Apple Green Acrylic Paint
Scissors with a Sharp Point
Large Googly Eyes or Paper
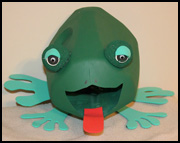
How to Make the Milk Jug Frog:
1. To remove the label from the milk jug fill the jug with hot water and let it stand for a few minutes. Do not get the label wet or it will just fall apart. Carefully peel off the label from all four corners. Then wash and dry the milk jug. To remove the inked numbers color over the numbers with a dry erase marker. The dry erase marker will dissolve the ink so you can wipe it off with a paper towel.
2. Draw a mouth around the opening of the milk jug with a dry erase marker. The handle is the bottom of the frog. Cut out the mouth by cutting down through the opening in the milk jug.
3. Cut two one-inch holes in the top of the jug for the Styrofoam ball eyes. Press the balls part way down into the jug and glue them down. (If you are using spray paint, spray paint the jug and Styrofoam eyes before adding the arms and legs. If you are using acrylic paint, paint the jug after attaching the arms and legs. If you attach the legs to the acrylic paint, they will pull the paint off the jug.)
4. Cut frog-shaped arms and legs from craft foam or card stock. To make them sturdy, glue two patterns on top of each other. To make the craft foam arms stronger and bendable, glue pipe cleaners to the arms and then glue another craft foam arm over top of the pipe cleaner. (Printable patterns for the frogs arms, legs, eyes, eyelids, and tongue are available to members.)
Member's ![]()
5. Draw eyes on white paper and cut them out. Glue them to the Styrofoam balls and then glue the eyelids over the eyes.
6. To finish cut a tongue from pink craft foam and glue it in the mouth.
©2013 - Digital by Design, Inc. - See Copyright Information
Duct Tape Valentine's Day Card Craft Kids Can Make with Free Printable Patterns
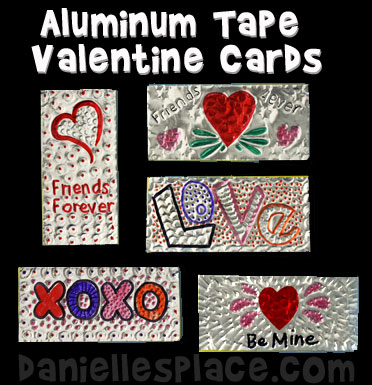
This craft comes with nine different patterns that can be used as templates to make the cards, or you can design your own cards using the blank templates.
What you will need:
Utensils to Engrave the Tape such as a Ballpoint Pen, Straws, the End of a Paintbrush, and the Tines of a Fork
Card Stock Paper (Heavy paper)
Scissors
Sharpie Fine-Tip Permanent Marker
Printer Paper
How to Make Foil Tape Valentine's Day Cards:
1. Print out the patterns if you want to use the ones provided. If you want to come up with your own designs, use the blank templates on Pattern 2.
Member's ![]()
Free Digital Download ![]()
2. Cut off a four-inch length of the duct tape and stick it to the craft foam sheet. The soft surface of the foam will make it easier to engrave the tape.
3. Cut out your design and place it on top of the duct tape and craft foam. Lightly trace over the pattern with a pen and then remove the pattern.
4. Use permanent markers such as Sharpies to color in the patterns, and then engrave the tape with other objects such as straws, tip of a paint brush, etc. by pressing the objects into the tape.
©2013 - Digital by Design, Inc. - See Copyright Information
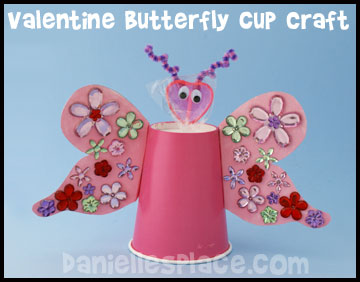
Butterfly Valentine's Day Cup Craft Kids Can Make
What you will need:
9-oz. Pink Paper Cup
Self-Adhesive Sparkling Flower Jewels
Card Stock (Heavy paper)
Heart-shaped Lollipop
Googly Eyes
Low Temp. Glue Gun
How to Make the Butterfly:
1. Cut wing shapes from card stock and glue them to the sides of the cup.
2. Glue flower jewels or other decorative items to the wings.
3. Punch a hole in the bottom of the cup and stick the lollipop handle through the hole. Glue on eyes.
4. Cut a pipe cleaner in half and wind the halves around a pencil to make them curly. Glue them to the back of the lollipop.
Created by Corrin Burner
©2013 - Digital by Design, Inc. - See Copyright Information
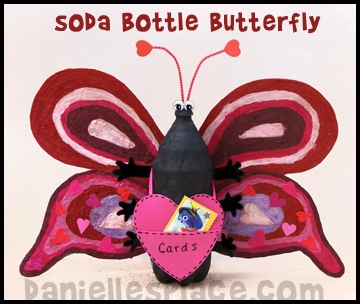
Butterfly Valentine's Day Card Holder Craft Kids Can Make
What you will need:
Craft Foam Sheets
Pink and and Red Colored Paper
2-Liter Soda Bottle with Lid
Uncooked Rice
Cardboard
Acrylic Patio Paint
Foam Heart Shapes
Googly Eyes
How to Make the Butterfly Valentine Card Holder:
1. Pour about 1/2 cup of dried rice into the clean, dry soda bottle and place the cap back on the bottle. The rise will keep the bottle from falling over when you glue on the wings.
2. Paint the 2-liter soda bottle and cap with acrylic paint. Do not paint the back of the bottle where the wings will be attached. (If you glue the wings to the painted area, the wings will pull off the paint. While the paint is drying cut large wings from cardboard, paint them and let them dry.
3. Glue the wings to the back of the soda bottle.
4. Glue pipe cleaners to the cap for antennae. Glue foam heart shapes to the ends to the pipe cleaner.
5. Glue two large googly eyes to lid of the bottle.
6. Cut arm and hand shapes from craft foam and glue them to the sides of the bottle.
7. Cut two large heart shapes from craft foam or card stock. Cut the top off of one heart and glue the two hearts together to make a pouch. Glue a ribbon or string to the heart pouch and drape it over the butterflies arms.
©2013 - Digital by Design, Inc. - See Copyright Information
Designed by Corrin Burner
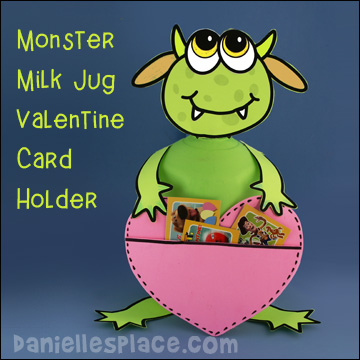
Little Monster Valentine's Day Card Holder Craft Kids Can Make
What you will need:
Gallon Milk Jug - clean and dry
Card Stock
How to Make the Monster Valentine Card Holder:
1. Paint an empty milk jug with acrylic paint of spray paint made for plastic.
2. Draw arms, legs, and a monster face on card stock (Heavy Paper) and cut them out. Glue them to the milk jug on the opposite side of the handle.
Member's ![]()
3. Cut two large heart shapes from craft foam or card stock. Cut the top off of one heart and glue the two hearts together to make a pouch. You can also decorate the heart pouch with heart stickers or foam heart shapes.
4. To finish glue the heart pouch to the hands of the monster.
Owl Printable Valentine's Day Card Craft for Kids
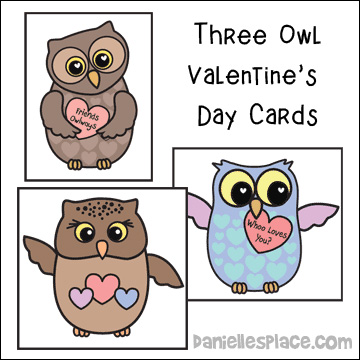
Printable patterns available to members on The Resource Room.
1. "Friends Owlways" Valentine's Day Card Craft
2. "Add Your Own Words" Printable Valentine's Day Card Craft
3. "Whoo Loves You?" Printable Valentine's Day Card Craft
Member's ![]()
Memory Cross Valentines Day Cards
These cards from Memory Cross Inc. are a great way for children to spread the Word on Valentines Day.
You can find more Valentine's Day Crafts on the Valentine's Day Crafts Page 2.
Valentine's Crafts on Other Pages
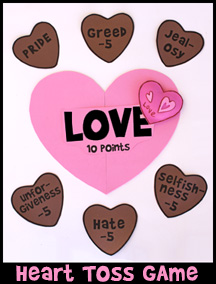
Candy Heart Valentine's Day Games and Activities for Sunday School
The following Crafts, Games, and Learning Activities go with the Valentine's Day Sunday school lesson "The Love Letter" on The Resource Room.
Member's ![]()