Nativity Paper Plate Crafts
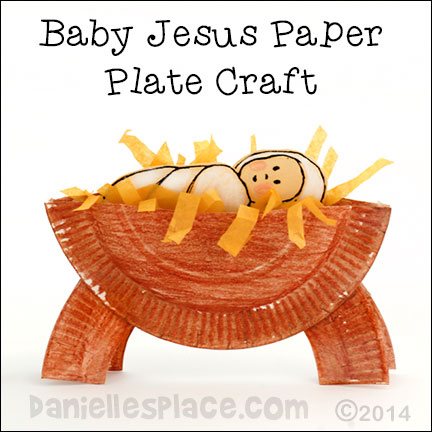
Baby Jesus in a Manger Christmas Paper Plate Craft for Children
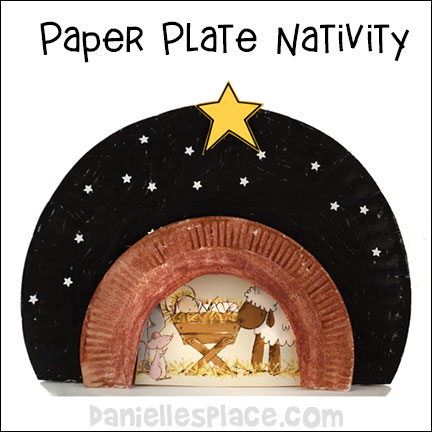
Nativity Paper Plate Craft for Christmas

Here’s a fun Christmas craft for kids that lets you recycle those old Christmas cards! With a dinner-sized paper plate and a couple of snack-sized paper plates, kids can create a delightful nativity scene. To make the night sky sparkle, they can stick on star stickers or use a star-shaped hole punch for a little extra magic. For the stable, just cut an arch shape in one of the snack plates and glue the nativity scene inside. And if you don’t have a nativity scene, no problem! The kids can get creative and draw their own. Happy crafting!
What you will need:
Dinner-sized Paper Plate (Use the cheap paper plate that don't have the shiny finish.)
Two Lunch-size Paper Plates (Use the cheap paper plate that don't have the shiny finish.)
Black Acrylic Paint or Black Markers
Star Hole Punch or Foil Star Labels from an Office Supply Store.
Glue
Manger Scene from Old Christmas Cards (Optional)
Yellow Construction Paper for the Star
How to Make the Paper Plate Nativity Craft:
1. To make the sky background fold the large paper plate back two inches from the bottom of the plate. (The folded back part will serve as a stand.) Paint the plate black and then use a star hole punch to punch out stars. If you don't have a star punch, you can use Foil Star Labels.
2. To make the nativity scene cut two inches off the bottom of two lunch-sized paper plates. Cut the center out of one of the plates and color and/or paint around the edge.
3. Use the center of the paper plate that you cut out as a template to cut a nativity scene from a Christmas card. Cut the nativity scene a little bigger than the template. If you don't have Christmas cards, you can just draw the nativity scene on the plate.
4. Glue the two small paper plate together top to top, and then glue the plate onto the larger paper plate so that the cut out paper plate and nativity scene are in the front.
©2014, Digital by Design, Inc. - *See Copyright Information
Baby Jesus in a Manger Paper Plate Nativity Craft for Preschool
Preschool children will enjoy creating and playing with this nativity craft. They will have fun arranging the Baby Jesus figure in a soft bed of hay, which can be removed and replaced repeatedly. The manger is made using two paper plates and is designed to stand on its own creating a perfect backdrop for reviewing the Christmas story.

What you will need:
Paper Plates - Snack-sized Paper Plate - Use the cheapest ones you can find. Do not use the ones with the shiny finish. Crayons and paint don't stick to the finish.
Crayons
Brown Water Color Paint
Scissors
Yellow Feathers, Yellow Tissue Paper, or Real Straw
Paper Towels
How to make the Paper Plate Manger Craft:
1. Cut paper plate in half to make the top of the manger.
2. To make the legs of the manger cut another paper plate in half and cut out the center of the halves.
3. Print out or draw pictures of Baby Jesus, or let your children draw a baby and then cut it out.
4. Color the paper plate parts with crayons, covering as much of the plate as possible. Do not use paper plates that have the shiny coating. Crayons and paint don't stick to the finish.
5. Once your children have colored the entire plate, you may want to add water color to fill in where the crayon didn't cover. If you use water color before using the crayon the paper plate will get very soggy and warp. If apply the water color paint on top of the crayon, the paper plate will not get soggy because it will only cover the exposed paper. Wipe off any excess water color paint with a paper towel.
6. When the paint glue the legs together so that the backs are together. This will make the legs separate about one inch.
7. Glue the two half paper plates to the legs as shown in the picture.
8. To finish cut up pieces of tissue paper into strips or use feathers. Place the tissue paper in the "manger" and then place the "baby" inside the manger.
©2014, Digital by Design, Inc. - *See Copyright Information- Please do not publish a finished version of the craft on Pinterest without giving Danielle's Place credit for the craft. Danielle's Place reserves the right to publish copies of any versions of this craft that are published on the web site.


