The Great Commission Bible Lesson
The Great Commission Bible Crafts, Good News and Witnessing Crafts
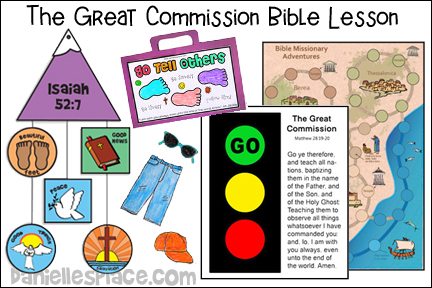
The following crafts and activities come from the Bible lesson "The Great Commission". The lesson is available to members on The Resource Room and as an instant digital download.
Member's ![]()
Instant Digital Download - ![]()
Missionary Adventures Bible Board Game
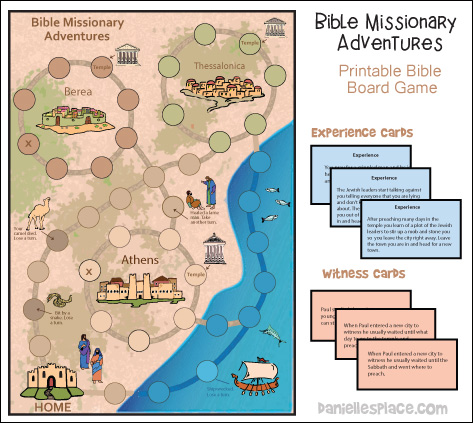
Use this printable board game to teach children what it would have been like to be a disciple during their missionary journeys. They will experience some of the same things that Paul and other missionaries experienced such as being bit by a snake and being shipwrecked.
Member's ![]()
Instant Digital Download - Complete Lesson - ![]()
Instant Digital Downlaod - Game Only - ![]()
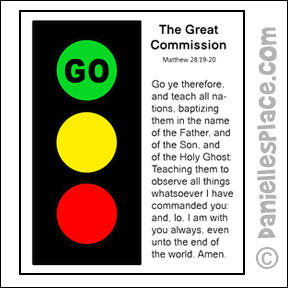
Great Commission “Go” Traffic Light Sunday School Craft for Kids
What you will need:
Black, Red, Yellow, and Green Construction Paper Cut to 8 1/2" x 11"
How to make:
1. Print the Traffic Light and Bible Verse Page NIV Pattern or KJV Pattern onto white card stock. Use the Circle Patterns to print circles on red and yellow paper cut to 8 1/2" x 11" so it fits in your printer. Or have your children color the circles in class.
2. Print the "Go" Circle Pattern onto green paper. Or print them on white paper and have your children color the circles green. Cut rectangles the same size as the traffic light from black paper or have your children color them black.
This craft is available as a Free Instand Download ![]()
Member's ![]()
Instant Digital Download - ![]()
3. In class have your children glue the pieces on as you talk about The Great Commission.
4. Before gluing, explain that Jesus had spent many days with the disciples after He had risen from the dead. But the time came when He had to leave the earth because he needed to be with His Heavenly Father. Jesus blessed the disciples and told them that they needed to go out and tell others about Him. This is called The Great Commission. Read Matthew 28:19-20 from your Bible.
5. Explain that the stop light will remind us that Jesus wants us to tell others about him. Have your children glue the black rectangle on the traffic light pattern or color the rectangle.
6. Ask, "What color do you think we should use to remind us of The Great Commission?" Jesus said, "Therefore go and make disciples of all nations." What color represents "Go" on a traffic light? That's right, green represents "Go". Let's glue the green circle with the word "Go" on it at the top of the traffic light.
7. Ask the children what the red light on the traffic light represents. It mean you should stop. Let's glue the red circle on the traffic light. It will reminds us that we do not want to stop telling others the good news about Jesus.
8. What does the yellow light represent on the traffic signal? The yellow light means slow down. We don’t want to slow down, but be obedient to what God wants us to do.
Glue green circle: What about green? What does the green light mean? To go!. That’s what Jesus wants us to do: GO! We wants us to go and tell others about him.
Sent in by Theresa Smiley
©2007, Digital by Design, Inc. -*See Copyright Information
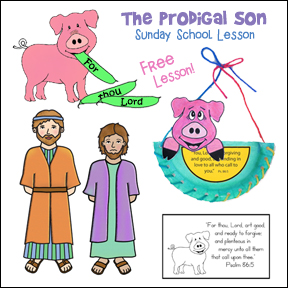
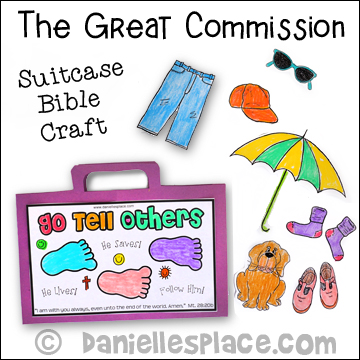
"Go Tell Others" Good News Paper Suitcase Bible Craft
Use this suitcase craft for Bible Lessons about Telling the Good News, The Great Commission, Witnessing, and Missions. The Bible verse on the front label of the suitcase is “I am with you always, even unto the end of the world. Amen.” Mt. 28:20b
You could also use the Bible verse Isiah 52:7, How beautiful upon the mountains
are the feet . . . "
What you will need:
Construction Paper
Scissors
Tape or Glue
Colored Pencils or Crayons
How to Make the "Go Tell Others" Travel Case Craft:
1. Before class make a suitcase out of construction paper for each child. Fold a piece of construction paper in half to make a paper that measures 9" x 6".
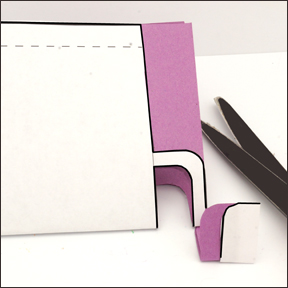
2. Fold the paper in half again and cut a handle on the unfolded edge using the pattern as shown in the picture below. Unfold the suitcase and fold the sides of the "suitcase" in 1/2" as shown on the pattern. Place glue on the folded edge and close the"suitcase" to glue the sides together.
3. Print out items that your children might want to place in their travel cases such as socks, shoes, and other items. Also include items that would be silly to take.
Patterns for the suitcase, travel items, and "Go Tell Others" Labels are available to members on The Resource Room.
Member's ![]()
Instant Digital Download - ![]()
4. In class have your children decorate the front of the suitcase (or color the "Go Tell Others" labels and write the Bible verse on the case. Then have them pick out items from the paper that they would like to put into their suitcases. They will have a lot of fun putting things in the suitcase they know would never fit in a suitcase. (For children who can't cut yet, have a bunch of pictures already cut out.) If you don't want to use glue, you can have the children color the pictures and circle the pictures that might go in a suitcase. My children loved this craft and wanted to do more than one. They especially liked putting things in the suitcase that really didn't belong.
5. Discuss what Paul might have taken with him on his journey.
6. Discuss what the children might take with them if they went on a trip and have them pack their paper suitcases.
©2008 and 2015, Digital by Design, Inc. -*See Copyright Information
We used this activity during our children's ministry program this past Wednesday. The kids all loved it! From pre school to 6th grade (We provided pre-cut pictures for the little ones to glue in). GREAT IDEA! We also played the Memory Game with a real suitcase which was another hit with the kids! Ann St. Peters, MO
I wanted to thank you for an excellent craft relating to missions. Currently we have been studying the Armor of God, but had an unplanned, unscheduled visit from one of our missionaries. I had to think quickly and find a craft related to missions. I did a quick search and came across the travel bag. The directions were easy to follow, thank you, though it took time to cut out 40 travel bags. The kids enjoyed the project. We have limited time for crafts, so I tend to do the majority of the work and let them color/create the project to make it their own. The missionary asked the kids to pray for the ministry/children in Cuba and she passed out prayer cards. Each child was excited to have a prayer card to place in their travel case. I heard several comments from parents afterwards stating what a great idea. Thank you for your website. Mary
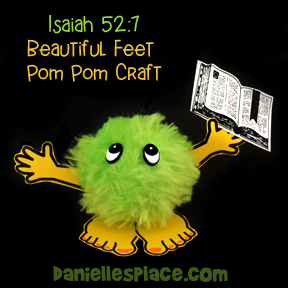
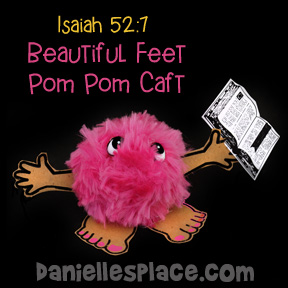
Isaiah 52:7 Beautiful Feet Pompom Craft
What you will need:
Two-inch Pom Poms (Bright Plush Pom Poms from Hobby Lobby) or Make Your Own Pom Poms, Colorful Card stock (Heavy Paper), Scissors, Eyes and Tacky glue
How to Make the Beautiful Feet Pom Pom Craft:
1. Draw feet and hands on a sheet of colorful card stock or use the printable pattern available to members.
Member's ![]()
Instant Digital Download - Complete Lesson - ![]()
2. Glue the feet and hands to a two-inch pom pom. We used the plush pom poms from Hobby Lobby because they look scruffy. You can also make your own pom poms using yarn and a pom pom maker, or make your own pom pom maker.
3. To finish glue on eyes and a picture of the Bible.
How to Make Your Own Pom Poms Without a Pom Pom Maker:
1. Draw two circles onto card board (Card board from cereal boxes work well) the size you would like your pom poms. Then draws circles inside the two circles. The bigger the inside circle the thicker your pom poms will come out.
2. Cut out the inside circles to make donut shapes.
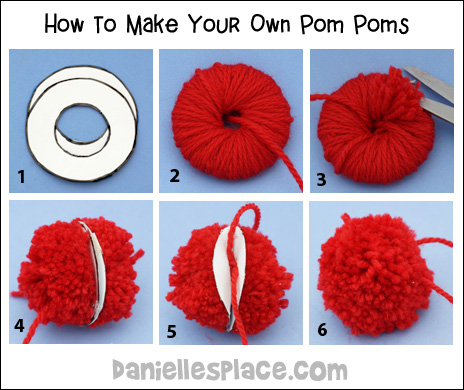
3. Place the two donut shapes together and wind long pieces of yarn through the holes in the donut shapes and around the outside until you have fill up the hole with yarn. To keep the yarn ends secure just wind the yarn around the ends until the ends are covered by the yarn. Add new lengths of yarn the same way.
4. When you have the hole filled up with yarn cut around the outside edge of the donut shape with sharp scissors all the way down to the card board.
5. Separate the two donut shapes and insert a piece of yarn between the shapes. Tie the yarn pulling it as tight as you can.
6. Cut the card board shapes and pull them away from the pom pom.
7. To save time you can cut the donut shapes so that they aren't complete circles. In this way you will just slip the yarn through the cut slit instead of inserting the yarn through the hole. See this YouTube video for a demonstration of this technique.
You can buy plastic pom pom makers in several different designs.
The Clover Small Pom Pom Maker allows you to wind one half of the donut shape at a time so you don't have to poke the yarn through hole, but it does take some maneuvering. You can see a video on YouTube here: https://www.youtube.com/watch?v=d2Ma-hgQIDU.
The Susan Bates Easy Wrap Pom Pom Maker is a little easier to use because the two sides of the pom pom are wrapped separately. Wrapping only one half of the circle saves a lot of time because you don't have to poke the yarn through the hole in the center of the donut shape. You can see a demonstration using this pom pom maker on YouTube here: https://www.youtube.com/watch?v=HaSqTUgFHi4.
©2013, Digital by Design, Inc. - See Copyright Information
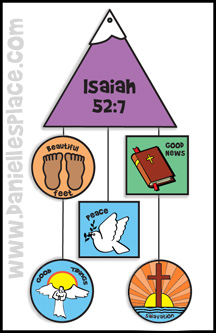
Isaiah 52:7 Mobile Craft for Children's Ministry
A craft and a memorization tool all in one.
This craft is available as a Free Instand Download ![]()
Member's ![]()
Instant Digital Download - Complete Lesson - ![]()
What you will need:
Paper (Card Stock)
Computer Printer
Crayons or Markers
Scissors
Hole Punch
String
How to make:
1. Before class print out the patterns. You can make two copies for each child so that they can glue the patterns back to back, or you can have your children write the corresponding part of the Bible verse on the back of each picture.
2. Cut out the patterns, color them, and tie them together to make a mobile. Glue the matching picture to the back of each picture.
Each picture is related to a line in the memory verse:
1. Top Picture - How beautiful on the mountain . . .
2. Feet - are the feet of those who . . .
3. Bible - bring good news.
4. Dove - who proclaim peace.
5. Angle - who bring good tidings.
6. Cross - who proclaim salvation . . .
©2013, Digital by Design, Inc. - See Copyright Information
Play a Guessing Game
Bring a backpack or suitcase filled with about five or six things that you might take on a trip such as: a flashlight, toothbrush, binoculars, comb and brush. Show the children all the items and name them. Put them all back in the suitcase. Pull out all the items except one and ask them which one is still in the suitcase then repeat with a different object. As an alternative, put at least ten things in the suitcase, pull them all out and show each one. Put them all back in and as the children name each item that is in the suitcase pull them out. Have the children take turns naming the items until there is nothing left in the suitcase.
©2008, Digital by Design, Inc. -*See Copyright Information
Make a Whispering Tube
Have the children decorate a paper towel roll with stickers or markers and use them to tell the good news. Discuss how Paul and his friends spread the Good News and how we can spread the Good News today: television, telephone, talking to others, books, etc. Play a game with the whispering tube. Whisper some good news ("Jesus loves you") to the child next to you and have the children go around in a circle whispering the same thing until it gets back to the last person who gives the message out loud.
©2003, Digital by Design, Inc. -*See Copyright Information
I used "Go and tell the Good news" with my two and three year olds class during a revival. The night was long but the time flew for us by using all the luggage-theme activities, the whispering tubes and memory games. How wonderful it was to go in prepared with such great things and great fun. Thank-You!!!! Tami