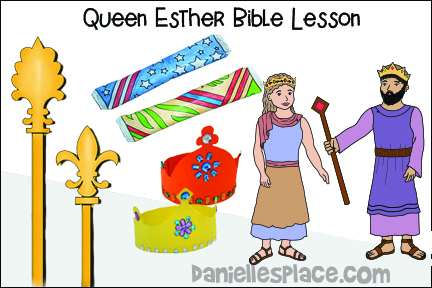
Queen Esther Bible Lesson, Crafts, and Activities
How to Make Bible Crafts Relating to Queen Esther Including: Queen Esther's Crown, King Ahasuerus' Golden Scepter, Purim Activities, Noisemakers, Queen Esther and King Ahasuerus Paper Dolls, and Songs
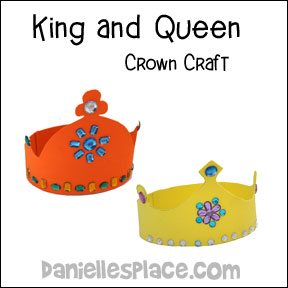
Queen Esther's Crown Craft for Kids
(A complete lesson with more crafts and activities is available on The Resource Room.)
What you will need:
Gold Poster Board
Scissors
Glue
Sequins
Glitter
How to make:
1. Before class print out the patterns and cut them out. Trace them onto gold poster board.
Member's ![]()
2. Place the pattern along the bottom center of the poster board. The patterns only show one half of the crown so you will have to turn the pattern over and trace the other half to form a whole crown. Add length to the crown according to the age of the children. You can use the short side of the poster board (22 inches) if you have younger children. You will have to use the long side for older children. I could fit four king's crowns on one piece of poster board and five queen's crowns on one piece of poster board making the longer crowns. Cut out the first crown and use it as a pattern for the rest of the crowns.
3. In class have the children decorate their crowns with sequins, glitter, and whatever you can find that will make them pretty.
©2006, Digital by Design, Inc. -*See Copyright Information
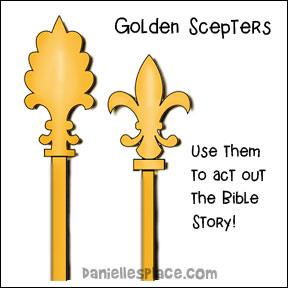
King Ahasuerus' Golden Scepter Craft for Kids
What you will need:
Gold Poster Board or Card Stock
Clear Tape
Scissors
Glue
Glitter
Craft Gems
Sequins
How to Make King Ahasuerus' Golden Scepter:
1. Before class print out the Scepter Top Patterns.
Member's ![]()
2. Cut out the patterns and trace around the edges to transfer the patterns onto gold poster board or use tracing paper to copy the patterns onto the poster board. Cut two of the same patterns for each scepter. The best way to cut out the patterns so that they match up perfectly (if only one side of the poster board is gold) is to trace the pattern onto the wrong side of the poster board. Cut out around the pattern loosely. Turn the poster board over and place the loosely cut out pattern on top of the poster board and cut out both tops at the same time. When you have finished cutting them out, turn them so that the gold side is facing out and they should match up perfectly.
3. To make the bottom of the scepter (the long skinny tube): Mark off 2 1/2 inch lengths down the long side of the poster board with a pencil. The strips should measure 22" x 2 1/2" each. You should be able to get 11 strips per poster board. Do not cut them apart yet.
4. Roll up the poster board (short ways) as tight as you can. Put a rubber band on it and let it set overnight or until the poster board holds its shape pretty well. This will make it easier to roll up each individual scepter bottom after they are cut apart.
5. Cut the strips apart. Roll them up to form a skinny tube. Use tape to keep them together.
6. Now you are ready to glue on the tops. Roll the bottom tabs in towards the wrong side of the pattern. Insert them into the tube. Secure them with hot melt glue. Use hot melt glue to glue the two patterns together.
7. In class have the children decorate their scepters with glitter, fake stones, shiny gold pipe cleaners, etc.
©2006, Digital by Design, Inc. -*See Copyright Information
Talk About Purim (a Jewish Holiday) and Do Activities Relating to It
Purim is a Jewish holiday celebrating the salvation of the Persian Jews from Haman's evil plot to have them all killed. The highest point of the celebration is the reading of the story of Queen Esther. Sometimes it is acted out with costumes or puppets. It is tradition for to use noise makers (gragar as they are called in Hebrew) to make as much noise as possible whenever Haman's name is mentioned in the story. The purpose being to stamp, drown, or blot out Haman's name which comes from the book of Deuteronomy which says, "You shall blot out the memory of the Amalekites Haman's people) from under the heavens."
Here is an idea relating to Purim sent in by Joanna Moore on our bulletin board:
I introduce the story of Esther as a melodrama with Haman as the villain and Esther & Mordecai as the heroes. I encourage the children to "boo and hiss" when the name Haman is mentioned and "cheer" when Esther and Mordecai are mentioned.
I tell them that even today Jewish families celebrate the holiday of "Purim" to remember this event. They always eat a pastry called "Haman's Ears." I buy, slice, and bake sugar cookies, slice them as directed on the package. Re-shape them into "ear shapes," sprinkle them with poppy seeds, and bake. The kids love eating "Haman's ears" and they'll never forget this wonderful story of God's sovereignty.
Thanks, Joanna, for taking the time to share this with us.
The following crafts and activities come from The Resource Room. To get the complete lesson with the craft patterns, songs, and activities go to the Esther Bible Lesson on The Resource Room.
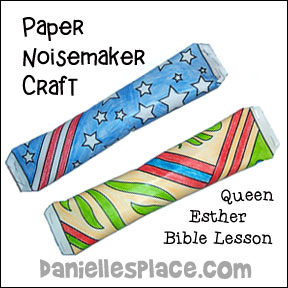
Make Noisemakers to be Used During the Lesson
What you will need:
Card Stock (Heavy paper)
Crayons
Stapler
Tape or Glue
Dried Beans, Corn, or Rice
How to make:
1. Give each child a piece of card stock and have them draw shapes and patterns on it to decorate it.
Member's ![]()
2. Roll the finished paper up and glue the sides together. Staple the bottom closed, and then fill with dried beans. To finish, staple the top closed.
3. To finish print the Bible verse down the side of the noisemaker.
©2006, Digital by Design, Inc. -*See Copyright Information
Make Queen Esther and King Ahasuerus Paper Dolls
You can use the paper dolls to illustrate the Bible story.
Member's ![]()
The paper dolls are made so their arms can be moved up and down.
Raise King Ahasuerus' arm when you get to the part of the story where he lifts his scepter so Queen Esther can speak.
Then lift Queen Esther's arm and place her hand on the top of the scepter and then tell the children what she said.
Play a Review Game Using a King's Scepter
Make a golden scepter from a wrapping paper tube or rolled up newspapers. Divide your children up into two teams. Tell them that you are going to pretend to be the king, and you will be holding the golden scepter. You will take turns asking questions of each team, but the only person who can answer the question is the person to which you extend the golden scepter. The person to whom you extend the golden scepter, should touch the top of the scepter with his or her finger and try to answer the question. Any child that speaks without having the golden scepter extended to them is out of the game. If a child does not know the answer to a question, he or she sits down. The team with the last person standing wins.
©2006, Digital by Design, Inc. -*See Copyright Information
Written by Carolyn Warvel
(Sing to the tune of "Zacchaeus was a Wee Little Man", the first two stanzas.)
Old Haman was a mean, evil man,
A mean, evil man was he.
He was meaner than an angry old flea,
As mean as he could be.
When Mordecai would not bow to him,
He had to make his plea.
He went to the king and made him agree
To sign an evil decree.
But Queen Esther was a very good queen,
A very good queen was she.
Without delay she began to pray
And she sent to God her plea.
She went to the King and bowed real low,
Even though she wanted to flee.
She got the king to change his decree,
The Jewish people were free!
And then the king gave a new decree
And Haman was no more to be.
You can find more songs for this lesson on The Resource Room.
©2006, Digital by Design, Inc. -*See Copyright Information
Queen Esther and King Xerxes Bible Crafts on Other Pages
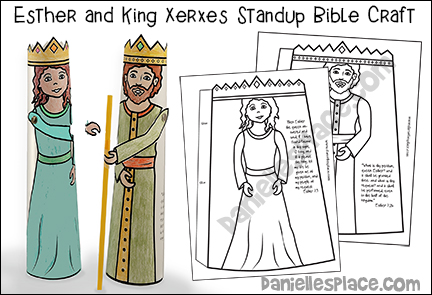
Esther and King Xerxes Tube Bible Craft
I just wanted to say that I just bought quite a few books for ideas to use in Sunday School and although they do have some good ideas, they were $10-$15 each which is a lot considering that all the ideas were not something I would use. I find more ideas on your site that I can use and think the subscription is well worth the price and I just wanted to let you know how much I appreciate it. Rebecca
I cannot tell you how often I use ideas from your website. I am in charge of crafts for 60 Bible school students every Sunday. They are first through third graders. I have used many of your craft ideas. I am also teaching in a Christian school. I have used ideas for crafts and Bible stories with my class. Your lesson ideas make everything interesting to the kids. They love getting to make crafts too! Thank you so much for your creativity!! Corinna
My Sunday School staff and I have been using your lessons since we joined as a church group The Resource Room and I was using the free lessons before. I want to thank you for all the lessons you have created they are marvelous and we are enjoying using them so much. I am teaching the preschool class and they just can't wait to come to class to find out what we are going to talk about and what craft they will be making. I know the other teachers are so excited too. Thank you again for your dedication to making God come to life for so many young people. Sincerely, Nancy


