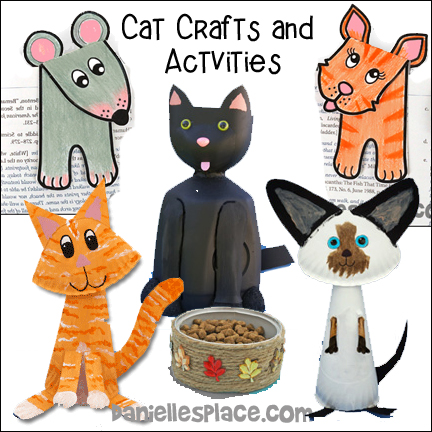
Cat and Kitten Crafts for Kids Page 2
How to Make Cat and Kitten Crafts for Kids
Cat and Mouse Printable Bookmark Craft
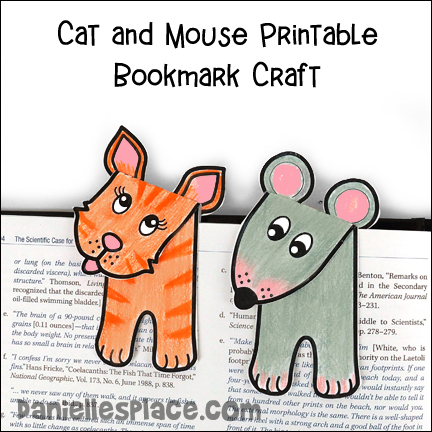
What you will need:
Cardstock (Heavy Paper)
Colored Pencils
Scissors
How to Make the Cat and Mouse Bookmark:
1. Print out the patterns onto card stock. (Printable patterns available to members and as an instant download.)
Member's ![]()
Instant Digital Download - ![]()
2. Have your children color the patterns and then cut them out.
3. Fold the animals faces down on the folded lines. Fold the top of the leg patterns back on the dotted lines. Place glue on the folded tab of the leg pattern and place it under the head, lining it up with the fold of the head. Press down to attach it to the bookmark pattern.
4. See how many books you can find about cats and mice in your local library and read them usng these adorable bookmarks! Place a bookmark on the page you are reading by draping the legs over the page and place the back of the bookmark behind the page.
©2019, Digital by Design, Inc. - See Copyright Information
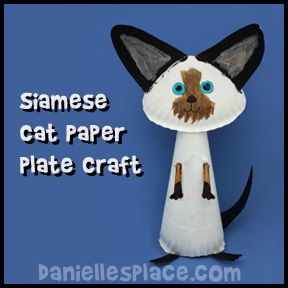
Cat Craft - Cat with Moveable Head Paper Plate Craft
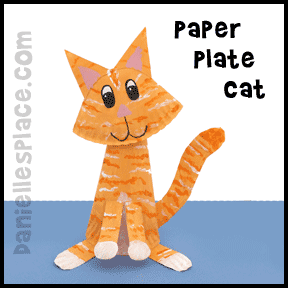
What you will need:
Two Paper Plates
Glue and/or Tape
Acrylic Paint
Scissors
Brass Brads
Hole Punch
Card Stock (Heavy Paper)
How to Make the Cat with Moveable Head Paper Plate Craft:
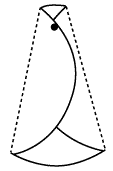
1. To make the body in the sides of one paper plate to make a cone shape. Flatten the sides. Punch a hole at the top of the cone shape where the plates come together. (See diagram to the left.)
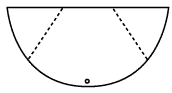
2. To make the head fold a paper plate in half and then fold back the sides and then fold them forward as shown in the diagram to the right. Then push the fold sides inside the folded paper plate to make the head shape. Glue the sides down. Punch a hole at the bottom of one side of the paper plate.
3. Place the head paper plate over the cone shape and connect them together with the brass brad.
4. Print out the cat's legs, arms, tail, and ear patterns onto card stock, color them, cut them out, and glue them to the body.
Member's ![]()
Free Digital Download ![]()
5. To finish paint the cat with acrylic paint or water color paint.
The Siamese cat craft below was made the same as above, except the face was rounded off and the ears were made from another paper plate.
©2013, Digital by Design, Inc. - See Copyright Information If you use this craft please do not put it up on Pinterest without giving Danielle's Place credit for the craft.
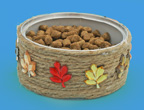
Tuna Can Cat Dish Craft for Kids
What you will need:
Empty Tuna Can
Two-ply Twine
Decorative Items
Hot Melt Glue Gun
How to Make Tuna Can Cat Dish Craft:
1. Clean and dry the tuna can.
2. Start by gluing the end of the twine to the bottom side of the can. Wind the twine around the can gluing as you go. If you don't have a glue gun you can use tacky glue.
3. To finish add decorative items such as sequins, buttons, and beads.
©2010, Digital by Design, Inc. - See Copyright Information
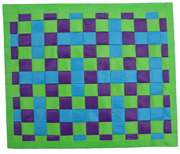
Duct Tape Cat Mat
What you will need:
Different Colors of Duct Tape and Scissors.
How to Make Duct Tape Cat Mat:
1. Cut twelve-inch pieces of Duct tape from different colors of tape.
2. Fold the pieces in half lengthwise so that the sticky side is on the inside.
3. Weave the pieces together and then cut the sides of the mat to make them even.
4. Secure the edges of the mat by placing pieces of tape around the edge and folding them over to the other side.
©2010, Digital by Design, Inc. - See Copyright Information
Cat Milk Jug Recycle Craft for Kids
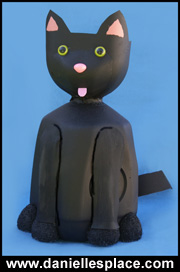
What you will need:
Two One-gallon Milk Jugs and a Half-gallon Milk Jug for the head
Flat Black Spray Paint (Try to find spray paint made for plastic, if you can't use a plastic primer first)
Pink Acrylic Paint
Cat Eyes
Pink and Black Craft Foam
Four 2" Foam Balls
How to Make Cat Milk Jug Recycle Craft:
1. Cut the top off the smaller milk jug just below the handle; cut ear shapes on the opposite side of the handle. Then cut off the very top part of the the jug where the cap is screwed on. Glue the large and small jugs together at the tops placing the small jug over the top of the larger jug as shown in the picture to the right.
2. Cut two corners from the second large jug to make the legs of the cat. Glue the legs to the front of the jug two inches from the bottom of the jug.
3. You can also make the muzzle stand out by cutting off a corner of the smaller jug. Glue it to the front of the face.
4. Cut the foam balls to form paw shapes and glue them to the bottom of the legs and to the sides to make the cats paws.
5. Cut a tail from black craft foam and glue it to the back of the cat.
6. Spray paint the entire cat with flat black spray paint.
7. Paint the ears and nose pink.
8. Cut a pink tongue from craft foam and glue it to the mouth.
9. To finish make a collar out of material and glue it the the neck of the cat.
Children may want to store small items in the head of the cat. You can also use it as a planter.
©2010, Digital by Design, Inc. - See Copyright Information
Cat or Dog Place Mats
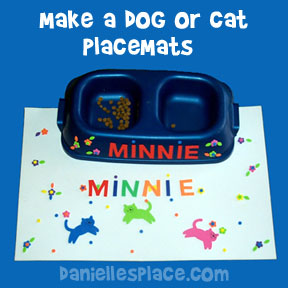
What you will need:
How to Make Cat Placemats:
1. Decide on your design and place all the items on the foam mat where you would like them to be before sticking them to the mat.
2. Peel off the back of the stickers and place them on the mat. You can also use permanent markers or paint markers to decorate the mat, but be careful to let the ink dry before touching it.
3. You can also decorate your cat or dog's dish with foam stickers or the permanent paint markers
©2007, Digital by Design, Inc. - See Copyright Information
Cat Crafts on Other Pages