Twelve Disciples Bible Crafts and Learning Activities
Bible Crafts Relating to the Twelve Disciples
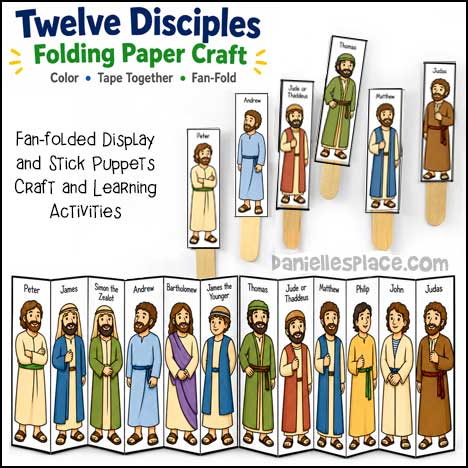
The Twelve Disciples Fan-folded Display and Stick Puppets Crafts and Learning Activities
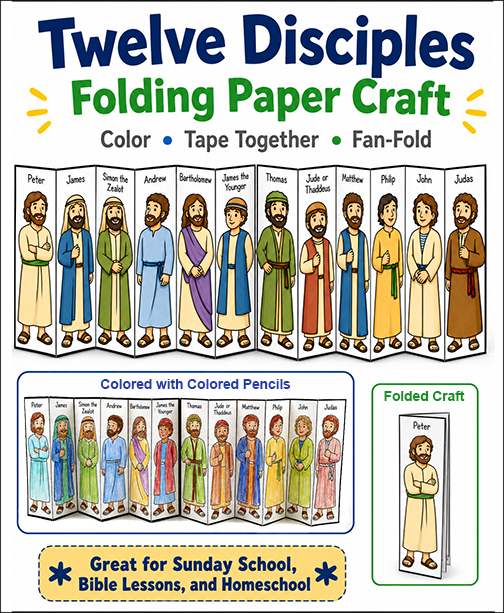
Help children learn the names of Jesus’ twelve disciples with this creative folding paper craft.
Children color, cut, tape, and fan-fold the printable panels to make a freestanding display featuring all twelve disciples. Each disciple is clearly labeled, making the finished craft useful for reviewing their names during Bible lessons.
The panels can also be cut apart and attached to craft sticks to make disciple stick puppets. Children can use the puppets to retell Bible stories, participate in group activities, or practice identifying each disciple.
The completed folding craft stands upright for display and folds compactly for easy storage. It is a fun addition to Sunday school, children’s church, homeschool Bible lessons, and lessons about Jesus calling His disciples.
The printable patterns are available in both full-color and black-and-white versions.
Member's 
Instant Digital Download - - Includes both color and black and white.
What you will need:Craft Sticks - Mini Jumbo Craft Sticks or Jumbo Craft Sticks, Elmer's Paper Glue,Scissors,Paper or Card Stock, Colored Pencils (Optional)
Make Stick Puppets!
©2017, Digital by Design, Inc. - See Copyright Information
The Twelve Disciples File Folder Review Activity
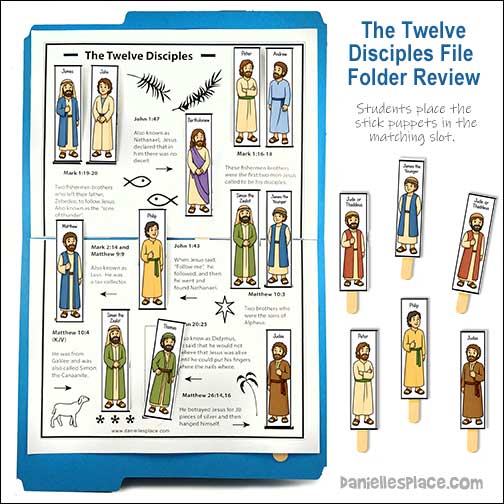
Help children learn the names of Jesus’ twelve disciples and discover more about each one with this fun, hands-on file folder activity.
Students match each disciple to the correct name, making review feel more like a game than a worksheet.
The printable disciple figures can be glued to craft sticks to create puppets that slide into the matching slots, or children can glue the pictures directly onto their own file folders. Students can make individual folders to take home, or you can prepare one or two reusable sets for small groups, learning centers, or classroom review.
Display the completed activity in your classroom and remove each disciple from the folder as you study him. It is an engaging way to introduce, review, and remember the twelve men Jesus chose to follow Him.
Member's
Instant Digital Download -
Supplies Needed:
Craft Sticks - Regular-sized or Mini Jumbo Craft Sticks, File Folders, Exacto Knife, Elmer's Paper Glue or Tape, Scissors, Paper or Card Stock, Colored Pencils (Optional)
©2017, Digital by Design, Inc. - See Copyright Information
Jesus and His Disciples in a Boat Bible Craft
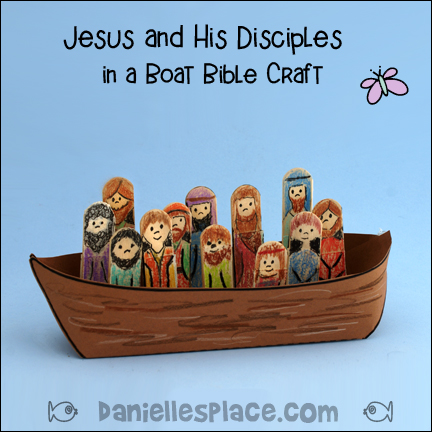
Children make a paper boat with the twelve craft stick disciples.
Instant Digital Download - 
©2000, Digital by Design, Inc. - See Copyright Information
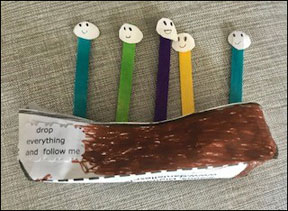
Marie Felix sent in this picture of the disciples in a boat her studends made.
She glued the Bible verse on the bottom of the boat and had her students draw faces on paper circles and glue them to colored craft sticks.
The Twelve Disciples Folding Craft Stick Bible Craft for Sunday School
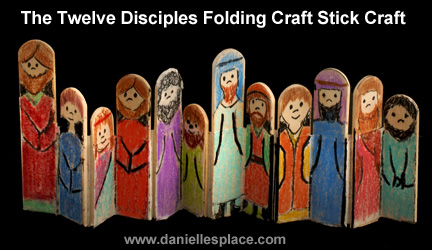
The craft sticks are taped together so that when they are pushed together from the sides they fan fold up into a compact stack of sticks for storage. Unfold the stack and the disciples appear standing next to each. Children will enjoy drawing each of the disciples and then writing the names of the disciples on the back of the sticks.
What you will need:

Woodsies Mini Jumbo Craft Sticks -4.5" 50/Pkg - Use good quality craft sticks that lay flat. The 5/8" work perfect with the one-inch tape. *You can use the Woodsies Jumbo Craft Sticks with the 1.5 Inch - 3M Scotch Masking Tape for a bigger canvas.
3M Scotch Masking Tape, 1-Inch - Other brands will work, but this tape works great! It is the exact color of the craft sticks. (Staple's Tape works better with the washable markers, but it is lighter than the stick and more transparent and doesn't cover the stick as well.)
Permanent Markers, Crayons, or Colored Pencils - (The washable markers don't work well because they smear on the tape.)
How to Make the Disciple's Folding Craft Stick Display:
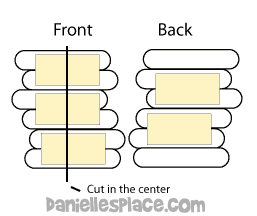
1. This technique will create two sets of twelve people. Place two sticks together, side by side, and tape them together covering both the sticks with the tape. You don't have to cover the rounded ends of the sticks. If you line the sticks up so that they aren't even on the side, you will have people of different heights.
2. Turn the two sticks over so that they are diagonal to you.
3. Place another craft stick next to and below the two sticks that you taped together. Use another piece of tape to tape the bottom two sticks together.
4. Turn all three sticks over diagonally and place another stick at the bottom of the row and tape the last two sticks together. Keep going until you have twelve craft sticks in a row.
5. You can also cover the first and last stick in the row by placing tape over the stick and then folding it back over the stick. It is easier to write on the tape than the craft stick. The ink soaks into the sticks and blurs.
6. Cut a straight line down the row of craft sticks. It is much easier to cut the craft sticks with the tape on them because the craft sticks don't crack. Use a good quality scissors to cut the sticks.
Children can use permanent markers, pens, or colored pencils to draw the disciples faces, hair, and clothes on the sticks. Have them write the disciples' names on the back of the sticks.
If a child messes up while working on his canvas, you can pull off the tape where he messed up and replace it with new tape.
©2012, Digital by Design, Inc. - See Copyright Information - Bloggers, if you use this craft idea or an adaptation, and link back to this page for the complete directions, let us know and we will put a link to your blog.
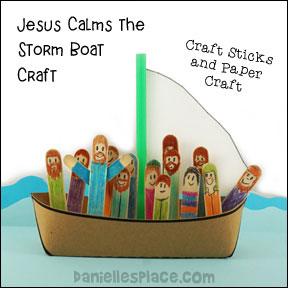
Disciple Ship Craft
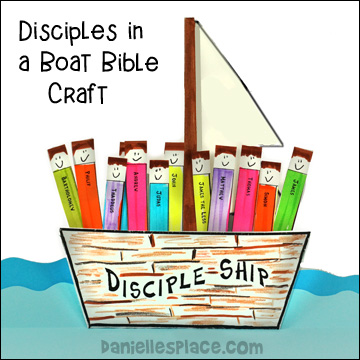
If you don't have time to make all the 3D boats you can use this time-saving pattern sent in by Gina Cheeks.
What you will need:
Card Stock
Drinking Straws
Crayons or Markers
Tape or Glue
Optional: Replace hand-drawn faces with small, smiley face stickers.
How to make:
1. Before class print out the patterns and cut them out. Do not cut the disciples apart yet.
Member's
Instant Digital Download
2. In class have your children color the front and backside of the boats.
3. Give your children white printer paper to cut out triangle shapes for sails. If you have very small children cut them out for them before class.
4. Give each child one straw and help them tape the sail to the top of the straw and tape the bottom of the straw to the inner part of backside of the boat.
5. Give one disciples pattern to each child. Instruct the children to draw a smiley face on the top of each disciple shape, or use smiley face stickers instead. Encourage your children to use different colors to color each of the disciple’s clothes.
6. When they are finished coloring, cut the group of disciples into individual strips.
7. Help your children glue or tape the disciples into the boat so they don’t fall out.
The Twelve Disciples Activity Sheet
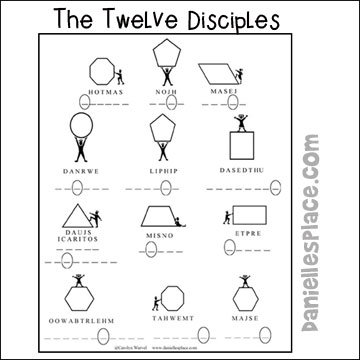
Children unscramble the words to find the disciples' names.
Member's