Halloween Alternative Crafts and Activities for Kids
How to Make Crafts and Learning Activities Relating to Halloween and Fall
Easy Paper Bag Pumpkins Craft for Kids
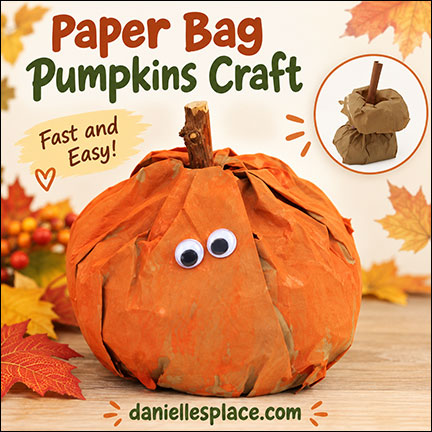
Turn ordinary paper lunch bags into charming, one-of-a-kind pumpkins! With just a little paint, googly eyes, and a twig stem, children can create pumpkins with plenty of personality for Halloween decorating or colorful fall displays.
Because every bag crumples and shapes differently, no two pumpkins look exactly alike. Use different-sized paper bags to make a mix of small and large pumpkins for an inexpensive classroom pumpkin patch.
What you will need:
Chenille Stems (Cut in half) or Twisty Ties
Twig or Brown Construction Paper
Tacky Glue or Low-temp Glue
Large Googly Eyes or Googly Eye Stickers, Jack-O-Lantern Face Stickers, Pumpkin Decorating Kit
How to Make the Paper Bag Pumpkin Craft:
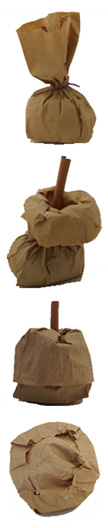
1. If you aren't using real twigs for the stem, cut a piece of construction paper in half and roll the halves into tubes about one half inch thick.
2. Stuff two or three plastic grocery bags into the bottom of the paper lunch bag.
3. Stick the twig or construction paper tube down into the bag so the tube is vertical.
4. Stuff more bags around the twig or tube rounding out the bottom of the bag.
5. Scrunch up the bag just above the stuffed grocery bag and secure it with a Chenille stem or Twisty tie.
6. Carefully roll down the top of the bag trying not to rip it. Place your fingers under the folded down top part to smooth it out and make it easier to fold down.
7.Once you have the top of the bag folded down as much as it will go start stuffing the bottom of the bag up into the folded down part gluing the top edge of the bag to the bottom of the bag.
8. Paint the bag with orange water color paint.
9. To finish draw on eyes or glue on googly eyes.
Make a whole bunch of paper bag pumpkins, set up a pumpkin patch, and pretend to go shopping for the best Halloween pumpkin.
©2014, Digital by Design, Inc. - See Copyright Information
Watch how to make this craft on our "View it and Do it!" video.
Candy Corn Stars Printable Coloring Book
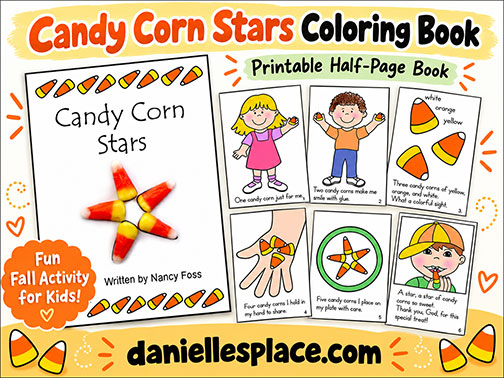
Turn candy corn into a fun fall learning activity with this printable half-page coloring book! Children color the pictures as they count from one to five candy corns, then finish the book with a candy corn star and a simple thank-you-to-God rhyme.
For an extra special touch, children can glue real candy corn to the cover to make the star. The small half-page format makes the finished book easy for little hands to hold and is a fun addition to fall, Halloween, or Sunday school activities.
Candy
Corn Stars
Written by Nancy Foss
"One
candy corn just for me.
Two candy corns make me smile with glee.
Three candy corns
of yellow, orange, and white.
What a colorful sight.
Four candy corns I hold in my hand to share.
Five candy corns
I place on my plate with care.
A star, a star of candy corns so sweet.
Thank you, God, for this special treat.
To assemble books see the Assembling Books Directions.
Directions and patterns for this craft are available to members and as an instant download.
Member's 
Instant Download Pattern - 
©2003, Digital by Design, Inc. - See Copyright Information
Candy Corn Sweet Treat for the Soul Craft
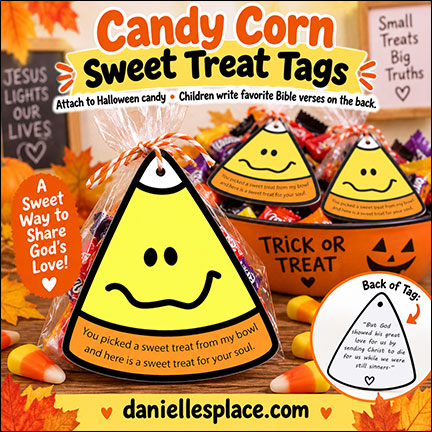
These little candy corns can be tied to candy treats and given out to trick-or-treaters as a witnessing tool. Children color the front and write a Bible verse on the back. Adults can help them pick out verses that are "sweet treats" for the soul. The front of the candy corn says, "You picked a sweet treat from my bowl and here is a sweet treat for your soul."
What you will need:Card Stock (Heavy Paper), Hole Punch, Yellow and an Orange Gel Highlighter Markers, Twine and 3" x 4" Clear Treat Bags or 4" x 6" Clear Treat Bags
Member's 
Instant Digital Download
©2004, Digital by Design, Inc. - See Copyright Information
Halloween Candy Bible Verse Matchup Game
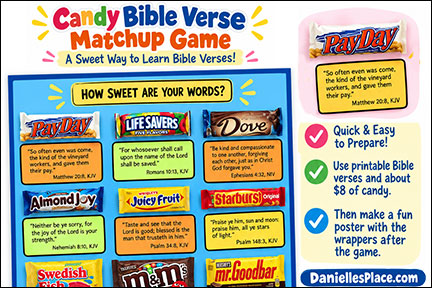
Here's a great alternative to a Halloween Party! Children matchup candy bars to Bible verses. You can find more information on our Printable Bible Games Page 1.
©2014, Digital by Design, Inc. - See Copyright Information
Jesus is our Life Saver Candy Printable Labels
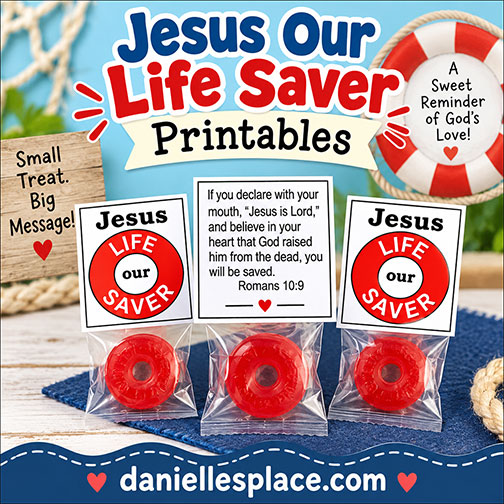
Here's a great way to make the most of your trunk-or-treat event. Each candy label says, "Jesus our Life Saver" on the front, and the Bible verse from Romans 10:9 on the back.
What you will need: Lifesavers Hard Candy, Individually Wrapped, Printer Paper, Stapler, Scissors
The patterns for this craft are available to members on The Resource Room and as an instant digital download.
Member's
Instant Download Pattern -
©2014, Digital by Design, Inc. - See Copyright Information
Skeleton Cup Puppet Craft
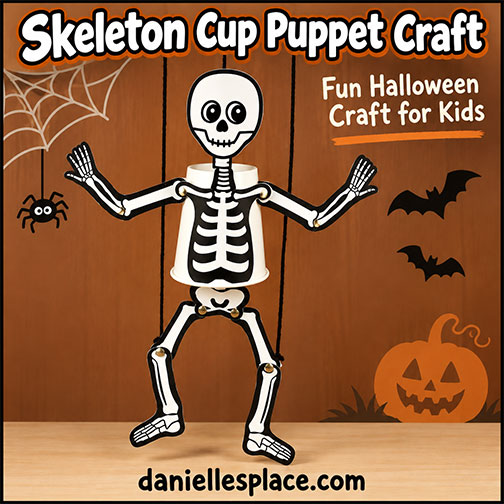
Give your Halloween crafting a little shake, rattle, and roll with this fun Skeleton Cup Puppet Craft! Kids can put together their own silly skeleton using a paper cup and printable bone pieces, then move and pose the arms and legs for all kinds of goofy positions.
Hang the finished puppet from string and make it dance, wave, kick, or dangle from a classroom display. Each skeleton can have its own personality depending on how children arrange the movable pieces.
This activity makes a fun addition to Halloween parties, classroom craft time, fall festivals, or lessons about bones and the human skeleton. It also makes a great take-home decoration children can play with again and again.
Supplies needed: Paper cup, printed skeleton patterns, cardstock, string, scissors, glue, and paper fasteners or other materials for attaching the movable pieces.
Member's
Instant Digital Download - - One Page
Watch a "View it and Do it" Video on how to make this craft:
https://www.youtube.com/watch?v=aRgtjE9CXTw
Shine for Jesus! Mini Craft Booklet
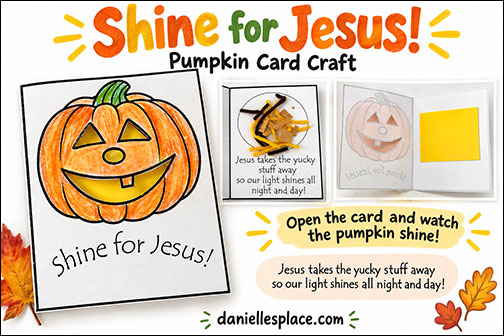
Make this “Shine for Jesus!” Pumpkin Card to reinforce the lesson in a fun, visual way. Children add pumpkin seeds or other “yucky stuff” to the inside of the card. The poem says, “Jesus takes the yucky stuff away so our light shines all night and day!”
As children open and close the card, the “yucky stuff” disappears behind the smiling pumpkin, helping illustrate how Jesus takes away our sin so His light can shine through us. This makes a memorable fall Bible craft for Sunday school, children’s church, or a Christian Halloween alternative activity.
What you will need:
Legal-size Paper (8 1/2" x 14"), Dried Pumpkin Seeds, Orange and Yellow Yarn, Glue, Green and Yellow Construction Paper, andCrayons or Colored Pencils
Member's
Instant Download Pattern -
This craft goes along with the book The Pumpkin Patch Parable
This charming story for children illustrates how a loving farmer can turn a simple pumpkin into a simply glorious sight. Liz Curtis Higgs weaves a beautiful parable as the farmer picks out a special pumpkin from his garden, and scoops out all the messy "goo" to make room for his light to shine from inside. In the same way, God's transforming love can fill each of our hearts with joy and light. Liz Cutis Higgs originally created this parable as a way to share the Good News with her own precious children each harvest season. After 10 years, she has touched children everywhere! Recommended for ages 3 to 7.
Comments and Ideas from Subscribers:
I bought some "mini pumpkin" gourds at the grocery store for the kids to decorate with happy faces (permanent markers work best, but I watched that they don't mark each other). I printed small versions of the "pumpkin" story. I punched holes in the stories to slip a ribbon through. I hot-glued the ribbon to the tops of the pumpkins. The kids loved doing this. Then, the kids gave these pumpkins to their favorite "pumpkins" to share the love, Sandy
I did this lesson in my Wednesday night class, it was preschoolers. I printed the material, but before we did the craft I brought in a real pumpkin and just cut the top off so they could reach their hands inside to see what the real yucky stuff was like, as I told the story. They thought it was great. Then I read the story from the book, The Parable of the Pumpkin, that I bought at the Christian Book store, and then made the craft. I bought real pumpkin seeds at the grocery store. I really like all the holiday lessons and crafts you always have, I hope you have some Thanksgiving and Christmas ones for the coming months! Thank you, Barbara from Ohio
©2005, Digital by Design, Inc. - See Copyright Information
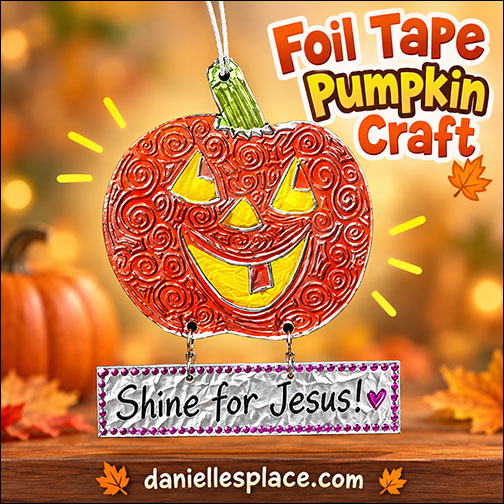
"Shine for Jesus" Foil Tape Pumpkin Craft
What you will need:
Craft Foam

Utensils to Engrave the Tape Such as a Ballpoint Pen, Straws, the End of a Paintbrush, and the Tines of a Fork
Paper
Scissors
Thin Wire or String
Sharpie Fine-Tip Permanent Marker

How to Make the Shining Pumpkin Craft:
1. Print out the pumpkin patterns onto card stock and cut them out. Use the patterns as template to cut pumpkin shapes from the craft foam.
Member's
2. Cut a piece of foil tape so that it is a little bit larger than the craft foam pumpkin shape.
3. Peel the back off the foil tape and stick the pumpkin craft foam shape to the tape.
4. Cut the tape around the edge of the pumpkin shape about 1/4" from the shape.
5. Fold back the edge of the tape around the craft foam.
6. To make the "Shine for Jesus!" sign cut a piece of craft foam 4 1/4" x 1" and cover it with foil tape.
7. Use a ball point pen to write the words and draw in the face features pressing the pen down on the tape into the foam. Add other details.
8. When you are done with your design color the foil with Sharpie markers a little at a time. Wipe off the excess marker before it dries completely with a paper towel. This will allow the foil to shine through giving the pumpkin a glowing affect.
9. Punch holes in the pumpkin and sign and wire them together. Tie a string to the top of the pumpkin to hang.
©2010, Digital by Design, Inc. - See Copyright Information
Milk Jug Candy Holders or Caddies
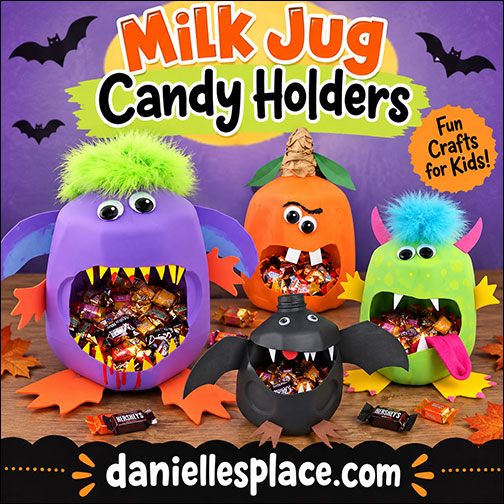
Milk Jug Monster Treat Container Craft for Kids
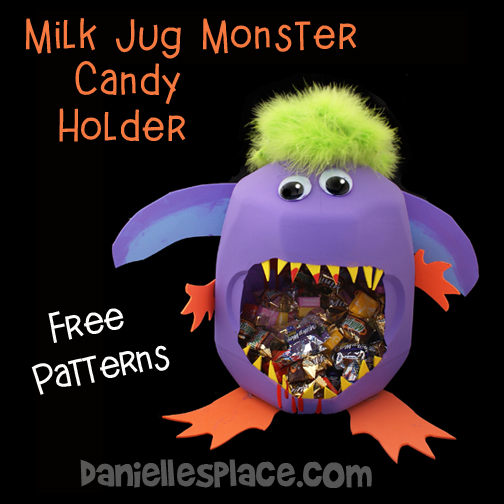
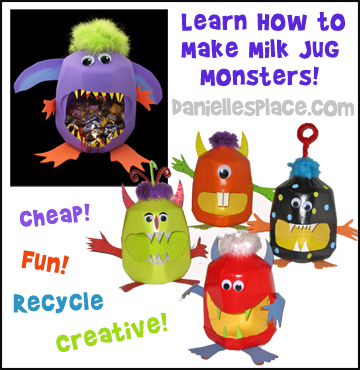
Place treats in this whimsical milk jug monster and your visitors will have a fun time snatching them from its mouth!
What you will need:
Empty Plastic Milk Mug


Sharp Scissors
Valspar Plastic Primer Spray Paint


Krylon Fusion Plum Plastic Paint 

How to Make the Milk Jug Monster Craft:
1. To remove the label fill the jug up with hot water and let it sit for a minute. This will loosen the glue. Carefully pull off the label. Do not get the label wet before trying to remove it or it will just disintegrate and you will have a hard time getting it off. Once the label is removed you can wash and dry the plastic milk jug.
2. Cut a mouth shape on the opposite side of the handle as shown in the picture.
3. Spray the jug with plastic primer paint and then paint it with the acrylic patio paint or spray paint it with spray paint made for plastic. Spray paint works best because the craft foam sticks better to the spray paint than the acrylic paint.
4. Cut hands, feet, teeth, wings, and whatever else you would like on your monster from craft foam and glue them to the jug. The teeth were glued to the inside of the jug.
Free Arms, Feet, and Teeth
5. To finish glue on large googly eyes and drip red acrylic paint inside the mouth, on the top teeth, and down in between the front lower teeth. Let the paint dry and then fill the mouth with candy.
If you use this craft and put it up on the web, please link back to this web site for the directions.
©2010, Digital by Design, Inc. - See Copyright Information
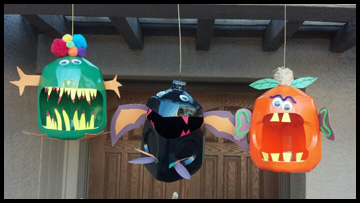
Here is Marissa Proctor's version of the Monster Milk Jug Craft, the Bat Milk Jug Craft and the Milk Jug Pumpkin Craft on this page. I love the ears on the pumpkin.
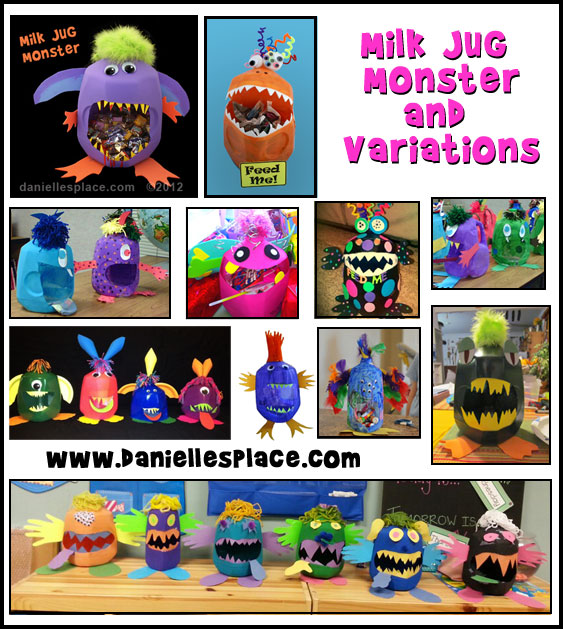
More Milk Jug Monsters!
Send us your pictures and comments about this craft and
we
will put them up here.
If you use this craft and put the images up on Pinterest please state that the craft comes from www.daniellesplace.com.
Milk Jug Pumpkin Treat Container Craft for Kids
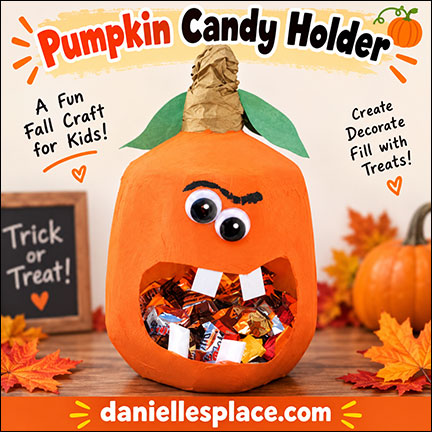
Place treats in this crazy milk jug pumpkin and your visitors will have a fun time collecting their treats!
What you will need:
Empty Plastic Milk Mug
White Craft Foam

Sharp Scissors
Valspar Plastic Primer Spray Paint
or Krylon Clear Plastic Primer Paint
Krylon Fusion for Plastic - Pumpkin Orange


How to Make the Milk Jug Pumpkin Treat Container:
1. To remove the label fill the jug up with hot water and let it sit for a minute. This will loosen the glue. Carefully pull off the label. Do not get the label wet before trying to remove it or it will just disintegrate and you will have a hard time getting it off. Once the label is remove you can wash and dry the plastic milk jug.
2. Cut a mouth shape on the opposite sides of the handle as shown in the picture.
3. Spray the jug with plastic primer paint and then paint it with the acrylic patio paint or spray paint it with spray paint made for plastic. Spray paint works best because the craft foam sticks better to the spray paint than the acrylic paint.
4. Cut teeth shapes from craft foam or card stock and glue them to the inside of the jug.
5. Cut a 12" x 4" length of brown tissue paper and twist it around the milk jug top. Glue it to the top when it looks the way you would like. Cut leaves from green tissue paper and glue them to the stem.
6. To finish glue on large googly eyes and fill the mouth with candy.
©2010, Digital by Design, Inc. - See Copyright Information
Milk Jug Spider Treat Container Craft for Kids
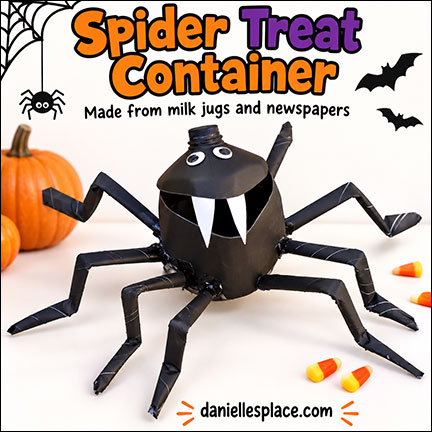
Place treats in this scary milk jug spider and your visitors will have a fun time trying to retrieve them.
What you will need:
Empty Plastic Milk Mug
White Craft Foam
Sharp Scissors
Valspar Plastic Primer Spray Paint
Krylon Fusion Plastic Spray Paint - Black

Newspaper

Wire or Pipe Cleaners
How to Make the Spider Milk Jug Craft
1. To remove the label fill the jug up with hot water and let it sit for a minute. This will loosen the glue. Carefully pull off the label. Do not get the label wet before trying to remove it or it will just disintegrate and you will have a hard time getting it off. Once the label is remove you can wash and dry the plastic milk jug.
2. Cut a mouth shape on the opposite sides of the handle as shown in the picture.
3. Spray the jug with plastic primer paint and then paint it with the acrylic patio paint or spray paint it with spray paint made for plastic. Spray paint works best because the craft foam sticks better to the spray paint than the acrylic paint.
4. Cut a one-inch section from the handle so that the top of the jug can be bent back and the mouth opened. Tape the remaining handle together so that the mouth stays open.
5. To make the legs place two pieces of newspaper together and line them up. Roll the two pieces into a tube starting from one corner and go to the corner diagonally from the one you start with. Tape the roll in the center and then fold it in half and cut it. Make eight legs altogether. Glue the legs to the milk jug. If you are using acrylic paint, you must glue the legs to the jug before you paint it. If you glue them to the paint they will just pull the paint off the jug and fall off. If you use spray paint, you can paint the jug first.
6. Spray the jug with primer paint and then paint it with acrylic paint or spray paint it.
7. Cut fangs from craft foam and glue them to the top of the mouth. To finish glue on googly eyes. Place treats in the spider's mouth.
©2010, Digital by Design, Inc. - See Copyright Information
"I Vant to Give You a Treat!" Milk Jug Bat Treat Container Craft for Kids
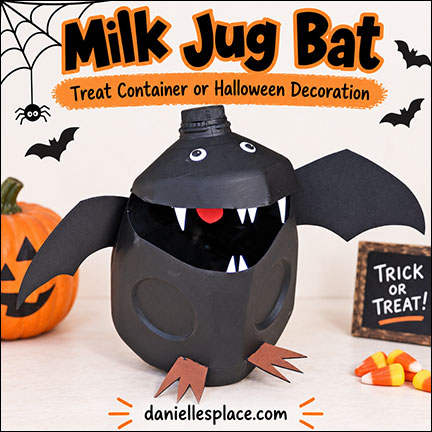
What you will need:
Empty Plastic Milk Mug
Black, Red, Brown and White Craft Foam or Card Stock

Sharp Scissors
Valspar Plastic Primer Spray Paint
Krylon Fusion Plastic Spray Paint - Black
How to Make the Bat Milk Jug Container Craft:
1. To remove the label fill the jug up with hot water and let it sit for a minute. This will loosen the glue. Carefully pull off the label. Do not get the label wet before trying to remove it or it will just disintegrate and you will have a hard time getting it off. Once the label is remove you can wash and dry the plastic milk jug.
2. Cut a mouth shape on the opposite sides of the handle as shown in the picture.
3. Spray the jug with plastic primer paint and then paint it with the acrylic patio paint or spray paint it with spray paint made for plastic. Spray paint works best because the craft foam sticks better to the spray paint than the acrylic paint.
4. Cut a line from side to side at the top of the jug about one inch below where the jug starts to form the top of the jug as shown in the picture.
5. Cut a one-inch section from the handle so that the top of the jug can be bent back and the mouth opened. Tape the remaining handle together with duck tape so that the mouth stays open.
6. Spray the jug with primer paint and then paint it with acrylic paint or spray paint it.
7. Cut bat wing shapes from craft foam and glue them to the sides of the jug. Cut fangs, a tongue, and feet from fun foam and glue them to the jug. To finish glue on googly eyes. Place treats in the bat's mouth.
©2010, Digital by Design, Inc. - See Copyright Information
Candy Corn Crafts and Learning Activities
See even more Candy Corn Crafts and Learning Activities on the Candy Corn Craft Page.