Monsters and Wild Things Crafts
Monster Crafts and Learning Activities for Children
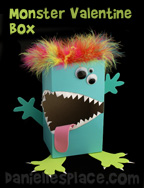
Monster Paper Bag Craft and Learning Activity
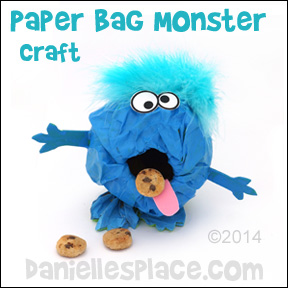
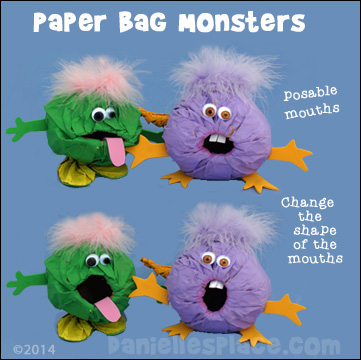
These little monsters can be used as fun toys for children of all ages. The mouths are made with Chenille stems so they can be posed into many different shapes. They are a little difficult to make so younger Children will need help forming the bag into the monster shape, but they will enjoy painting, decorating, and posing the mouth.
This is a great craft for large groups because it costs less than fifteen cents a piece to make!
Use this craft to review math and spelling words, or as an incentive to learning.
What you will need:
Paper Lunch Bags
Chenille Stems
Acrylic Paint and Paint Brushes
Scissors
Recycled Plastic Grocery Bags
2 oz. Bottle of Paint or Something Similar that is About 2 1/4" Wide
Masking Tape and/or Low Temperature Glue Gun
Craft Foam, Feather Boa, and Wiggle Eyes
How to Make the Paper Bag Monster
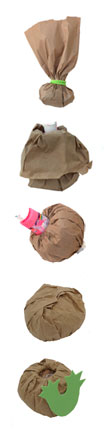
1. Stuff two to three plastic grocery bags into the bottom of the paper lunch bag. Gather up the bag just above the stuffed plastic bags. Pull up on the sides of the bag to make them straight.
2. Open the bag just enough to place the paint bottle into the center of the bag so that it is standing up. Gather up the bag again around the bottle and secure it with a Chenille stem.
3. Carefully bend down the top of the bag over the sides of the bag bringing it down over the bottom of the bag so that it overlaps. Glue the overlapping sides together to form a ball-like shape.
4. Remove the paint bottle.
5. Cut feet and arm shapes from craft foam and glue them to the bag.
Member's ![]()
6. Paint the bag with water color paint or other paint and let it dry.
7. When the paint is dry carefully remove the plastic bags from the monster's mouth.
8. To finish glue on googly eyes and parts of a feather boa for the hair. You can also add teeth and tongues cut from craft foam.
©2014, Digital by Design, Inc. - *See Copyright Information - Please do not publish your pictures of this craft on Pinterest without giving Danielle's Place credit for the craft. If you make this craft, a derivative work, and publish it on the web, do not include the instructions. You must link back to this page for the complete instructions. This is copyrighted material and we do not allow this material or a derivative of this work to be published in full on other web sites. Please read our full copyright regulations.
Paper Bag Monsters Games and Learning Activities
These paper bag monsters can be used for many home school learning activities:
1. Feed the Monster Game
Give each child a paper bag monster. Take turns having the children spell or read a word. If a child is correct, he gets to feed his monster. Child get to eat whatever they have fed their monsters.
2. Writing Activity
Have your children paint and decorate paper bag monsters and then write a short story about their monsters. Encourage them to use emotion words such as sad, happy, glad, excited mad, etc. Have them read their stories and pose the monsters mouth each time they read about a different emotion.
3. Monster Words Reading Activity (See Below)
Use the paper bag monster to store monster words. When your child comes across a monster word in his reading, have him write the word on a small piece of paper, roll it up and feed it to his paper bag monster. When the monster if full have him take out the pieces of papers and read the monster words.
4. Reading Monster Words
Write monster words on sheets of paper and place them in the paper bag monsters mouth. Remove one word at a time and challenge your children to read the monster words.
Turn your children into monster readers with these fun reading incentives. Print out the monster reader bookmark and have your children write the names of the books they have read on the stack of books. Give them a monster prize when they have filled in all the books.
Tell your children that the Hungry Green Reading Monster loves to eat big words. Encourage them to write the new words they have learned while reading on pieces of paper and feed them to the hungry monster.
You can find directions on how to make the Milk Jug Monster below. You can also use this as a craft. Just precut the jugs and spray them with primer paint before having your children paint them.


Monster Reader Bookmark and New Words Game
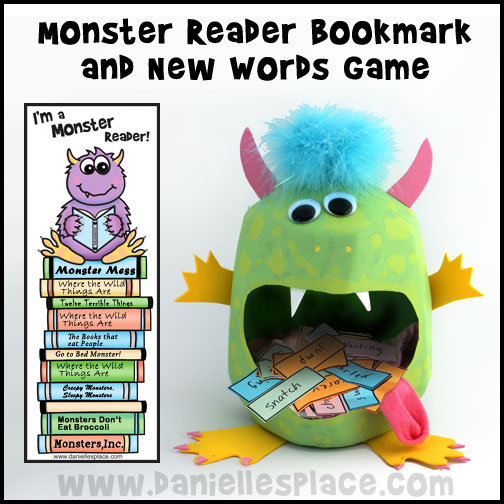
Children write the names of the books that they read and words the learned on pieces of paper and feed to the monster if they remember them.
The printable bookmark pattern, available in black and white and color, is available to members. Patterns include "My Monster Words" the bookmark is also available to members.
Member's ![]()
© 2013, Digital by Design, Inc. - See Copyright Information
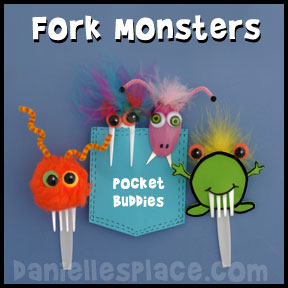
Monster Fork Pocket Buddies Craft
What you will need:
Cheap White Plastic Forks and Spoons
Utility Lighter with Long Handle
Scissors
Pipe Cleaners
How to Make the Monster Pocket Buddies Made from a Plastic Forks:

1. Hold a plastic fork in your left hand (if you are right-handed)so that it is parallel to the table with the tines facing down as shown in the diagram to the right.
2. Hold the lighter with your right hand underneath the fork near the top of the handle where the head of the fork meets the handle. (See diagram to the right.) *Do not hold the lighter too close to the fork because it could catch fire. You only want to heat it up. (This part of the craft is for adults only. Children should not use lighters.) When the fork starts to melt and bend remove the lighter and bend the head of the fork down so that it meets the handle. Hold it in place for about ten seconds until the plastic hardens.
3. You can break off some of the tines by just snapping them off. Place your fingernail on the tine where you would like it to break off and then bend the tine up until it snaps off.
4. Use pom poms or craft foam to make the monster's bodies. If you use craft foam, cut a hole in the foam for the mouth and stick the tines through the hole.
5. Glue on wiggle eyes and part of a feather boa for the monster's hair.
6. Place the handle of the fork in your pocket and let the monster hang over your pocket.
© 2013, Digital by Design, Inc. - See Copyright Information
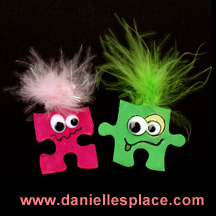
Monster Puzzle Piece Craft
What you will need:
Puzzle Pieces
Blank Puzzles Pieces or Larger Puzzle Pieces
Googly Eyes
Acrylic Paint
Permanent Markers
Magnet or Pin
Feathers and Glue
How to Make the Monster Puzzle Craft:
1. Paint the puzzle pieces with acrylic paints or color them with permanent markers.
If you use markers that aren't permanent markers draw on the side that doesn't have the shiny coating. The markers will stick better without rubbing off.
2. When the paint dries glue on googly eyes and feathers.
3. Use a permanent marker to draw in the mouth.
4. Glue a pin or magnet to the back of the piece to make a refrigerator magnet, or glue or tape a pin to the back to make a brooch, or punch tiny holes and add a string to make a necklace.
© 2012, Digital by Design, Inc. - See Copyright Information
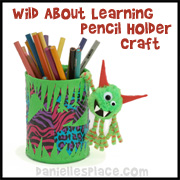
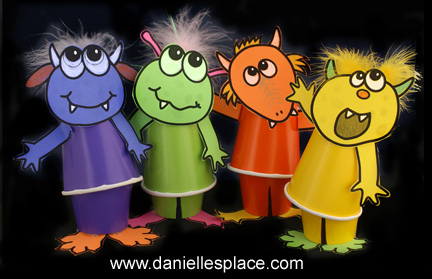
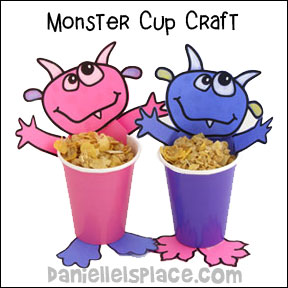
Wild Things - Little Monster Cup Craft
What you will need:
9-oz. Paper Cups of Different Colors
Tape
Glue
Colored Paper
Fake Fur
Feather Boas
Feathers
Black Permanent Marker
Scissors
How to Make the Paper Cup Monsters:
1. Draw monster or wild thing faces, arms, and feet onto colored paper, or use white paper and then color them with colored pencils, and then cut them out. A printable pattern of the monster faces, arms and legs is available to members.
Member's ![]()
2. To make the bottom cup fit inside the top cup cut slits about one inch apart all around the top of one cup about one inch deep. Fold in the top of the cup where you made the slits. Place another cup over the cut cup so that it is upside down. Draw a line down the center of the bottom cup to make it look like two separate legs.
3. Glue the head, arms, and feet onto the cups.
4. To finish glue feathers, pieces of feather boa, or fake fur to the heads.
© 2011, Digital by Design, Inc. - See Copyright Information
Great Books to Use With This Craft
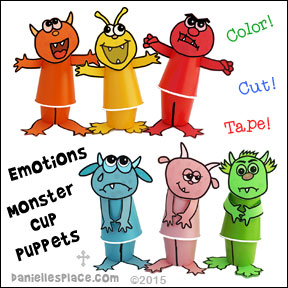
Emotions Monster Cup Puppet Craft
What you will need:
9-oz. Paper Cups of Different Colors
Tape
Glue
Colored Paper
Black Permanent Marker
Scissors
How to Make the Emotions Paper Cup Monster Puppets:
1. Patterns for this craft are available to members of Danielle's Place. Children color, cut out, and then glue the parts to paper cups.
Member's 
Instant Download Pattern - 
2. To make the bottom cup fit inside the top cup cut slits about one inch apart all around the top of one cup about one inch deep. Fold in the top of the cup where you made the slits. Place another cup over the cut cup so that it is upside down. (See picture to the left.) Draw a line down the center of the bottom cup to make it look like two separate legs.
3. Glue the head, arms, and feet onto the cups.
4. To finish glue feathers, pieces of feather boa, or fake fur to the heads.
Use this craft to go along with the book "Glad Monster, Sad Monster" by Ed Emberley. Children talk about what makes them sad, glad, etc. and try on die-cut masks from the book.
© 2015, Digital by Design, Inc. - See Copyright Information
Seven Printable Mad Monster Posters
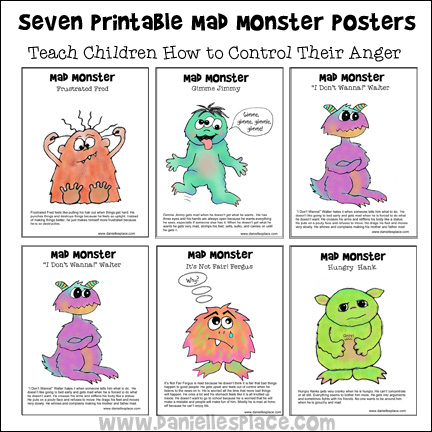
"It's Not Fair" Fergus, Hungry Hank, "I Don't Wanna" Walter, Owie Howie, Frustrated Fred, Gimme Jimmy, and Jealous Jill teach your children how to take control of their mad monsters before they control them. Each poster or coloring sheet describes a different situation in which a child might get angry. Parents can discuss how the child may react to their anger in a positive way.
Member's
Instant Download Pattern -
(Patterns are in both color and black and white for coloring.)
Mad Monsters! Printable Game
Use his printable board game to help your children talk about their anger and learn how to deal with it in a positive way.
Member's
Instant Download Pattern -
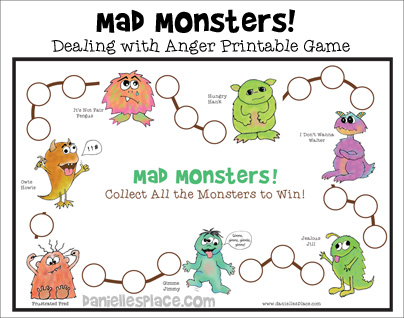
Children learn to control their 'mad monsters' with this simple game. When a child lands on a monster he gives an example of why he got angry when that type of 'mad monster' was controlling him. For example, if a child lands on the "Gimme Jimmy" Monster, he might say, "I got mad when my mom wouldn't buy me the toy I wanted. I yelled and whined until my mom threatened not to take me to the store any more." The child should then say how he could have handled his anger better.
There are seven monsters: "It's Not Fair" Fergus, Hungry Hank, "I Don't Wanna" Walter, Owie Howie, Frustrated Fred, Gimme Jimmy, and Jealous Jill.
The game board measures 14" x 10" and uses two sheets of card stock. It comes with directions, printable monster cards, and suggestions about how children can deal with their anger in positive ways.
© 2015, Digital by Design, Inc. - See Copyright Information
Mad-O-Meter Craft and Learning Activity
This is a great activity for children who have a hard time controlling their anger. Not only does it help them recognize when they are angry, but it also serves as a distraction from whatever has made them mad.
Talk to your angry child and ask him what has made him mad, how he would rate his anger, and what he can do to help himself calm down.
After talking ask your child again how he would rate his anger and let him move the pointer to the level he feels is correct: minimally mad, mildly mad, moderately mad, mostly mad, majorly mad, or mega mad.
If you catch your child begin to get upset, point out the Mad-O-Meter and encourage him to use it. Try to get him to come up with solutions to problem before the pointer gets to the mega mad area of the meter.
To prepare print out the pattern onto card stock (Heavy Paper) and have your child color it if you printed out the black and white pattern. Cut a pointer from another sheet of card stock, pouch a hole in the pointer and in the Mad-O-Meter, and attach the pointer with a brass brad.
© 2015, Digital by Design, Inc. - See Copyright Information
This activity is available to members or as an instant download, in color and in black and white.
Member's
Instant Download Pattern -
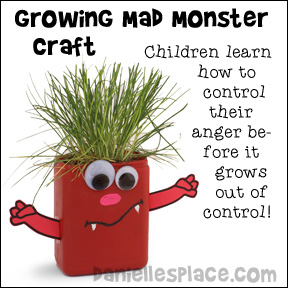
Growing Mad Monster Craft
Children use this Growing Mad Monster to help them control their anger before it controls them.
What you will need:
Plaster Container or Can - The container pictured is a red Hills Brother’s Cappuccino container.
Red Paint (Optional) and Red Paper
Large Wiggle Eyes
Liquid Chalk Markers or Permanent Markers
Glue and/or Tape
Scissors
Fast Growing Seeds Such as Beans, Sprouting Seeds, Clover, Grass, etc.
Soil
How to Make the "Growing Mad" Monster:
1. Before class print out the arm patterns onto red paper or card stock and cut them out. Or have your children design their own monster arms. If you are using a can or other container, you can tape red paper onto the can or spray paint them red before class. Or just leave them their original color. Use paper that matches the container color for the arms.
Member's ![]()
2. Print out labels for the back of the container and cut them apart.
The labels read, "If you feel like your mad monster is beginning to control you, take charge before it does. Use this "Growing Mad" Monster to redirect your anger by styling its hair. Once you have calmed down talk about why you were angry and try to resolve the conflict in a calm manner. ©2015, www.daniellesplace.com" (If make your own labels include the copyright notice.)
3. In class have your children draw a mad face on the container using the chalk markers or permanent markers, glue on wiggle eyes, and tape the arms to the sides of the container.
4. When they are done have them fill the container with dirt and add seeds or a plant.
5. Instruct them to take the "Growing Mad" Monster home and use it when they feel like they might lose control of their anger.
© 2015, Digital by Design, Inc. - See Copyright Information
"Where the Wild Things Are" Movie Discussion Questions - Dealing with Anger

"Where the Wild Things Are" Movie is a great tool to use to teach children about dealing with anger.
More Children's Books About Emotions


Wild Things Treat Cup
What you will need:
9-oz. Paper Cups of Different Colors
Card Stock
Tape
Glue
Colored Paper
Scissors
How to Make the Monster Cup Craft:

1. Draw monster or wild thing faces, arms, and feet onto colored paper or use the patterns provided.
2.Print the patterns onto white paper and then color them with colored pencils and cut them out. Or use colored paper and use opaque colored pencil to color the features.
Member's ![]()
2. Glue the head, arms, and feet onto the cups.
© 2011, Digital by Design, Inc. - See Copyright Information
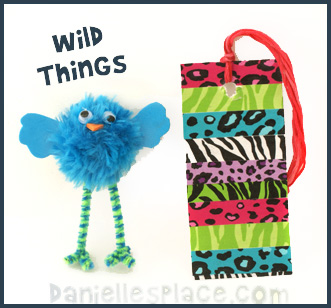
Wild Thing Bookmark and Wild Thing Pompom Bird Craft Kids Can Make
What You Will Need To Make the Wild Thing Bird:
Craft Foam - for the wings
Small Googly Eyes
Scissors
What You Will Need To Make the Bookmark:
Scotch Heavy Duty Packaging Tape
Yarn, Ribbon, or Floss
Hole Punch
How to Make the Wild Thing Bird:
1. To make the Bird's legs and claws cut a striped pipe cleaner in half and bend one end of each half into bird claws.
2. Glue the pipe cleaner legs onto the medium-sized pompom with a low temperature glue gun or tacky glue.
3. Cut wing shapes and a beak from craft foam and glue them to the pom pom.
Member's ![]()
Free Instant Download ![]()
4. To finish glue on googly eyes.
How to Make the Wild Thing Bookmark:
1. Cut bookmark shapes 2" by 5" from card stock or cardboard.
2. Cut 1/2" by 2 1/2" strips from the animal print tissue paper and glue them to the bookmark. Don't worry about the edges of the strips not fitting on the book mark. .
4. When the glue is dry cut off any paper that hangs over the edge of the bookmark to make it straight.
5. Cover the back and front with clear packaging tape.
6. To finish punch a hole in the top of the bookmark. Fold a 12" piece of yarn, ribbon, or floss in half and insert the folded end into the hole in the bookmark pulling it through about one inch. Bring the other end of the folded ribbon or yarn over and insert it through the folded, looped end that is in the bookmark. Pull it through the loop until it is tight.
Free Sock Monster Match Card Game
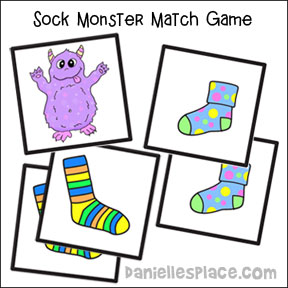
Children of all ages will love this game. Match up the socks and try to figure out which sock the sock monster ate, but be careful that the monster doesn't eat you!
What to do:
Print out the card patterns onto card stock (Heavy paper) and cut them out.
Member's ![]()
Free Digital Download ![]()
To play:

1. Remove the two sock monster cards, place all the cards in a pile and mix them up. Remove one card from the pile without looking at it and place it to the side. Replace the sock monster cards and mix them up again.
2. Place the cards (except the one you placed aside) face down in rows in the middle of the table without looking at them.
3. Players take turns turning over two cards trying to find socks that match. If a player gets a match, he keeps the cards and takes another turn until he doesn't make a match. Then the next player takes a turn.
4. If a player turns over one sock monster during his turn, he may try to guess what sock the monster ate (the card that was removed from the deck) by describing the sock. If the player guesses, he then turns over the card that was placed aside at the beginning of the game to see if he is correct. If he is correct, he receives 40 extra points, and the game continues until all the cards have been picked up. If he is wrong, he loses all his points, and that round is over.
5. If a player turns over both sock monster cards on his play, that round is over and that player loses all his points. Collect all the cards, add up the scores for that round, and start another round. Players receive 10 points for each card they collect.
6. Keep playing rounds until one player reaches 200 points.
© 2000, Digital by Design, Inc. - See Copyright Information
Sock Monster Sock Dolls
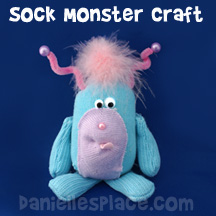
Learn how to make each sock monster out of children's socks.
Go to the Sock Crafts and Learning Activities Page for directions and patterns.
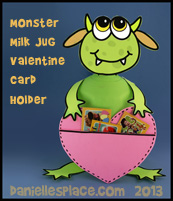
Milk Jug Sock Monster Sock Caddy Craft for Kids
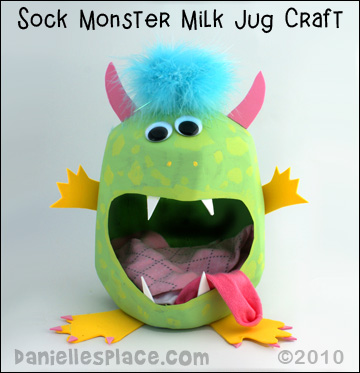
These cute little sock monsters are great for storing your missing socks and things you pull out of pockets before washing clothes.
What you will need:
Plastic Milk Jug
Craft Foam
Low-temp. Glue Gun
Scissors
Acrylic Paint for Plastic and Plastic Primer Paint or Patio Paint
Googly Eyes
Feather Boa
Pompom
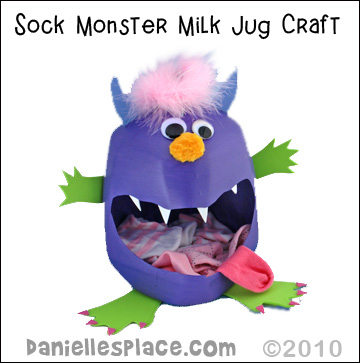
How to Make the Milk Jug Monster:
1. Wash out and let your milk jugs dry.
2. Cut a hole in the jug on the two sides opposite the handle of the jug for the mouth.
3. Spray paint or use acrylic paint to paint the entire jug.
4. Glue a piece of feather boa to the lid of the jug for hair.
5. Cut feet, arms, teeth and horns from craft foam and glue to the jug as shown.
6. To finish glue on googly eyes.
© 2010, Digital by Design, Inc. - See Copyright Information
Wild Things and Monster Crafts on Other Pages