Easter Crafts and Learning Activities for Kids
How to Make Easter Crafts and Activities
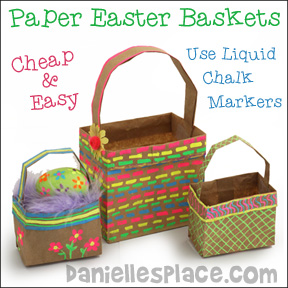
Lunch Bag Easter Baskets
Kids are going to have so much fun making these super cute and inexpensive paper bag Easter baskets! With bright and colorful chalk markers, they can let their creativity shine. To add even more flair, they can decorate with fun stickers, sparkly glitter, and pretty ribbons. Once the baskets are all decorated, they’ll love placing a Easter eggs inside, resting it on a cozy bed of vibrant Easter straw. This fun project is a great way for little ones to express themselves and get excited for the holiday!
What you will need:
Paper Lunch Bags - 4 7/8" x 3" x 10"
Craftycroc Liquid Chalk Markers
Glue and Tape
Decorative Items
How to Make the Paper Bag Easter Baskets:
1. Cut the top quarter of the bag.
2. To make the baskets carefully fold down the top one inch and then one inch again.
3. Use the cut off top part of the bag to make the basket handle. Cut it so it is in a long strip and then fold in into a long thin strip. Cut the strip to the length you want for the handle and glue it to the basket.
4. Use decorative items to embellish the basket such as flower, buttons, and lace.
©2015, Digital by Design, Inc - *See Copyright Information
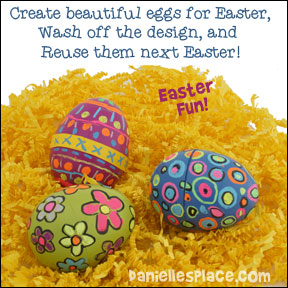
Reusable Easter Egg Fun
Children will love decorating these eggs! There is no preparation and no mess, and best of all you can reuse them over and over again.
What you will need:
Candy and Treats to Place in the Eggs
How to Make the Eggs:
1. Place candy and treats in the eggs and close them tight.
2. Use the liquid chalk markers according to the directions to decorate the eggs. When making designs let the chalk dry before adding more chalk. Work around the egg from one side to the other trying not to smudge what you have already worked on.
If you make a mistake or don't like your design, use a wet cloth to wipe off the design and start again.
©2015, Digital by Design, Inc - *See Copyright Information
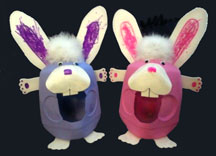
Easter Bunny Cup Craft

What you will need:
Two 9 oz. White Paper Party Cups
One 9 oz. Green Paper Party Cup
White Card Stock (Heavy Paper) or Craft Foam
Pink Pompom for Nose
Candy and Easter Basket Grass
Scissors
Pink Paint or Colored Pencil
Watch a "View it and Do it" video for this craft:
How to Make the Bunny Cup Craft:
1. To make the body cut the rim off one of the white paper cups. Cut slits on both sides of the cup about 2 1/4" long towards the bottom of the cup. Press the back of the cup towards the front of the cup so that the back overlaps the front.
Staple the back at the sides so they overlap the front as shown in the diagram.
2. To make the head cut the rim off another cup and then cut the top off so that the cup is shorter at the sides. Glue the head to the body at the back using a low temperature glue gun.
3. Cut arms, legs, and ears from card stock and glue them to the cup.
(A pattern for the arms, legs, and ears are available to members.)
Members 
Instant Digital Download - 
4. To finish glue on pink pompom on for the nose, google eyes, and part of a feather boa in front of the ears. Use a marker to draw the mouth and whiskers.
5. To make the basket cut the green paper cup in half, punch tiny holes in the side and fasten a pipe cleaner to the sides to make the handle.
©2013, Digital by Design, Inc - *See Copyright Information
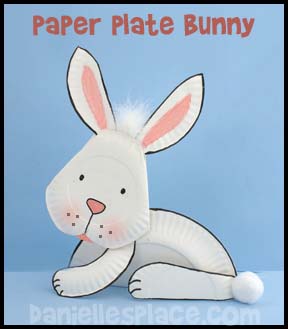
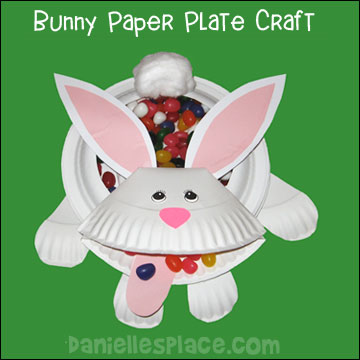
Easter Bunny Paper Plate Craft
What you will need:
One 9-inch Paper Plate
Five Snack-sized Paper Plates
Cotton Ball
White Feather Boa or Feathers
Glue
Scissors
Marker Paint
How to Make the Paper Plate Easter Bunny:
1. Fold the 9-inch paper plate in half and glue it closed.
2. Cut arms, legs, and ears from snack-sized paper plates. Patterns for this craft are available to members. Print out the patterns and use them as templates to cut from paper plates. Glue the arms and legs to the large folded paper plate as shown in the picture.
Members
Instant Digital Download -
3. To make the head fold the sides of two snack-sized paper plates. Cut a mouth shape out of one of the paper plates and then glue them together to make the head.
4. Glue the ears and a piece of feather boa to the top of the head. Paint the ears and head.
5. Glue the arms and legs to the body paper plate as shown in the picture.
6. To finish glue a cotton ball on for the tail.
©2013, Digital by Design, Inc - *See Copyright Information
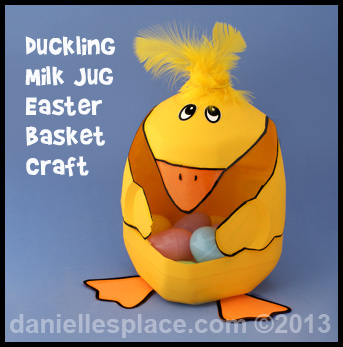
Duckling Easter Basket Milk Jug Easter Craft Kids Can Make
What you will need:
Empty Plastic Milk Jug
Orange Craft Foam or Poster Board
Yellow and Orange DecoArt Patio Paint
Scissors
Yellow Feathers
Valspar Plastic Primer Spray Paint or Krylon Clear Plastic Primer Paint - If you are using the Acrylic Patio Paint
Yellow Krylon Fusion Spray Paint or other Spray Paint Made for Plastic
Yellow Feather Boa or Feather Boa
How to Make the Milk Jug Duckling Craft:
1. To make it easier to peel off the label on the outside of the jug fill the jug up with hot water and let it set for a few minutes. Then peel it off. Wash and dry the jug. To remove the inked numbers rub a dry erase marker over the numbers until they smear and then wipe them off with a paper towel.
2. Draw a duck head shape and wings on the milk jug with a dry erase marker on the opposite side from the handle. Cut out the head shape and wing shapes and and around the front about 2 1/2" from the bottom of the milk jug as shown in the picture. (Patterns for the duckling's head, wings, and feet are available to members.)
Members
Instant Digital Download -
3. Paint the duck's face and beak with acrylic paint. When it dries paint on the eyes and nose.
4. Cut the duck's feet from craft foam and glue to the bottom of the jug.
©2012, Digital by Design, Inc - *See Copyright Information

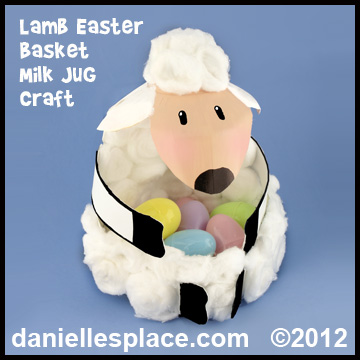
Lamb Easter Basket Milk Jug Easter Craft Kids Can Make
What you will need:
Empty Plastic Milk Jug
White Craft Foam or Poster
Board
Scissors
Cotton Balls
Valspar Plastic Primer Spray Paint or Krylon Clear Plastic Primer Paint - If you are using the Acrylic Patio Paint
How to Make the Lamb Easter Basket Milk Jug Craft:
1. To make it easier to peel off the label on the outside of the jug fill the jug up with hot water and let it set for a few minutes. Then peel it off. Wash and dry the jug. To remove the inked numbers rub a dry erase marker over the numbers until they smear and then wipe them off with a paper towel.
2. Draw the lamb's head shape on the milk jug on the opposite side of the handle. Cut out the head shape and behind the ears then down the sides of the milk and and around the front about 2 1/2" from the bottom of the milk jug as shown in the picture. Cut arm and hoof shapes from with craft foam.
(Patterns for the lamb's head, arms, and hooves are available to members.)
Members
Instant Digital Download -
3. Spray paint the jug with primer paint and then paint the lamb's face and ears with acrylic paint. When it dries paint on the eyes and nose.
4. Cut arms and hooves from the craft foam and paint the hooves black.
5. Glue the arms to the jug and then glue on the cotton balls. Cut the cotton balls in half before gluing them on so you don't have to use too many.
6. To finish glue on the hooves.
Designed by Danielle Warvel
©2012, Digital by Design, Inc - *See Copyright Information
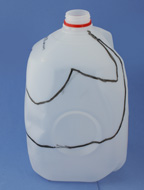
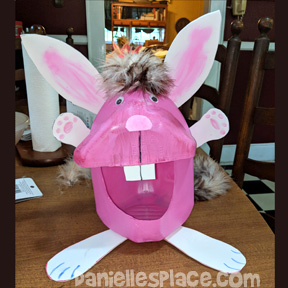
Easter Bunny Milk Jug Easter Basket Craft Kids Can Make

If you and your children enjoy milk together, why not transform those empty milk jugs into something magical? This Easter-themed craft invites you to upcycle, creating delightful bunny-shaped baskets filled with joy. With just a few extra supplies, you can inspire creativity and togetherness while preparing to collect eggs and holiday goodies. Embrace the spirit of Easter through this fun and imaginative project!
What you will need:
Two Empty Plastic Milk Jugs
White Craft Foam or Poster
Board
Low Temp Mini Glue Gun
Scissors
Valspar Plastic Primer Spray Paint or Krylon Clear Plastic Primer Paint
How to Make the Bunny Milk Jug Easter Basket Craft:

1. To make it easier to peel off the label on the outside of the jug fill the jug up with hot water and let it set for a few minutes. Then peel it off. Wash and dry the jug. To remove the inked numbers rub a dry erase marker over the numbers until they smear and then wipe them off with a paper towel.
2. Cut the bunny's muzzle from the bottom of one of the milk jugs as shown in the picture. Spray paint the muzzle with primer paint. When the primer paint is dry paint the muzzle with the acrylic paint.
3. Cut an oval shape in the opposite side from the handle as shown in the picture. Spray paint the jug with plastic primer paint. When the paint is dry paint the jug with the acrylic paint.
4. Glue the muzzle to the top of the jug covering part of the mouth.
5. Cut arms, feet, ears, and teeth shapes from white fun foam or poster board. Paint the ears and the paws on to the shapes and then glue them to the jug. (Patterns for the arms, ears, and feet are available to members.)
Members
Instant Digital Download -
6. To finish glue on the googly eyes and part of a feather boa to the top of the jug for hair.
7. See how to use this craft as a reading and spelling game. Go to the Educational Crafts page for ideas.
©2012, Digital by Design, Inc - *See Copyright Information
Easter Bunny Milk Jug Craft Made by Followers
Send us pictures of your milk jug creations and we will publish them here!
Milk Jug Bunnies
See instructions above!
Beth Evans sent in this pictures of the bunny she made.
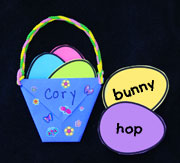
Preposition Easter Egg Hunt, Writing Activity, and Bulletin Board Display
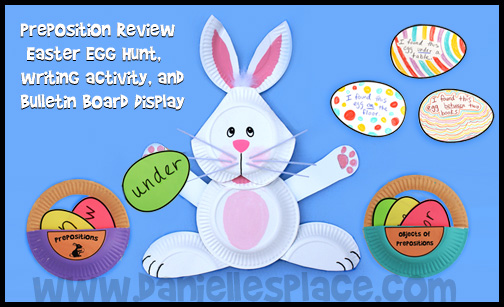
Use this Easter display to review prepositions, vocabulary words, or for other learning activities.
Also available as an instant download to non-members for $2.00 including: Bunny pattern, preposition basket labels, and egg shapes.
Members
Instant Digital Download -
What you will need:
Regular-sized Paper Plates, White Card Stock, White Pipe Cleaners, Paint, Scissors, Feather Boa or Feathers, and Glue
What to do:
1. To make the head fold down two sides of a paper plate about one inch wide and six inches long. Fold another paper plate the same way. Cut the mouth shape out of one of the paper plates. (Pattern available to members, above.)
2. Draw a face on the plate and poke small holes for the whiskers. Cut pipe cleaners in half and stick them in the holes. Tape them to the back of the plate. (Patterns for the eyes, nose, and mouth are available to members, above.)
3. Glue the two head paper plates together to make the head and glue it to the top of another paper plate.
4. Cut feet shapes, arms, and ears shapes from other paper plates and glue them to the body. (Patterns are available to members, above.)
5. Paint the ears, mouth, paws, and belly.
6. To finish glue part of a feather boa or feathers to the top of the head.
7. To make the baskets fold a paper plate in half and cut out half the center of a paper plate. Cut another paper plate in half and glue it to the front of the cut paper plate to make a basket. Paint the basket. Write "Prepositions" on one plate and "Objects of Prepositions" on the other, or use the printable pattern. (Available to members, above.)
Jelly Bean Poem with Frame and Jelly Bean Man Easter Craft

What you will need:
Color Paper or Printer that Prints in Color, Glue, Scissors, Construction Paper and Jelly Bean Stickers (Optional)
How to Make the Jelly Bean Picture Frame and Jelly Bean Man:
Member's
Instant Digital Download - Includes: Jelly Bean Poem, Jelly Bean Shapes, Jelly Bean Man Coloring Sheet, and Jelly Bean Man Craft.
1. Print out the poem pattern and cut it out, or print the following poem on a piece of paper.
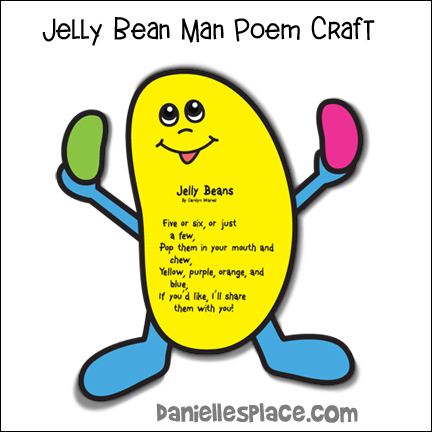
Jelly Beans
By Carolyn Warvel
Five or six, or just a few,
Pop them in your mouth and chew,
Yellow, purple, orange, and blue,
If you'd like, I'll share them with you!
2. Glue the poem onto the center of a piece of construction paper.
3. Print out the jelly beans patterns. Print out the black and white pattern onto different colors of paper to save on expensive printer ink.
Member's
4. Cut out the jelly beans and glue them around the frame.
5. Use the same poem to make a Jelly Bean Man.
©2007, Digital by Design, Inc - *See Copyright Information
Note - It is illegal to publish this poem on any other web site without permission, even if you include the author's name.
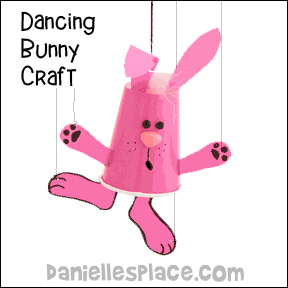
Free Dancing Bunny Cup Marionette Easter Craft Kids Can Make
What you will need:
Matching Color Card Stock (heavy paper)
9-oz. Party Cup
Eyes
Nose
Black Marker
Glue, Tape, Yarn or String, Craft Stick, and Heavy Duty Thread
Feather Boa
How to Make the Marionette:
1. Print out the pattern onto card stock (heavy paper) that matches your cup color. Cut out the patterns.
Member's ![]()
Free Digital Download
2. Punch a small hole in the middle of the bottom of the paper cup. Cut a piece of yarn or string about two feet long. Poke one end of the string through the hole to the inside of the cup. Put your hand inside the cup and pull the string down.
3. Tie a big knot about five inches from the end of the string. Pull up on the string from the outside of the cup to bring the knot up against the bottom of the cup, make sure it won't come out.
4. Punch a hole in the feet pattern on the circle and stick the pattern up inside the cup to the position you would like it to hang. Note where the hole meets the string and tie the feet to the string at that point.
5. Glue or tape on the hands and ears. Draw a bunny face on the cup or glue eyes and a nose on the cup.
6. Tie the other end of the string to the middle of a craft stick about six inches from the bottom of the cup.
7. Punch tiny holes in the toe of each foot and tie a piece of thread to the feet. Tie the other end of the thread at each end of the craft stick. Make sure the thread is long enough so that the legs hang down freely.
8. Move the ends of the craft stick up and down to move the feet.
©2012, Digital by Design, Inc - *See Copyright Information
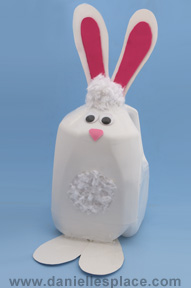
Easter Bunny Milk Jug Craft
What you will need:
DecoArt Patio Paint or White Spray Paint Made for Plastic
Empty Milk Jug
White Pink Craft Foam or Poster
Board
Scissors
Scissors
Large White pompoms or Cotton Balls, and White Yarn.
Valspar Plastic Primer Spray Paint or Krylon Clear Plastic Primer Paint
How to Make Milk Jug Easter Rabbit:
1. To make it easier to peel off the label on the outside of the jug fill the jug up with hot water and let it set for a few minutes. Then peel it off. Wash and dry the jug. To remove the inked numbers rub a dry erase marker over the numbers until they smear and 2. Fill the bottom of one milk jug with sand to give it some weight. then wipe them off with a paper towel.
3. Cut ear and feet shape from white fun foam and glue them to the milk jug.
4. Spray paint the entire milk jug with plastic primer paint including the feet and ears. When the primer paint is dry spray paint or use acrylic paint to paint the jug white.
5. Cut out a pink nose and inner ear shapes and glue them to the milk jug when the paint is dry.
6. Glue on some googly eyes.
7. To finish glue a white pompom to cover the lid of the milk jug and glue some cut up pompom or white yarn to the stomach area.
Created by Corrin Burner
©2012, Digital by Design, Inc - *See Copyright Information
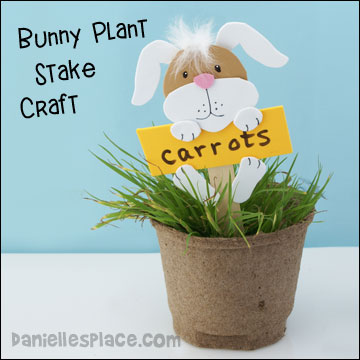
Foam Easter Rabbit Plant Stake Easter Craft for Kids
What you will need:
Jumbo Craft Stick, Craft Foam, Paper, Scissors, Paint (optional), Permanent Marker, and Glue
How to Make Foam Easter Rabbit Plant Stake:
1. Paint the craft stick and let it dry.
2. Draw a picture of a bunny on a piece of paper and then use the picture as a pattern to cut the shapes from craft foam. Glue the pieces together.
Members
Or as an Instant Download for $2.00 Including: A colored Pattern, a black and white pattern, and pattern template to use with craft foam:
Instant Digital Download -
3. Cut a piece of craft foam 4" x 1 1/2" for the sign. Glue the sign to the craft stick and then glue the head and hands on the top of the sign. Glue feet to the bottom of the sign and the craft stick.
Also available - Color and cut picture or a picture that is already colored that can be glued on a craft stick.
©2010, Digital by Design, Inc - *See Copyright Information
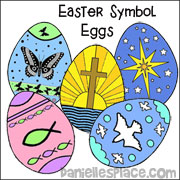
18 Colorful Easter Egg Printables
These colorful Easter eggs can be used for many different purposes.

1. Play Match Game
Print out two copies onto cards stock, and use them to play a Easter match game.
2. Have an Easter Egg Hunt
Hide them in your house or outside and have an Easter egg hunt.
3. Make Crafts
Use them to decorate Easter Crafts such a frame for an Easter picture.
4. Egg Banner
Make an egg banner by stringing the eggs together.
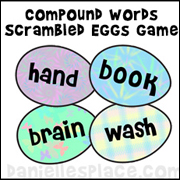
5. Egg Scramble
Use the eggs to review compound words. Write one part of a compound word on one egg and the other part on another egg. Have your children try to match up the eggs to make compound words.
What you will need: Card stock (Heavy paper) or pretty scrap booking paper, marker, and. scissors.
How to make: Cut egg shapes from the paper and write words on the eggs that when put together will make a new compound word. (A printable pattern is available to members.)
To play: Give each child a set of cards and see who can "unscramble" the eggs first.

See Educational Crafts and Activities for Kids Page for more ideas.
Members
This pattern is also available as an instant download for $1.00. It includes a pattern of 18 colorful eggs, and three sheets of Compound Words to play the Scrambled Eggs game.
Instant Digital Download - 18 Different Designs
©2010, Digital by Design, Inc - *See Copyright Information
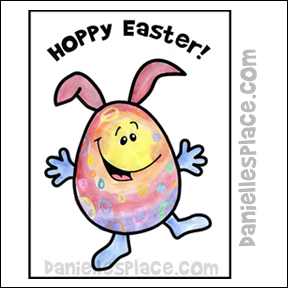
Free Hoppy Easter Coloring Sheet
Celebrate Easter with these fun and creative Easter egg printouts featuring a joyful dancing Easter bunny. Children can use white crayons or wax candles to draw their own unique designs on the egg shapes. Then, by applying watercolor paints over the drawings, the designs will beautifully pop out, resulting in a stunning and personalized Easter print. Enjoy this engaging activity that combines art and the spirit of the holiday!
What you will need:
Crayons
Water Color Paint
What to do:
1. Print out the pattern and make copies if your printer uses water soluble ink.
Member's ![]()
Free Instant Digital Download ![]()
2. Have your children draw patterns on the eggs with crayons and then paint over the crayon. The water paint will not stick to the crayon.
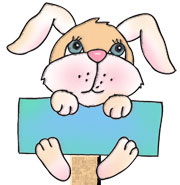
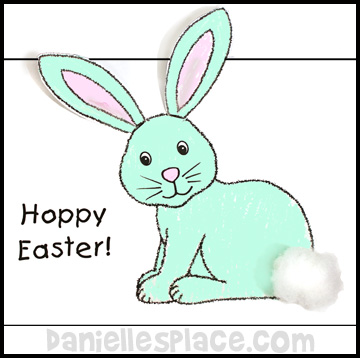
Hoppy Easter Bunny Activity Sheet
What you will need:
Paper
Crayons
Cotton
Tape and scissors
How to Make Hoppy Easter Bunny Activity Sheet:
1. Draw a picture of a bunny without the ears and tail.
Member's ![]()
2. Draw the ears on another sheet of paper, color and cut them out.
3. Cut slits on the bunny's head where the ears should attach about 1/2" smaller than the end of the bunny's where the ears. Fold the end of the ears and stick them in the slits and tape them to the back of the picture where they come through the slits.
4. Glue on a cotton ball for the tail.
©2009, Digital by Design, Inc - *See Copyright Information
Jelly Bean Bunny Easter Craft for Kids
What you will need:

Small Plastic Bags, 3" x 5" (You can get these at craft stores)
Jelly Beans
Card Stock (Heavy Paper)
Scissors
Stapler
Colored Pencils
Tape
How to Make Jelly Bean Bunny Easter Craft:
1. Print out the patterns, color them, and cut them out.
Members
Instant Digital Download -
2. Fill your bag with jelly beans leaving about 1 1/2" inches at the top empty. Fold in the top sides of the bag to make it skinner at the top about one inch wide. Staple the top closed.
3. Tape the bag with the jelly beans inside to the top of the leg pattern as shown in the picture above. Tape the arms and head onto the bag as shown. To finish tape the "Hoppy Easter" sign to on of the bunny's arms.
©2008, Digital by Design, Inc - *See Copyright Information
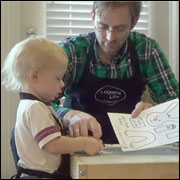
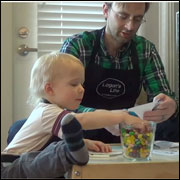
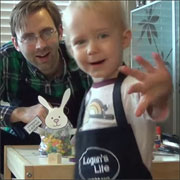
![]()
With his mouth stuffed with jelly beans two-year-old Logan helps his dad make the jelly bean bunny craft. This is a great craft for preschool children if they have lots of parental supervision. Talk about colors, taste, and work on counting skill while making this craft with your child. Let them help you fill up the bag to work on their fine motor skills.
Watch the video of Logan making this craft with his dad on Logan's Life
Paper Plate Easter Bunny Candy Dish Craft for Kids
What you will need:
Dinner-sized Heavy Duty Paper Plates, Regular Paper Plates, Pink Paper, White Card Stock, Heavy Paper,Cotton Balls, Jelly Beans
How to Make Paper Plate Easter Bunny Candy Dish:
1. Cut the center out of a heavy duty paper plate and glue it to another heavy duty paper plate, top to top, to make the dish.
2. To make the bunny face, fold a regular paper plate in half. Mark off 3 1/4" from the sides of the plate at the fold as shown in the picture on the right.
3. Cut 3 1/4" slits on each side of the folded paper plate as shown in the picture on the left.
4. Open up the plate and draw lines at right angles to the slits from the 3 1/4" marks on the folded edge of the paper plate about 3" long as shown in the picture at the right.
5. Place glue near the edge of the drawn lines as shown in the picture.
6. Bring the cut edges over to line up with the drawn lines and press down to secure as shown in the picture on the left.
7. The back of the bunny's head should look like the picture on the right when you are done.
8. Cut a nose and tongue from pink paper and glue to the front of the head.
9. Cut ears from white card stock and inner ears from pink paper, or color the inner ears pink. Glue them to the back of the head as shown in the picture.
10. Cut arms and legs from extra paper plates or white card stock. Glue them to the bottom of the candy dish paper plate as shown in the picture at the top.
©2005, Digital by Design, Inc - *See Copyright Information
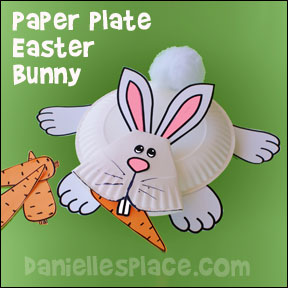
Paper Plate Easter Bunny Craft and Learning Activity for Kids
What you will need:
Dinner-sized Heavy Duty Paper Plates
Regular Paper Plate
Orange Paper
White Card Stock (Heavy Paper)
Cottonball
Scissors and Glue
How to Make Paper Plate Easter Bunny Craft and Learning Activity:
1. Follow the directions above for the Candy Dish except do not cut out the center of the dish. (A pattern for the ears, feet, nose, eyes, and teeth is available to members.)
Member's ![]()
2. Cut out carrot shapes about 5" long from orange paper. (A pattern for the carrots is available to members.)
Member's ![]()
Learning Activities to Go with this Craft:
Science
1. What do Bunnies Like to Eat? - Go to the library or pet store and find out what bunnies eat.
2. Rabbit or Hare? - Find out what the difference is between a rabbit and a hare.
Reading

1. Read "It's Not Easy Being a Bunny" by Marilyn Sadler - This is a great story to help your child learn to be thankful for what he has and who he are. In the story P.J. Funnybunny was sad because he didn't like being a bunny. He had to eat cooked carrots every day, and he had too many brothers and sisters. He decided he didn't want to be a bunny any more. He tried being a bear, but living with the bears wasn't very exciting because they slept all winter long.
He tried being a bird, a beaver, a pig, and a moose, but none of them worked out. At the end he decides what he really wants to be is a bunny, and it's not so bad being a bunny after all.
After reading this story help your child think of other animals that P.J. Funnybunny might have tried living with. Discuss what he would have liked about living with those animals and what he wouldn't have liked. Ask your child if he had a to be an animal, what animal would he be. What would he like about being that animal and what would he dislike.
2. Make Up a Story about a Bunny - Name your bunny and make up stories about it. Act out the stories using the carrots and the bunny.
Math
1. Math Stories - Make up stories about the bunny and how he lost, gave away, or found some carrots, and have your child figure out how many carrots the bunny has left. For example, you may say, "One day Hoppy the Bunny gathered a bunch of carrots into a big pile. He looked at the pile and wondered if he had enough carrots for his family. Can you help Hoppy count his carrots?" Or you can say, "Hoppy had ten carrots in his mouth. On his way home he got hungry and stopped to eat some. How many carrots did Hoppy eat?" Have your child count how many carrots are left in Hoppy's mouth and figure out how many he ate.
2. Deliver Carrots - Make a list of the people in your family or neighborhood with the number of carrots each person should receive next to his of her name. Have your child help the bunny deliver the correct number of carrots to each person. You can use candy, cards, or notes instead of the carrots. Or you can write little notes on the carrots.
3. Feed the Bunny Game - Write numbers, letters, words, shapes or math fact on the carrots. Tell your child, "Bunny would really like to eat carrots with the letter "a" on them. Can you find a carrot with the letter "a" and feed the bunny?" If your child feeds the bunny the wrong letter, make a yucky sound and have the bunny spit it out. Keep playing until all the carrots have been eaten.
4. How Far Can Bunny Hop? - Pretend your bunny is hopping and help your child measure how far he can hop. Have your child jump as far as he can and measure the distance of his jump.
Also see the Educational Crafts Page for more learning game ideas and recommended books about bunnies.
©2004, Digital by Design, Inc - *See Copyright Information
Folded Paper Easter Bunny
This little bunny can be used as a craft or for educational purposes.

What you will need:
Scissors
Color Paper
Tape
Glue
Markers
Cotton Balls
How to Make the Folded Paper Easter Bunny Craft:
1. Print out the patterns:
Members
Instant Digital Download -
2. Cut out the body and head pattern along solid lines. Cut out the solid part of line D up to the dotted lines (shown in red). Fold down on the two center lines (line D and line E) and fold the back legs up (lines C).
3. Bring the front legs together by crossing one leg over the other (Bring A over B) and match the cut line with the folded dotted line as shown in the picture. (Note: diagrams do not match patterns for the bunny exactly.)
4. Glue the head to the front at Point A. Glue on a cotton ball for the tail. Fold down one ear.
Easter Bunny Learning Activities
1. Make five or more bunnies and hide a piece of candy underneath one of the bunnies. Let your children take turns picking up a bunny to see if they can find a piece of candy. Make the game educational by writing letters, numbers, words, math problems etc. on each bunny. Have your children read the letters, numbers, words, or do the math problem before they can turn it over to see if there is candy underneath.
2. You can also have your children practice placing the bunnies in alphabetical order or in numerical order.
3. Have your children name their bunnies and write a story about them
©2007, Digital by Design, Inc - *See Copyright Information
Easter Crafts Page 2
Easter Crafts for Sunday School on Other Pages
Go to the Easter Bible Themes Page for More Easter Crafts