Ladybug Crafts for Kids
How to Make Crafts and Activities Relating to Ladybugs
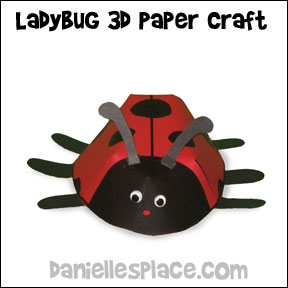
3D Paper Ladybug Model Learning Activity
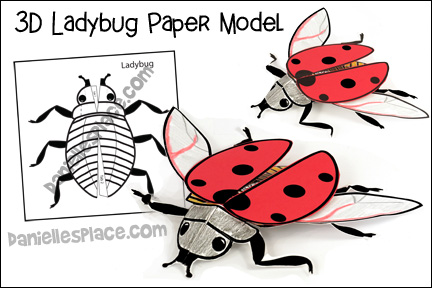
This hands-on learning activity is an excellent way for children to learn about ladybugs. Children study ladybugs and then color the pattern to match what they see online to make a realistic 3D ladybug paper model. This model includes the head, thorax, abdomen, eyes, pronotum, legs, tibia, tarsal claw, wings, and elytra. Children use all their senses to make this model. Coloring, cutting, gluing, folding, and assembling this model helps children improve their manual dexterity and will help them learn more and remember longer what they have learned.
Member's 
Instant Digital Download - ![]()
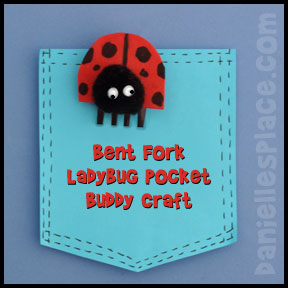
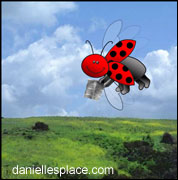
Bent Fork Ladybug Pocket Buddy Craft for Kids
What you will need:
Cheap Black Plastic Forks (If you can't find black forks, you can just use the white ones and color the tines with a black Sharpie Marker.) The cheap ones work best because they are easier to work with.
Black Sharpie Permanent Marker
Red Craft Foam Sheets or Red Card Stock (Heavy Paper)
Low Temp Mini Glue Gun or Two-sided tape, and Elmer's Tacky Glue
Utility Lighter with Long Handle

How to Make the Ladybug Pocket Buddy:
1. Hold a plastic fork in your left hand (if you are right-handed) so that it is parallel to the table with the tines facing down as shown in the diagram to the right.
2. Hold the lighter with your right hand underneath the fork near the top of the handle where the head of the fork meets the handle. (See diagram to the right.) *Do not hold the lighter too close to the fork because it could catch fire. You only want to heat it up. (This part of the craft is for adults only. Children should not use lighters.) When the fork starts to melt and bend remove the lighter and bend the head of the fork down so that it meets the handle. Hold it in place for about ten seconds until the plastic hardens.
3. Break off the tines about halfway up by placing your fingernail where you want the break and bend the part under your finger up so that it snaps off. Cheap forks are very easy to break this way. If you have thicker forks you may want to use some pliers.
4. Cut a piece of red or yellow craft foam in a half circle shape as shown in the picture. It should be big enough to cover your fork.
5. Use a permanent marker to draw in the spots. Glue the body to the fork with a low temperature glue gun or two-sided tape.
6. Glue on a pom pom for the head and wiggle eyes.
7. Stick the handle of the fork in your pocket or over your clothes and let the ladybug hang over.
©2013, Digital by Design, Inc. - See Copyright Information
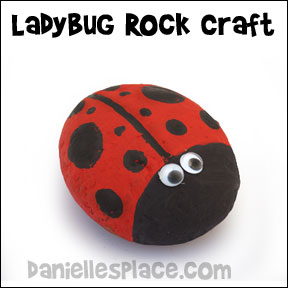
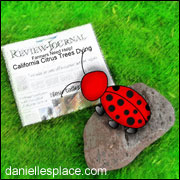
Ladybug Rock Creatures Craft for Kids
What you will need:
Smooth Beetle Bug-shaped Rocks (we got ours from a landscaping company)
Red and Black Acrylic Paint Patio Paint (if you are using them outside)
Chenille Stems for Antennas (Optional)
Wiggle Eyes (any size you want to use),
Clear Spray Paint (if you are going to use them outside, optional)
How to make the Ladybug Rock Craft:
1. Wash the rocks removing all dirt particles let dry.
2. Paint and let dry.
3. When completely dry spray with a clear spray paint if you are going to use them outside.
4. Glue on Chenille antennas and eyes.
Also try making other insects, spiders, and bugs using the same techniques.
©2004, Digital by Design, Inc. - See Copyright Information
Ladybugs with Movable Wings Craft for Kids
What you will need:
Black and Red Poster Board
Two Paper Fasteners (the shorter ones)
Chenille Stems for Antennas (Pipe Cleaners)
Pom Poms for the Antennae
How to Make the Ladybug Craft:
1. Print out the free ladybug pattern and cut out.
Member's ![]()
Free Instant Download ![]()
2. Draw the outline of the pattern on black poster board and cut out.
3. Cut the head off the pattern and trace onto red poster board.
4. Cut the red circle in half to form the wings. Cut out small circles from the black poster board and glue to the wings.
5. Position the wings on the body and poke holes through the wings and body in the place indicated on the pattern with something sharp.
6. Poke paper fasteners through the holes so that the wings will move up and down. Glue on mouth, eyes, nose and antennae.
©2004, Digital by Design, Inc. - See Copyright Information
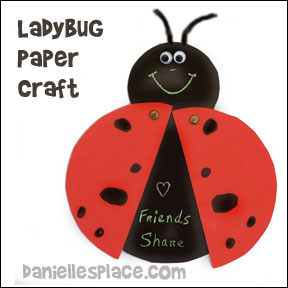
Paper Ladybug Craft for Kids
How to Make the Ladybug Craft:
1. Print out the ladybug pattern onto red or yellow paper and cut the pattern out on the solid lines. Also cut the solid white line on the face.
Member's ![]()
Free Digital Download ![]()
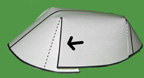
2. Draw spots on the ladybug, then glue the pattern together at the darts. To assemble, glue the darts so that the solid-line sides of the darts overlap to cover the dotted-line sides of the darts (See diagram).
3. Have your children cut out six legs and antenna to glue onto the body. To finish, glue on two googly eyes to the face.
©2004, Digital by Design, Inc. - See Copyright Information
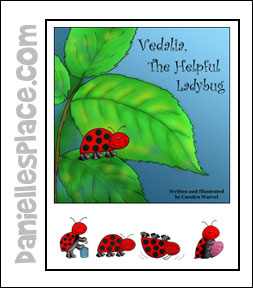
"Vedalia, The Helpful Ladybug" Printable Book for Children
Printable Book
In the early 1890's California farmers discovered a serious problem with their citrus trees. Tiny little creatures called cottony cushion scale were destroying their trees. The cottony cushion scale had inadvertently been imported from Australia. Australian farmers didn't have a problem with the insects because they had a natural enemy, the Vedalia ladybug beetles.
Australia sent hundreds of ladybugs to California to help the farmers control the cottony cushion scale. Within two years the ladybugs had eaten enough cottony cushion scale to save the farmers' trees.
"Vedalia, The Helpful Ladybug" is a children's story based on this real life event. Vedalia, a clumsy little ladybug, wants more than anything to follow God's teaching and to be helpful, but she never seems to get things right no matter how hard she tries. One day she discovers a newspaper article that tells about the problem in California. She realizes that she can help the farmers. She and her family become one of the over 500 ladybugs that are sent to California to help save the farmers' trees.
The printable pages to this book is available to members.
Member's 
Instant Digital Download -

©2007, Digital by Design, Inc. - See Copyright Information
Free Helpful Ladybug Activity and Color Sheet

This activity sheet can be used for many purposes:
1. Reward Poster
Have your children color in a spot each time they accomplish a task. This activity sheet was designed to go along with the printable book, "Vedalia, The Helpful Ladybug." The activity sheet can be used to help your children learn to be helpful. Each time they do something to help others, they can color in one spot on the ladybug.
2. Writing Numbers and Counting
Have your children count the ladybug's spots as they write numbers on each spot.
3. Review Numbers, Letters, or Words with a Matching Game
Help children learn their numbers, letters, or new words with a matching game. Cut small circles the same size as the ladybug's spots from card stock. Write letters, words, or numbers on the circles. Make enough copies so that you have a set for each child. Write matching letters, numbers, or words on the ladybug sheets. Place the circles facedown on a table in front of your children. Have your children take turns turning over a circle. The children should place the circles they turned over on top of the matching spot on their ladybug pictures. If they already have a circle covering the matching spot, they should turn the circle back over and try again on their next turn. The child who covers all his circle first wins.
4. Review Numbers, Letters, or Words Bingo Game
Write letters, numbers, or words in the spots on the Ladybug Activity Sheets. Use different combinations of letters, numbers, or words on each sheet. Write all the letters, numbers, or words you have used on the activity sheets on small circles cut from card stock. Put them all in a bag or box and mix them up. Pick one at a time out of the bag and call out the letter, number or word written on the circle. The children should place a marker such as a button on the spot on their ladybug with the matching letter, number, or word. If they don't have that letter, number, or word on their ladybug, they do nothing. The child who covers all his or her spots first wins.
Member's ![]()
Free Printable
©2004, Digital by Design, Inc. - See Copyright Information
Ladybug Card Games
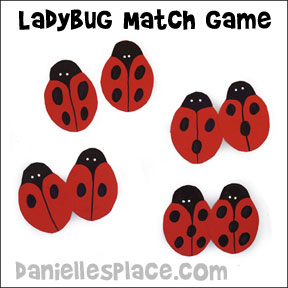
Ladybug Match Game:
Make ladybugs from red and black poster board. Draw spots on the ladybugs so that you have two cards with the same pattern on each. Let the children help you match up the ones that look the same.
Compound Words Ladybugs Game:
Use the cards from the Compound Word Bug Game above.
Mix up the cards and have your children pick two cards from each color group. Have them put them together to make a new type of bug, and draw a picture of the new type of bug.
Memory Games:
Make all the ladybug cards look different and play a memory game. Write math problems on half the cards and the answers on the other half. Have your children play concentration. You can also use these cards to review vocabulary words or any other things you happen to be teaching.
©2004, Digital by Design, Inc. - See Copyright Information
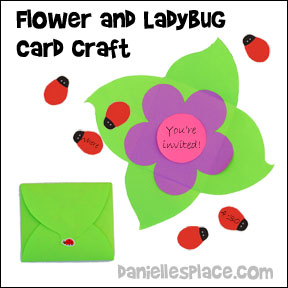
Flower Card or Invitation with Ladybug Confetti
Use these cute cards to send out invitations to your bug-themed birthday party. Add ladybug confetti and little notes on larger ladybugs that will fall out when the card is opened.
What you will need:
Green Paper to Make the Card
Different Colors of Paper for the Flowers
Red Paper for the Ladybug
Black Markers
Paper Glue
Scissors
How to Make the Flower and Ladybug Card:
1. Make your own leaf pattern as shown in the picture or print out the patterns.
Member's ![]()
2. Use the patterns as templates to cut the leaves from green paper. Cut out the pattern and then place it on a stack of 4 or five pieces of green paper. Trace around the edge and then cut out the shape from the stack to paper.
3. Cut out the flower shape and place it on a stack of colorful paper. Trace around the flower and cut out the shape from all the sheets at the same time.
4. Cut small ladybug shapes from red paper. Draw black spots and a head on the ladybug.
5. Glue the flower to the center of the leaves, and the ladybug to the flower. Fold the leaves over the flower to make an envelope. Secure with ladybug stickers.
©2004, Digital by Design, Inc. - See Copyright Information
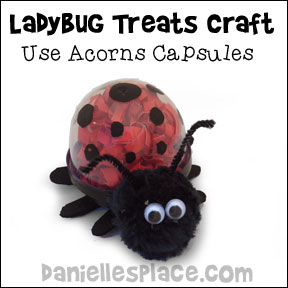
Ladybug Treat Container Craft
What you will need:
Sharpie Permanent Markers or Paint Marker Pen
Red Cinnamon Hearts or Other Candy
Black Craft Foam or Black Construction Paper
Scissors
Wiggle Eyes
How to Make:
1. Use a Sharpie Marker or Paint Marker Pen to color the cap of the acorn capsule black. Do not paint where you want to attach the pompom head.
2. Cut eight black legs from craft foam or construction paper and glue them to the cap of the acorn capsule. Place candy in the capsule and close the lid.
3. Glue a black pompom to the cap where you didn't paint it for the head. Glue wiggle eyes to the head.
4. Cut Chenille stems about 2" long and glue them to the head of the ladybug.
5. Use a Sharpie or paint marker to draw dots on the ladybug.
©2004 & 2015, Digital by Design, Inc. - See Copyright Information


