Bell Christmas Crafts
Ring the Bells Christmas Lesson
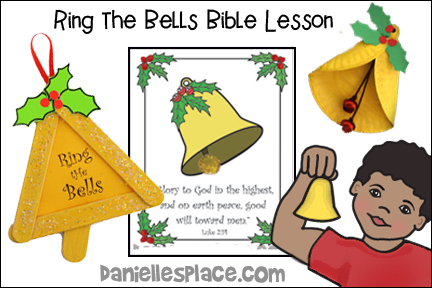
The following crafts and activities go with the Bible lesson "Ring the Bells!" on The Resource Room. In this lesson children consider bells and how they are used to convey messages, especially how they are used in the church and at Christmas time to give praise to God and tell others the good news about Jesus’ birth. They make their own bells to remind them and their family about the good news of Jesus' birth.
This lesson is available to members on The Resource Room and as a digital download.
Instant Digital Download ![]() - Complete Lesson
- Complete Lesson
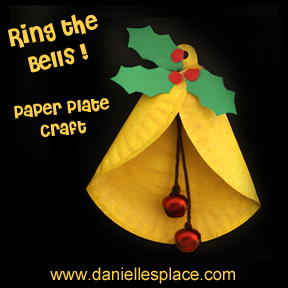
"Ring the Bells!' Paper Plate Craft
What you will need:
Lunch-sized Paper Plates or use a Piece of Yellow Construction Paper cut into an 8-inch circle
Green and Red Construction Paper
Jingle Bells or Beads
Yarn, String or Chenille Stems
Scissors and Hole Punch
Ribbon and Glue
How to Make the Paper Plate Bell:
1. Print out the pattern and use it as a template to cut bell shapes from the paper plates. If you don't have paper plates you can just use the paper pattern as your bell.
Instant Digital Download ![]() - Complete Lesson
- Complete Lesson
2. Fold down the sides of the paper plate where indicated on the pattern and glue the plate together where it overlaps. Punch a hole in the top of the bells.
3. In class have your children paint the paper plate and string two bells on a piece of yarn, and tie the bells to the ends of the piece of yarn. Fold the yarn in half and then glue it to the top of the bell under the place where the paper plate overlaps.
4. Have your children glue on holly leaves and berries to decorate the bells. You can bring in other decorative items to decorate the bell.
5. Tie a ribbon to the bell to hang.
©2012, Digital by Design, Inc. - See Copyright Information
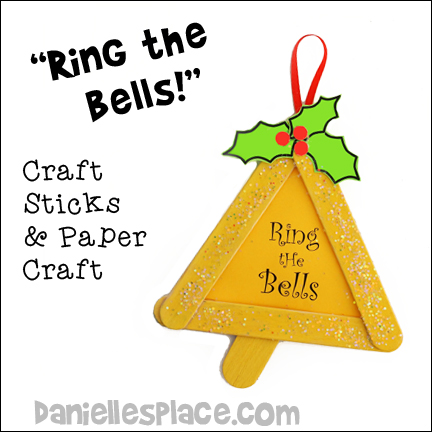
"Ring the Bells" Craft Stick Bell
What you will need:
Mini Jumbo Craft Sticks and a Jumbo Craft Stick
Red and Green Paper
Glitter
Ribbon
Gold or Yellow Paint
Hole Punch
What to do:
1. Glue three mini jumbo crafts sticks together to form a triangle shape.
Instant Digital Download ![]() - Complete Lesson
- Complete Lesson
2. Cut two inches off the end of a jumbo craft stick at an angle. Glue the piece to the bottom of the triangle.
3. Paint the bell shape. When the paint is dry spread glue over the craft sticks and sprinkle glitter on the glue.
4. Place the bell shape on a piece of yellow paper and trace around the outside of the shape. Cut the piece out inside the lines you drew.
5. Write "Ring the Bells" on the center of the paper and glue it to the back of the bell shape. (A printable pattern is available to members and as an instant download. See above.)
6. Cut holly leaf shapes from green paper and use a paper punch to punch berry shapes from red paper. Glue the pieces to the top of the bell.
7. To finish glue a ribbon to the top of the bell.
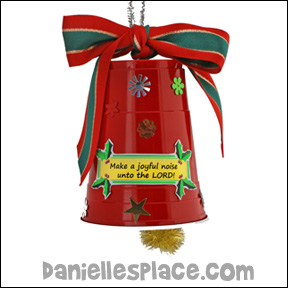
Plastic Cup Christmas Bell
What you will need:
Large Plastic Cups
Jingle Bells
Chenille Stems
Christmas Ribbon
Sequins
Christmas Stickers
Printer Paper
Scissors
Glue
Pompoms (Optional)
What to do:
1. Before class punch small holes in the top of the cups with a sharp pair of scissors.
2. Print out labels that say "Make a Joyful Noise" onto computer paper and cut them out.
Instant Digital Download ![]() - Complete Lesson
- Complete Lesson
3. In class have your children string jingle bells on one end of a Chenille stem. When they are done determine where you will need to make a loop in the chenille stem so that the bells hang down just below the rim of the cup and stop the stems from being pulled back up through the hole. Make a loop and then stick the end without the bells up into the cup through the hole. Loop the end of the stem and wind it around the part of the stem that is just sticking out of the bottom of the cup.
4. Tie a bow at the top of the bell.
5. Have your children glue on the "Make a Joyful Noise" title to the front of their bells and decorate the rest of the bell with Christmas stickers, sequins, glitter glue, etc.
©2011, Digital by Design, Inc. -*See Copyright Information
Bell Bible Verse Picture
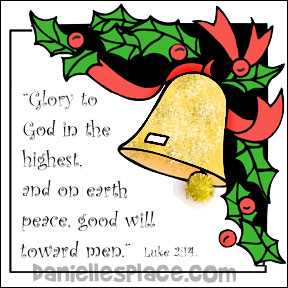
What you will need:
Computer Printer Paper
Crayons, Colored Pencil or Markers
Small Pompoms (Optional)
Construction Paper
Glitter Glue
What to do:
1. Before class print out the pattern and make copies.
Instant Digital Download ![]() - Complete Lesson
- Complete Lesson
2. In class have your children color the picture and then glue a pompom to the bell's clapper, and then add glitter to the bell.
3. Cut the picture out and glue it to a piece of construction paper.
©2011, Digital by Design, Inc. -*See Copyright Information
Bell Bible Verse Activity Sheet

What you will need:
Computer Printer Paper
Gold or Silver Pompoms
Red Hot Candies
Colored Pencils or Markers
Glue
What to do:
1. Print out the Pattern before class and make copies.
Instant Digital Download ![]() - Complete Lesson
- Complete Lesson
2. In class have your children color the picture and then glue a pompom on the clapper.
3. They may also want to glue red hot candies on the berries. If you think the children might eat them, you can use flour and water paste. To make the paste add a small amount of water to 1/4 cup of flour to make a paste consistency.
©2011, Digital by Design, Inc. -*See Copyright Information
Jingle Bell Door Hanger
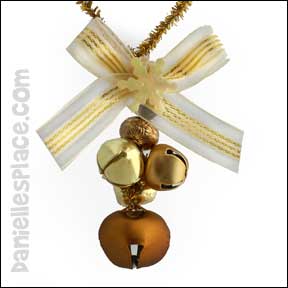
What you will need:
Jingle Bells
Chenille stems
Ribbon
Beads
Glue
Decorative Christmas items such as Sequins, Button, and Beads
What to do:
1. In class have your children string jingle bells and large beads onto one end of a chenille stem (pipe cleaner). When they are finished make a loop at the other end and wind around the stem to secure it. Tie a ribbon at the top.
©2010, Digital by Design, Inc. -*See Copyright Information
Psalm 98:4 "Find the Word" Bible Verse Review Game

1. Before class print out the word patterns onto colorful paper and cut the words apart.
Instant Digital Download ![]() - Complete Lesson
- Complete Lesson
2. In class, place all the words face up spread out on a table. Have your children stand around the table. Read the verse and then tell your children that you are going to have a contest to see who can find the most words first from the Bible verse. Tell them, "The first word of the verse is “make”. Let’s see who can find the first word first."
3. When a child has found the correct word, let him or her keep it, and then tell them the second word and see who can find that word first. When you have gone through all the words, have the children count how many words they have found to see who collected the most.
4. Play the game again to review the verse again. Have the children place all the words back on the table and mix them up. Ask the children if they remember what the first word of the verse is and see who can find it first.
If you have very young children, you can show them a picture of the word before you have them look for the word. Print out more than one copy of the verse. You can remove the extra words for younger children to make it easier.
Communion Cup Christmas Bell Craft for Kids
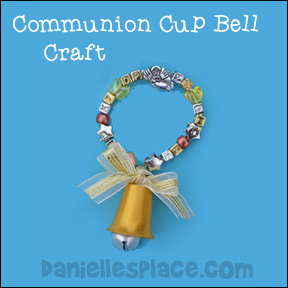
What you will need:
Clean
Dry Communion Cups
Beads
Pipe Cleaner (Chenille stems)
Ribbon
How to make:
1. Drill a small hole in the bottom of the communion cups. Do not press down hard with the drill bit or you will crack the cups.
2. Spray paint the cup with gold spray paint and let dry.
3. Attach a small jingle bell to the end of a Chenille stem. Put a crimp in the Chenille stem about two inches from the top of the bell. Insert the other end of the Chenille stem into the inside of the communion cup through the hole and pull the end through the hole.
4. String bead onto the end of the Chenille stem and then make a loop with the stem and wind the end around the part of the stem that is near the hole in the communion cup.
5. To finish tie a bow where you twisted the Chenille stem.
This craft goes with the Sunday School lesson "Ring the Bells!" above.
©2009, Digital by Design, Inc. -*See Copyright Information
Christmas Bell Crafts on Other Pages

