Stick Puppets
How to Make Stick Puppets
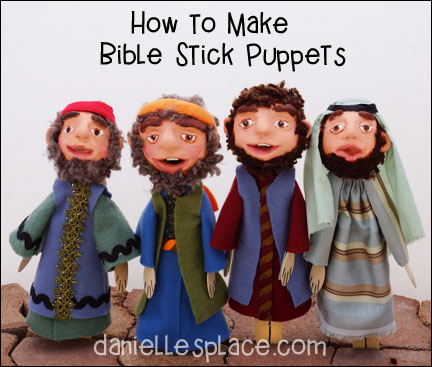
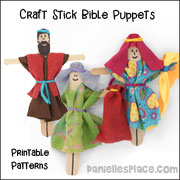
Bible Stick Puppets
What you will need:
Paint Stick or Other Stick
Aluminum Foil
Skin, Hair and Lip Colored Acrylic Paint
Decorative Trim such as Felt Ric Rac Ribbons
Sharpie Fine Point Permanent Markers
How to Make Stick Puppets:
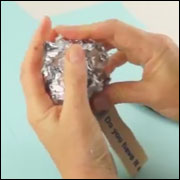
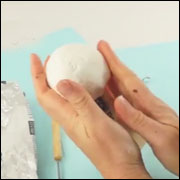
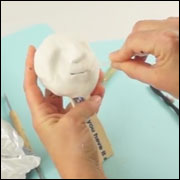
1. To make the head cut crinkle up a large piece of aluminum foil into a head shape onto the end of a paint stick. Remove the aluminum foil and place glue at the end of the stick and then replace the foil.
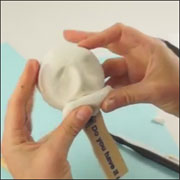
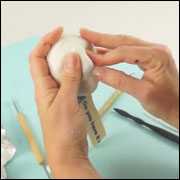
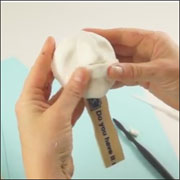
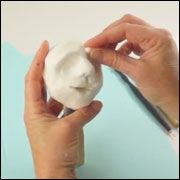
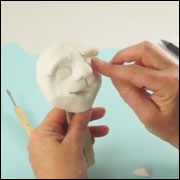
2. When the glue is dry cover the foil ball with Crayola Model Magic. Add balls of clay to make the chin, nose, lips, eyes, and ears. Shape and smooth out the clay as you work. (See the video below.) Place the head aside to dry for at least 1 - 2 days.
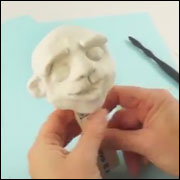
3. When the clay is dry paint it with acrylic paint and let it dry. Draw in the eyes with Fine Point Paint Marker.
Watch a "View it and Do it!" video on how to make the stick puppets.
4. As the paint dries cut the yarn into tiny pieces for hair. When the paint on the head is dry place a thick layer of glue all over the head where the beard and sideburns should go. Pat the cut up pieces of yarn onto the glue.
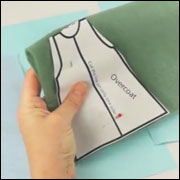
5. Print out the stick puppet clothes patterns and use them to cut pieces from felt sheets.
Member's ![]()
Free Digital Download 
Before cutting the felt pieces make sure they will fit around your paint stick. Adjust the pattern if they don't fit.
To cut out the overcoat pattern fold a piece of felt in half and place the top of the overcoat pattern on the fold. Cut one side of the overcoat pattern in half along the vertical line.
6. Place the coat flat on a table and then place the stick puppet on top of the coat centering the puppet on the coat. Glue the coat to the back of the stick just below the head. Bring the sides up and around and glue them to the front of the puppet just below the chin. Glue the coat closed down the front of the coat.
7. To make the arms bring the sides of the arm material together to make a cone shape and glue them closed. Glue the arms to the sides of the stick just below the head.
8. Draw lines on craft spoons for fingers to make the hands. Glue the craft spoons inside the arms.
9. Place the overcoat pattern on the stick puppet and glue the sides together.
10. To finish add decorative items. Add a belt or head band.
11. To make the head covering cut a piece of material into a rectangle shape that fits over the head and drapes down over the shoulders. Glue it to the top of the head. Cut a long piece of material to tie around the head over the head covering.
©2016, Digital by Design, Inc. - See Copyright Information
Stick Puppets Made by Viewers

Made by Rajinder Kainth
I love the shiny coat, slanted eyes, and red shoes!
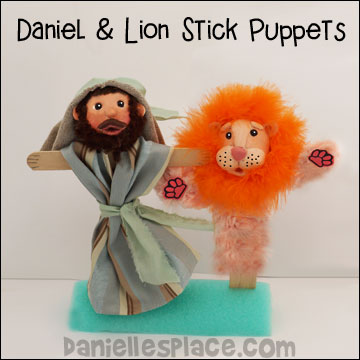
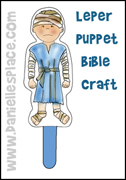
Daniel and Lion Stick Puppet Craft
What you will need:
Material for Outfit
Paper
Scissor
Low Temperature Glue Gun
How to Make the Stick Puppets:
1. Place a ball of Magic Model clay on the end of an extra jumbo craft stick.
2. Add balls of clay to make the face features smoothing out the clay as you work.
3. Press your finger in the clay where the eyes should go making a slight indent.
4. Press the tiny black eyes into the clay.
5. Let the clay dry for several days and then paint it with acrylic paint. Cut up pieces of yarn and glue them to the head for the hair and beard.
6. To make the Daniel stick puppet glue a jumbo craft stick under the head for the arms.
7. Print out the coat and head covering pattern, and use them to cut from material. Place the coat pattern onto a folded piece of material. Fold the coat in half an cut the center of the material where indicated. Then cut down the center of one side for the front of the coat. Sew the raw edges or glue them. Tie the coat onto the stick puppet with a piece of material or string.
Member's ![]()
Free Digital Download
Watch this amazing video on how to sculpt a head from polymer clay:
©2016, Digital by Design, Inc. - See Copyright Information
No-Sew Benjamin Franklin Paint Stick Puppet
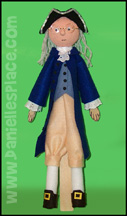
This type of puppet is fairly easy to make but does take some practice. The Styrofoam ball head is attached to a paint stick. The clothes and tricorn hat are made from felt.
You will find direction to this puppet and other crafts about Benjamin Franklin on the Benjamin Franklin Craft Page.
©2004, Digital by Design, Inc. - See Copyright Information
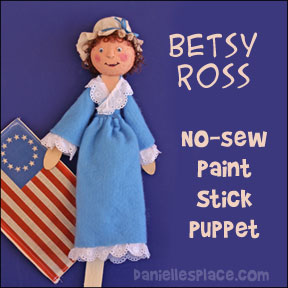
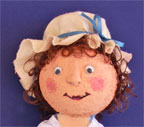
No-Sew Betsy Ross Paint Stick Puppet
This type of puppet is fairly easy to make but does take some practice. The Styrofoam ball head is attached to a paint stick. The clothes are made from felt.
What you will need:
Head: 2 1/2" Styrofoam ball, paint stir stick (You can get them free when you buy a gallon of paint or you can buy them very cheap from a paint store.), flesh colored acrylic paint, marker, googly eyes, and brown yarn or doll's hair. (Optional - I used fast drying clay to make a nose).
Bonnet: White muslin and 1/8" blue ribbon.
Body: Flesh colored felt, blue felt, 1 yard of 1" eyelet lace, 1/4 blue ribbon, and two wooden craft spoons for the hands.
Flag: color printer, white muslin or cotton material, and iron-on transfer.
How to Make the Head
1. Press one end of the paint stick into Styrofoam ball, pull it back out, and put some glue on the end of the stick. Push the head back in and let it dry. This will keep the head from falling off.
How to Make the Dress
1. Glue some flesh colored felt around the neck area of the puppet.
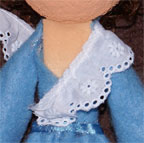
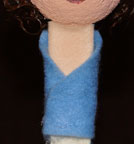
2. Print out the bodice and arm pattern and cut the bodice from light blue felt. Glue the bodice around the paint stick below the head leaving a V-shape in front.
Member's ![]()
Free Digital Download
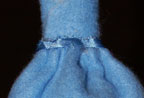
3. Cut a 7" by 9" rectangle from the same blue felt. Sew a straight stitch along the top of the skirt (the 9" side) and pull the thread tight to gather the material. Glue the skirt at the bottom of the bodice. Glue a 1/4" ribbon around the gathers at the waist. If you are using a thin material use a longer piece.
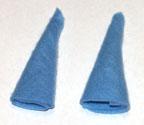
4. To make the sleeves use the arm pattern to cut two pieces of material from the blue felt. Roll up the pieces to make two wedge shapes as shown in the picture to the left. Glue some eyelet inside the wider end. Glue the sleeves right underneath the neck. To make hands draw fingers on the wide end of the wooden craft spoons. Place some glue on the thinner end and glue them to the inside of the sleeves.
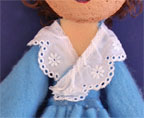
5. Glue some eyelet lace around the neckline. Start at the waist. Fold under part of t2. Add a nose - Make a small raindrop shape out of fast drying clay, flatten out one side, put a little glue on the flat side and press it onto the head. Use an eraser or something else to smooth out the nose. Poke two holes in the bottom of the nose to make nose holes. You can even add ears or other face features in the same way if you would like.
6. Paint the whole ball flesh color. You will need a lot of paint. Use a hair dryer to speed up drying. You may need at least three coats of paint. When the face is dry glue on yarn for hair or use doll's hair.
How to Make the Bonnet:
1. Cut a six-inch circle from white muslin. I didn't worry about the raw edges, but if you want to hem the edges make the circle one inch bigger. To gather the material into a hat shape, sew a straight stitch all around the circle about 3/4" in from the edge. Gather the material into a smaller circle to fit the head by pulling the thread and bunching up the material so that it just fit the head. Tie the two ends together. Glue it to the head. Glue a tiny blue ribbon around the stitches and tie it in a bow in the front.
How to Make the Body
he lace to make it pointy at the waistline and glue it up and around the back of the neck. Bring it over the other shoulder and stuff the end behind the lace you already glued on.
1. To make the flag print out the Flag Pattern onto T-shirt transfer material. (Follow the directions for your printer.) Cut it out and iron it to a white piece of material. Cut out the transferred pattern and sew a hem around the edge. Glue the flag to Betsy's hand.
©2009, Digital by Design, Inc. - See Copyright Information
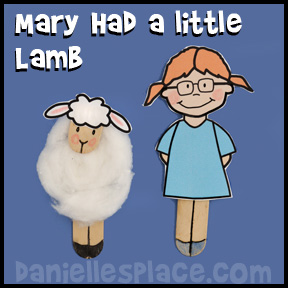
Mary Had a Little Lamb Craft Stick Puppets
What you will need:
Cotton Balls
Sharpie Fine Point Permanent Markers
How to Make the Mary and Lamb Stick Puppets:
1. Print out patterns or draw the sheep head and a Mary figure and make copies.
Member's ![]()
2. Have your children color the Mary pattern.
3. Cut a jumbo craft stick three inches in length with a pair of strong scissors. Glue the Mary figure onto the craft stick. Draw a line down the center of the craft stick to make Mary's leg. Color the bottom for her shoes.
4. Cut another jumbo craft stick three inches long and glue a cotton ball to cover the cut end of the stick. Use a marker to draw in the legs and hooves. Cut another jumbo craft stick 1 1/4" inch long or use the template on the pattern. Glue the ears and top of the head to the craft stick. You can glue a small amount of cotton to the top of the head. Glue the head to the cotton ball.
5. Use these puppets with the "Mary Had a Little Lamb" Printable Book below.
Copyright 2013, Digital by Design, Inc. - See Copyright Information
Mary Had a Little Lamb Printable Book with Craft Stick Puppets
With six colorful pages your children will enjoy reading this rhyme over and over.
An alternative first page can be used that doesn't have the pictures of Mary and her little lamb. The stick puppets can be inserted into the slots on the page to store them.
Children can make up their own rhymes and stories using the stick puppets or make their own puppet skits.
Member's ![]()
The stick puppet patterns for this book can be found above.
Stick Puppets on Other Pages


More Stick Puppets
Printable Stick Puppets for Easter Resurrection Story