Spring Crafts and Activities for Kids
How to Make Crafts and Activities Relating to Spring
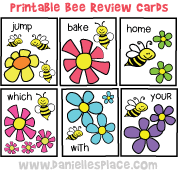
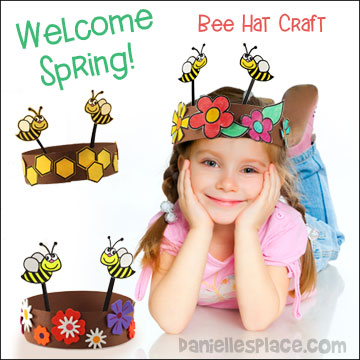
Happy Bees Spring Hat Craft for Kids
What you will need:
Construction Paper
Printer Paper
Crayons or Colored Paper
Scissors Tape or Glue Stapler
Cardboard
How to Make the Happy Bee Spring Hat:
1. To make the headband cut pieces of construction paper two inches wide and the length of the paper. Staple two pieces together to make a long strip of paper. Fold down the stapled edge and place tape over the staples and folded edge.
2. Print out the bee, flowers, and beehive hexagon shapes before class. You can use white paper and have your children color and cut out the shapes or print out the patterns onto different colors of paper, and then cut them out.
Patterns for this craft are available to members and as an instant download.
Member's 
Instant Download Pattern - 
3. Have your children glue the paper flowers, flower stickers, or the hexagon shapes to the headband and then fit the headband to the child's head and staple it to secure. Place tape over the staples so that hair doesn't get stuck in the staples.
4. To finish cut strips of cardboard to attach the paper bees to the inside of the headband. You could use pipe cleaners instead of the cardboard strips, but they are a little harder to the headband.
©2016, Digital by Design, Inc. - See Copyright Information

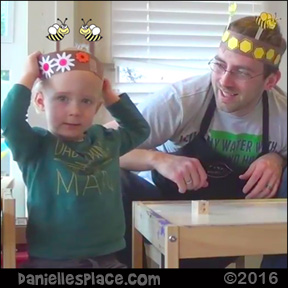
Logan had a great time making bee headbands with his dad to celebrate spring.
Although he wasn't interested in coloring the printouts, he loved sticking all the fun foam flower shapes on the headband.
Toddlers love stickers and with a little help from their parents, they will love making this bee-themed craft.
Check out a video on Youtube of 2-year-old Logan making this craft with his dad.
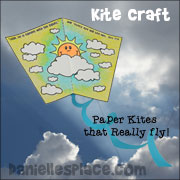
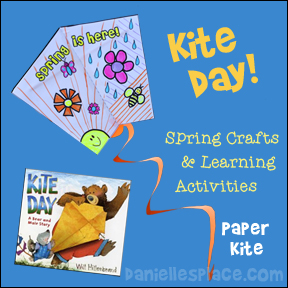
Spring Kite Craft for Children
These kites really fly!
What you will need:
Legal-sized Paper
Long Plastic Straws
Clear Tape
Kite String and Wooden Dowels to Wind the String Around
Markers or Crayons
Hole Punch
How to Make the Paper Kites:
1. Print out the pattern onto legal size paper.
Member's ![]()
2. Fold the paper in half so that the picture is in the inside. Fold the two flaps out on the dotted lines so that the picture is visible and comes together in the middle. Tape the kite down the center with scotch tape.
3. Put a piece of tape over the two circles on the under side of the kite and use a hole punch to punch a hole through the paper. Tie one end of the kite string through the hole. Wind the other end of the string around a short length of wooden dowel.
4. Tape a plastic straw on the top of the kite across the length to keep the kite from bending, or punch a hole near the other hole up against the folded edge. Stick a straw through the hole and tape flat against the kite.
5. Cut an 8-inch circle from another sheet of paper. Cut the circle into a snake shape (start cutting around the outside of the circle about 3/4" from the outside and go around and around until you reach the center). Tape one end of the snake to the bottom of the kite for a tail.
©2000, Digital by Design, Inc. - See Copyright Information
Children's Books to Use with the Activity
Kite Day (Bear and Mole Stories)
Mole and Bear make a kite and have a great time until a spring storm takes their kite. But Bear and Mole have a great surprise when they find out what happened to their kite.
Spring Is Here! (Bear and Mole Story)
Mole is excited because spring is here. He does everything he can think of to wake up bear. When he finally gets him to wake up he is so tired that he falls asleep.
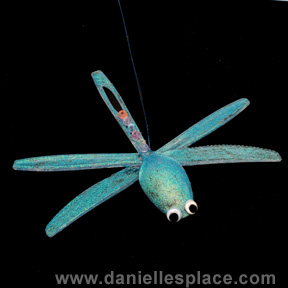
Plastic Spoon and Knives Dragonfly Craft
What you will need:
Clear Plastic Ppoons and Knives
Glitter Glue Paint
Googly Eyes
Paint Brush
String or Heavy Duty Thread
Low Temp. Glue Gun
How to Make the Spoon and Fork Dragonfly Craft:
1. Glue two knives together in an X-shape to make the dragonfly's wings using a low temp. glue gun.
2. Glue the wings to the plastic spoon just below the cupped part of the spoon.
3. Paint the dragonfly with glitter glue and let it dry.
4. Glue on googly eyes at the tip of the spoon. You can also add decorative items such as beads and sequins.
5. To finish tie on some thread to hang the dragonfly.
©2012, Digital by Design, Inc. - See Copyright Information
Craft Stick Plant Stakes
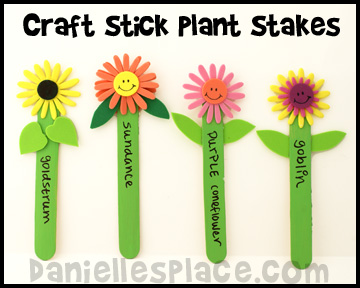
What you will need:
Foam Stickers 5-Ounce, Black Light Flowers
Sharpie Fine-Tip Permanent Marker
How to Make the Craft Stick Plant Stakes:
1. Paint the craft sticks with Patio paints and let them dry.
2. If you are planting flower seeds, pick flower shapes that look like the flower you will be growing. If you can't find any that match, you can cut some from craft foam, or use permanent markers to color the shapes the correct color.
3. Use a low temperature glue gun to glue the flowers to the craft stick.
4. Cut leaf shapes from craft foam and glue them to the craft stick.
Note: Instead of making plant stakes to mark your flowers, you can just make flower stakes to decorate your garden. Also see how to make 3D Foam Flower Stakes.
Build a Fairy House this Spring!
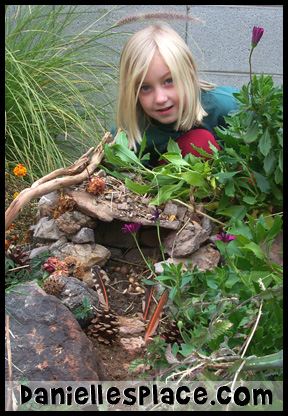
Hi, I'm Danielle. I just read a great book called "Fairy Houses by Tracy Kane" It's a story about a little girl who builds a fairy house. It tells how she attracted some fairies and a lot of other animals. At the end of the book it tells you all about how you can build a fairy house and attract some fairies too.
You should only use natural things to build your house. Fairies do not like to disturb anything that is growing so you shouldn't use anything that is still growing like flowers, ferns, and leaves.
Fairy Houses (The Fairy Houses Series)
My mom helped me build these houses in our garden. I hope the fairies like them. We had a lot of fun building them and so will you. And just maybe you will see a fairy, or at least some animals visiting your home.
You can find out more about this book and see more pictures of fairy houses by going to www.fairyhouses.com
©2000, Digital by Design, Inc. - See Copyright Information
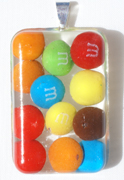
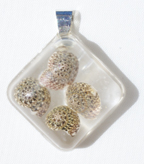
Resin Jewelry
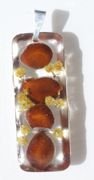
This craft is mostly for older children and adults, but younger children will love looking for tiny objects that can be placed in the molds. It should be done outside on a warm spring or summer day because the fumes from the resin are very strong.
The resin and molds used for this craft can be purchased from Amazon.
You will need to purchase Castin' Craft EasyCast Resin Jewelry Mold, Environmental Technology 32-Ounce Kit Casting' Craft Casting Epoxy, Clear, Castin' Craft Mold Release Conditioner.
Collect tiny items that will fit in each mold. Place them in the molds to make sure they fit and don't stick out over the edge of the molds.
Some suggested items, small flowers, stones, beads, gems, feathers, seeds, candy, stickers, and sea shells.
You can find excellent directions to make these pendants on YouTube and on the package of Castin Craft Resin.
I used needle nosed pliers to bend clip-on 10 mm pendant bails so that one end hung down into the molds. I pulled out the short bottom part so that it would hang down into the molds and squeezed the top of the bails almost closed. If you can't find the right pendant bails, you can use the ends of paper clips or bent wire.
This is a fairly easy craft, but it does take some practice. The we enjoyed most was searching to things to place in the pendants.
EasyCast Resin Jewelry: Over 50 Stylish Jewelry Projects to Make & Wear

©2000, Digital by Design, Inc. - See Copyright Information
"Spring has Sprung" Spring Color and Activity Sheet
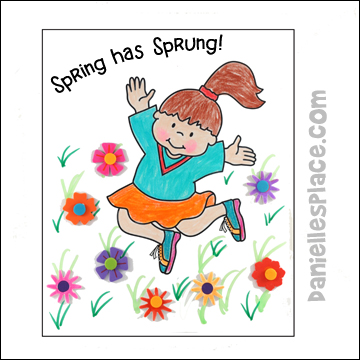
What you will need:
Crayons, Butterfly, Birds or Flower Stickers, and Craft Foam Shapes or Silk Flowers
How to make:
1. Print out the pattern and make copies.
Member's ![]()
Free Digital Download ![]()
2. Have your children color the picture. You may also want to provide stickers, silk flowers or real pressed flowers for the children to glue onto their picture. You can even have them press their own flowers a few days before you do this craft.
©2000, Digital by Design, Inc. - See Copyright Information
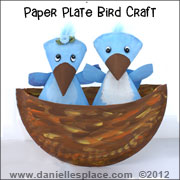
Spring Bird Picture with Real Leaves
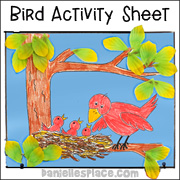
What you will need: Heavy Paper, Crayons and Markers, Glue, Dried Leaves, Straw or Dry Grass, Pipe Cleaner, and Exacto Knife
How to make:
1. Print out the pattern onto heavy paper.
Member's ![]()
Free Digital Download ![]()
2. Collect leaves and press them in a heavy book between sheets of waxed paper. Collect some dried grass or straw. You can also use silk leaves collected from old silk flowers. The leaves used in the picture were Green Collage Flowers Petals cut into leaf shapes from Lakeshore Learning Store.
3. Color the picture and then glue on dried leaves on the branches and grass on the nest.
4. Cut a hole on each side of the mama bird's beak. Cut a piece of brown pipe cleaner about 2 to 3 inches long and stick in through the hole to make it look like the bird is holding a worm.
©2000, Digital by Design, Inc. - See Copyright Information
Spring Bird Feeder Craft
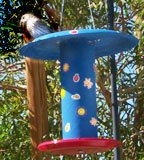
What you will need:
6 3/4 oz. Pringle's Potato Chip Can with Lid, 7 in. Plastic Chinet Plate, and a 9 in. Plastic Chinet Plate, Bolt with Nut, Hot Melt Glue Gun, Hole Punch, String for Hanging, Acrylic Paint, and Stickers (optional)
How to make:
1. Paint the Pringle's can any color you would like and let dry.
2. Cut three or four small holes about 3/4" by 1/2" around the bottom edge of the can for the bird seed to come out.
3. Poke two hole in the top sides of the can on opposite sides. These will be used to hang the bird feeder.
4. Glue the bottom of the can onto the middle of the 7" plastic plate. Drill a hole in the bottom of the plate through the bottom of the can. Stick a bolt through and screw on the nut from the inside of the can.
5. Glue the top side of the plastic lid onto the to of the large plastic plate. Poke to holes in the plastic plate right next to the lids on opposite sides.
6 .Stick one end of a piece of string through a hole in the top of the Pringle's can, through the middle and the other hole and out of the can. Now bring both ends of the string up through the wholes you punched in the top plastic plate. Tie the string ends together at the top. To fill the bird feeder just pull off the lid and let it dangle to the side.
©2000, Digital by Design, Inc. - See Copyright Information
Spring Crafts on Other Pages