Under the Sea Crafts and Learning Activities for Kids
How to Make Fish Crafts and Other Under-the-Sea Creatures for Kids
Swimming Fish Puppet Folded Paper Craft
What you will need:
Bright Colored Paper, 1/2" Brass Paper Fasteners, 1/4 Inch Hole Punch, Scissors, Ruler, Googly Eyes (Optional) Tacky Glue, Clear Tape and Markers
Watch a "View it and Do it" Craft Video for directions to this craft!
How to Make the Swimming Paper Fish:
1. To make the head cut a sheet of paper 8.5” by 8.5”.
2. Fold the paper in half diagonally making a triangle.
3. Turn the folded paper so that the folded edge is at the bottom. Fold one bottom corner over to the other side of the triangle so that it meets the other opposite edge of the triangle and forms a straight line across the top of the triangle.
4. Fold the other corner over in the opposite direction so that the point meets the other side of the triangle. It should cover the first folded corner.
5. Fold down the top of the triangle where it meets the folded corners. Tuck the front, top triangle that you just folded into the sides on the front of the triangle.
6. Tuck the back folded triangle into the center of the head shape.
7. Make the tail in the same way except start with a square of paper that is 7” x 7” .
8. Punch a hole in the head shape on the back near the open end of the shape in the center about 1/2” from the edge. The back of the head shape is the side with no visible fold lines.
9. Punch a hole in the fin on the shortest end in the center about ½” from the edge.
10. Place a brass fastener through the back side of the fish. Place your index finger inside the fin and feel for the hole on the back of the fin (the side with the visible folds). Place the hole over the hole on the head feeling for the points of the brass fasteners. Stick the fastener through the hole and spread out the legs inside the tail.
11. Glue on googly eyes or use the eye patterns. Cut a fin from paper or use the printable fin patterns.
Member's ![]()
Eyes and Fins Pattern Instant Download - ![]()
12. Decorate the fish with markers and paper.
©2016 - Digital by Design, Inc. -*See Copyright Information


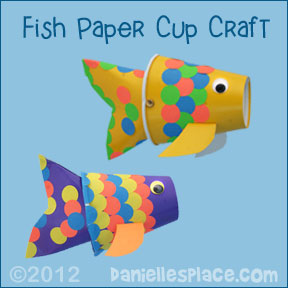
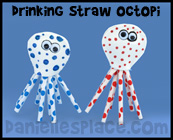
Rainbow Fish Puppet Made from Paper Cups
What you will need:
9 oz. Paper Cups (You can make smaller fish using smaller paper cups, or Dixie cups that already have a design on them.)
Scissors
Peel & Stick Wiggle Eyes (Optional)
Dot Color Coding Labels - Found at office supply store. You can also use the filler paper reinforcements.
Colored Paper
Low Temperature Glue Gun and Glue Sticks
Hole Punch
How to Make the Paper Cup Fish Puppets:
1. Cut the white rim off of one of the cups. This one will be used for the tail fins.
2. Punch two holes using a sharp object on opposite sides of the cup about 1/2" from the bottom of the cup.
3. Insert the tail cup into the fish-body about one inch.
4. Using a sharp object punch a hole through the tail cup from the hole in the body cup.
5. Insert a brass fastener into the holes on the fish-body cup and through the hole in the tail cup. Put your hand inside the tail cup and flatten out the brad. Do the same thing on the other side of the fish. (If you do not have brads you can just glue the tail to the inside of the body with a low temperature glue gun.)
Here's a handy tip that will make the cup fish easier to assemble! Before inserting the brass fastener, pull the prongs apart. Hold the fastener prongs together while inserting it in the hole. When the prongs are all the way through they will open up making it easier to open them all the way from the inside of the cup.
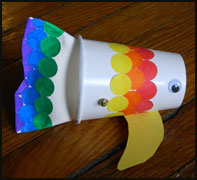
6. Press the tail cup flat at the edge and cut it in the shape of a fin. Glue it closed with a low temperature glue gun.
7. Cut the side fins from matching paper or card stock, fold down the end, and glue it to the fish.
8. Decorate your fish with dot stickers or anything else you would like.
Handy tip - Remove the paper around the dot stickers before giving them to your children. The stickers will be much easier to remove.
9. To finish glue on to googly eyes. (If you have preschool children, you can draw on the eyes with a Sharpie marker instead.)
You can glue craft sticks or straws to the bottom of the tail and head parts to make your puppet move, or just use your hands.
"View it and Do it Craft!"
If you would like to see how it made, watch our video on Youtube.com:
©2012 - #1-893557691, Digital by Design, Inc. -*See Copyright Information
Do not publish the directions to this craft on other web sites. Bloggers if you use this craft or a derivative of this craft refer back to this site for the complete directions. See Copyright Information, and follow all copyright regulations.
Rainbow Fish Puppet Craft Variations Made by Users
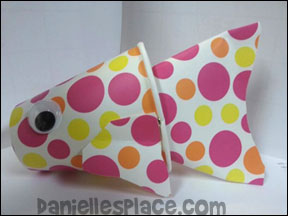
Maggie Carr made the cute little spotted fish using spotted Paper Cups.

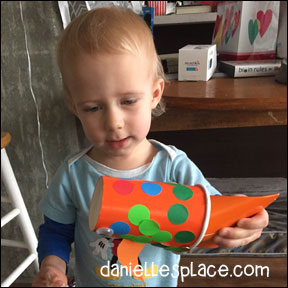
Logan made this paper cup fish with a little help from his dad. He enjoyed decorating the fish with dot stickers. He learned that bending the sticker paper makes it much easier to get the stickers off the page. Being able to remove the stickers himself after a little instruction gave him confidence and pride in his ability to do things for himself.
He especially liked playing with the it. This is a great craft to review names of colors with your toddler!
You can watch a video of Logan making this craft with his dad on Logan's Life.
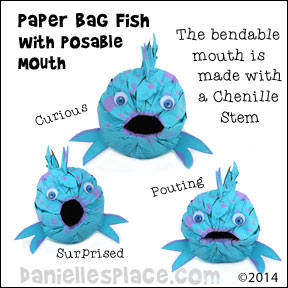
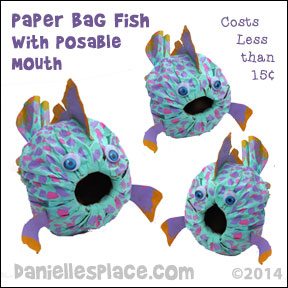
Paper Lunch Bag Fish with Posable Mouth
These unique fish make fun toys for children of all ages. The mouths are made with Chenille stems so they can be posed into many different shapes.
They are a little difficult to make so younger Children will need help forming the bag into the fish shape, but they will enjoy painting, decorating, and posing the fish.
This is a great craft for large groups because they cost less than fifteen cents a piece to make!
What you will need:
Paper Lunch Bags
Chenille Stems
Water Color Paint and Paint Brushes
Scissors
Recycled Plastic Grocery Bag
2 oz. Bottle of Paint or Something Similar that is About 2 1/4" Wide
Masking Tape
How to Make the Paper Bag Fish:
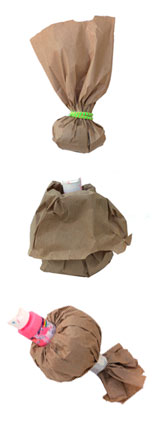
1. Stuff two plastic grocery bags into the bottom of the paper lunch bag. Gather up the bag just above the plastic bags. Pull up on the sides of the bag to make them straight.
2. Open the bag just enough to place the paint bottle into the center of the bag so that it is standing up. Gather up the bag again around the bottle and secure it with a Chenille stem.
3. Carefully bend down the top of the bag over the bottom of the bag bringing it down over the bottom of the bag as far as possible. Gather up the bag again around the bottom of the bag to form the fish shape and secure it with masking tape.
4. Remove the paint bottle.
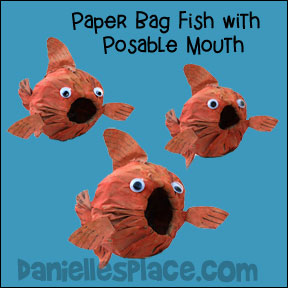
5. Cut fish fins from another paper bag and glue them to the fish.
6. Paint the fish with water color paint or other paint and let it dry.
7. When the paint is dry carefully remove the plastic bags from the fishes mouth.
8. To finish glue on googly eyes.
Watch how to make this craft on our View it and Do it! Craft video:
©2013, Digital by Design, Inc. -*See Copyright Information
We would love to see your paper bag fish. If you make this craft send us a picture and we will publish it here!
This craft can also be used to as a treat bag for a fish themed party. Stuff candy and small toys inside the mouth. They can hold a surprising amount of stuff!
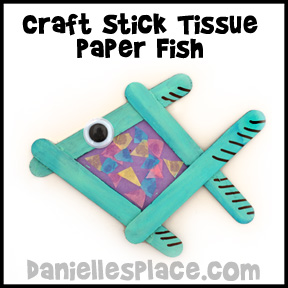
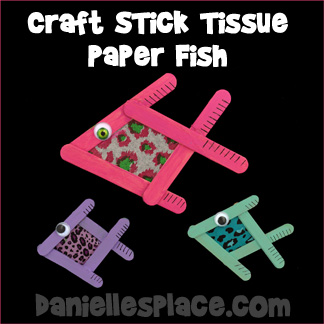
Craft Stick Tissue Paper Fish Craft
What you will need:
Jumbo Colored Wood Craft Sticks or Natural Wood Jumbo Craft Stick
Acrylic Patio Paints and Paint Brushes
Pink and Green Leopard Print Tissue Paper and Animal Print Tissue Paper or Small Pieces of Tissue Paper
Clear Contact Paper (Optional)
Markers
Gems and other Decorative Items (Optional)
How to Make the Craft Stick Fish:
1. Glue the craft sticks together using the pictures to the right as a guide or use the Template.
Member's 
Instant Download Pattern - 
2. Decide what tissue paper you would like to use and paint the craft stick fish to match the colors on the tissue paper.
3. Place the painted fish on a piece of paper tracing around the inside of the fish. Cut out the pattern adding one-half inch around the edges. Use the pattern to cut the shape from the tissue paper. (Pattern available to members.) Glue the tissue paper to the back of the fish.
You can also stick clear contact paper on the fish and then have children stick pieces of cut of tissue paper to the contact paper to decorate the fish.
4. To finish glue the wiggle eyes to the fish or draw the eyes with a Sharpie marker. Add other decorative items such as glitter or gems. Draw lines on the fins with a black marker.
5. Glue a string to the top of the fish to hang.
©2013, Digital by Design, Inc. -*See Copyright Information - Bloggers if you use this craft refer back to this site for the complete directions. See Copyright Information, and follow all copyright regulations.
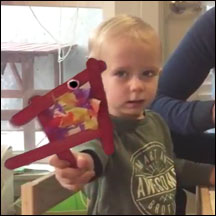
Logan made the craft stick fish craft with his father. Since he is only two years old his father used clear contact paper instead of the glue to decorate the fish. This worked very well since using glue with tissue paper can be very messy and frustrating for any age.
The clear contact paper was attached to the back of the fish and Logan stuck the tissue paper to the front.
You can watch a video of Logan making this craft with his dad on Logan's Life.
Variations of the Craft Stick Fish Craft
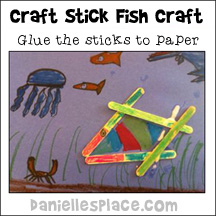
Here are some creative ways followers have used the Craft Stick Fish Craft from our web site:
Jessica Tennison used the craft stick fish craft to make sea life pictures. She glued the craft stick to a piece of paper and used the regular-sized craft stick instead of the jumbo craft sticks.
We would love to see how you use this craft in your home school or craft classes. Send us a picture and we will publish it here.
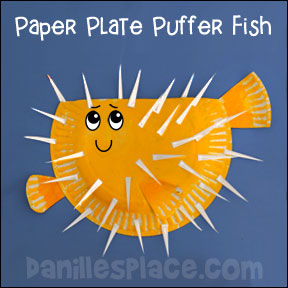
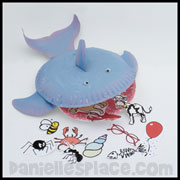
Paper Plate Puffer Fish Craft
What you will need:
Two Paper Plates
Card Stock (Heavy Paper)
Paint
Glue
Scissors
How to Make the Puffer Fish Paper Plate Craft:
1. Fold back the top of a paper plate to make the puffer fish shape.
2. Cut the tail fin and other fins from the sides of another paper plate and glue them to the body paper plate.
3. Paint the fish and fins.
4. When the paint is dry cut spike shapes from card stock and glue them all over the body.
5. To finish glue on googly eyes or paint them on.
©2013, Digital by Design, Inc. -*See Copyright Information
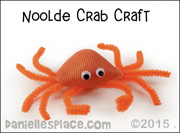
Crab Crafts


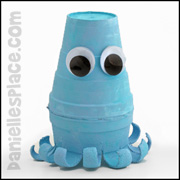
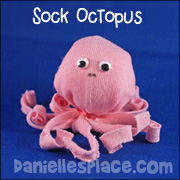
Octopus Crafts
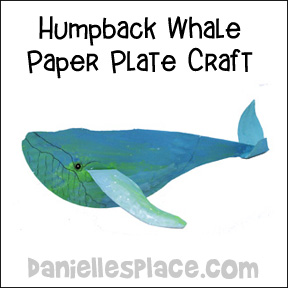
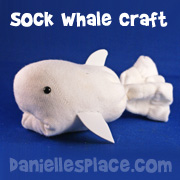
Humpback Whale Paper Plate Craft for Kids
What you will need:
Dinner-sized Paper Plates
Paint - Water Color or Tempera
Markers or Crayons
Glue
Scissors
How to Make a Paper Plate Humpback Whale:
1. To make the body of the humpback whale fold a dinner-sized paper plate in half.
2. Print out the patterns for the flukes and flippers and cut them out.
Member's ![]()
Free Digital Download ![]()
3. Place the fluke pattern in the middle of another paper plate and the flipper pattern on the sides of the fluke pattern. Place the flipper patterns on the paper plate so that the convex edge of the flipper pattern is on the fluted edge of the plate. There is only one flipper pattern so you will have to turn the pattern over and trace it on the other side of the plate to make the other flipper. Cut out the flipper and flukes.
4. Fold the fluke pattern in half, fold up the flukes as shown in the picture, and glue it closed. Glue the fluke to the folded body paper plate as shown in the picture. Glue the body paper plate closed.
5. Fold the end of each flipper and glue them on to each side of the body as shown in the picture.
6. Cut the folded side of the body paper plate so that there is a hump on top of the whale's head as shown in the picture.
7. Punch a hole at the top of the whale and add a string to hang the whale.
8. Visit some web sites with pictures of humpback whales and then paint the whale, let it dry and then draw in details with a marker.
©2011, Digital by Design, Inc. -*See Copyright Information
Enchanted Learning Web Site has a printable humpback whale information sheet.
National Geographic has great pictures and information about whales.
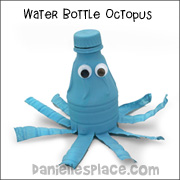
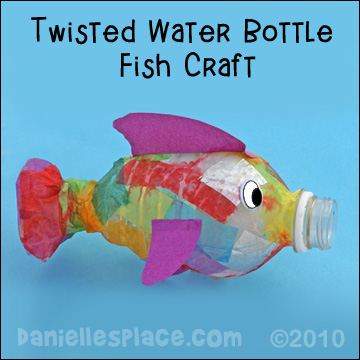
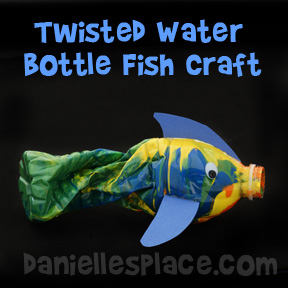
Twisted Water Bottle Fish Craft for Children
What you will need:
Plastic Water Bottle (The thinnest water bottle you can find)
Tissue Paper
Scissors
White Glue
Paint Brush
Colored Paper for the Fins
Acrylic Paint (Optional)
How to Make the Twisted Water Bottle Fish:
1. Remove the label from the water bottle. If the label doesn't come off easily, you can fill the bottle with hot water, let it set for a few minutes, and then try to pull it off. The hot water loosens the glue. (Make sure you use the really thin water bottles. They are much easier to twist.)
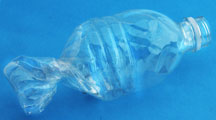
2. Hold the bottom of the bottle with one hand and grasp the bottle about two inches up from the bottom with your other hand. Twist the bottle like you would a balloon to make the tail fin. (See the picture to the right.)
3. Insert a pen or something long and skinny inside the bottle to punch out any areas that were dented in when you twisted the bottle. (You can also blow into the twisted water bottle like you would a balloon to get out any dents. Hold the twisted end so that it doesn't untwist while blowing.)
4. Cut pieces of tissue paper into one-inch squares or irregular shapes.
5. Paint white glue on the bottle and stick the tissue paper squares on the glue to cover the entire bottle.
6. Cut fins from colored paper and glue to the fish to finish.
*If you have children who do not like to glue, or you don't want the mess, you can just have your children drop the cup pieces of tissue into the bottle and then twist the bottom of the bottle.
Another fun way to make these is to have your children drip different colors of acrylic paint into the mouth of the bottles.
First twist the bottle, and then untwist it. Let paint drip down into the bottle and then move it around so that the paint makes interesting shapes. Add more colors to get the variegated effect.
If your paint is too thick you can add a little water, but you don't want it too thin either because the colors will become muddied.
When the paint starts to dry re-twist the bottles to make the fish shape.
©2000, Digital by Design, Inc. -*See Copyright Information - If you use this craft or a derivative link back to page for the complete directions.
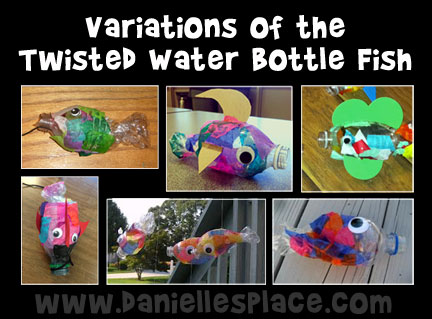
Kathy Hutto used the water bottle fish craft to teach children about how Jesus chose his disciples. She attached the fish to a fishing line with the Bible verse. You can find other ideas on her blog.
©2000, Digital by Design, Inc. -*See Copyright Information - If you use this craft or a derivative link back to page for the complete directions.
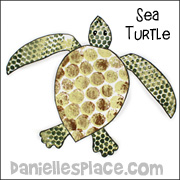
Sea Turtle Crafts and Activities
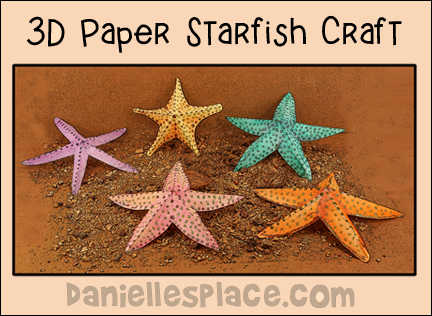
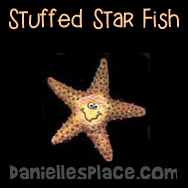
Paper Plate Starfish Craft for Kids
What you will need:
Scissors
Water Color Paint
Paint Brushes
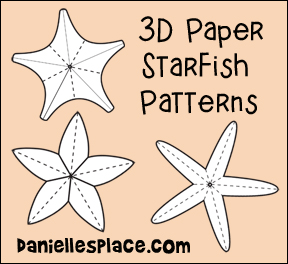
How to Make the 3D Paper Starfish:
1. Print out starfish patterns. Cut the patterns out and use them as templates to cut the starfish shapes from card stock. (If you don't have cardstock, you can use a 9" paper plate.)
Member's
Instant Download Pattern -
2. Place the pattern on top of you cutouts and trace over the fold lines to score the cardstock under the pattern. This will make folding easier.
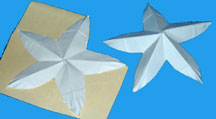
3. Fold the longer lines on the rays down and the shorter lines in the center up. Crease the lines starting at the center of the starfish out towards the rays.
4. Paint the folded starfish with water color paint and let them dry.
5. When the paint is dry use glitter glue to decorate the starfish.
6. Glue a string or magnet the the starfish to hang them up.
Watch our "View it and Do it Craft!" Video on Youtube to see how to make this craft.
Comments:
We loved the starfish activity in my 1st grade class. To save money I substituted cheerios for the beads. One box was enough for the whole class! A. Braswell, K/1 Looping Teacher
Quick Tip:
To save money on paint make your own water color paint. Mix 4 Tbsp. Baking Soda, 2 Tbsp. White Vinegar, 1/2 tsp. Light Corn Syrup, and add Food Coloring. Pour the mixture into bottle caps and let them dry overnight.
©2001-2016, Digital by Design, Inc. - See Copyright Information
Under the Sea Crafts on Other Pages


Under the See Crafts Ideas on Other Web Sites:
Ocean Diorama from Enchanted Learning.com - Just print out the patterns of the whales and tie them inside a box decorated to look like the sea.
Artist's Helping Kids - Has lots of links to site with Ocean Crafts, Aquatic Crafts, and Sea Life.
Making Friends.com - Has fishing crafts, under the sea crafts, sea life creatures, fish crafts and even a mermaid paper doll. I must see page!