Bible Lessons, Crafts and Activities About Love
Bible Lessons, Bible Crafts, and Games About Love for Children's Ministry, Children's Church, and Sunday School
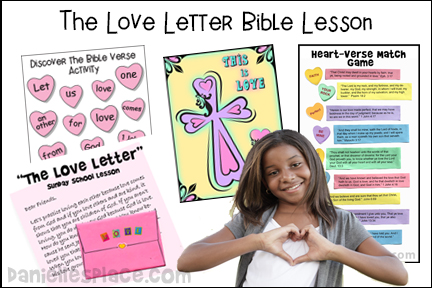
The following six crafts and activities come from the Bible lesson "The Love Letter" on The Resource Room. The lesson is available to members and as an instant digital download.
Member's 
Instant Digital Download  - KJV
- KJV
Instant Digital Download - NIV
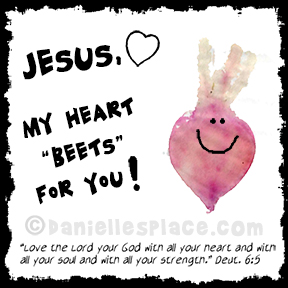
"This is Love" Color Sheet
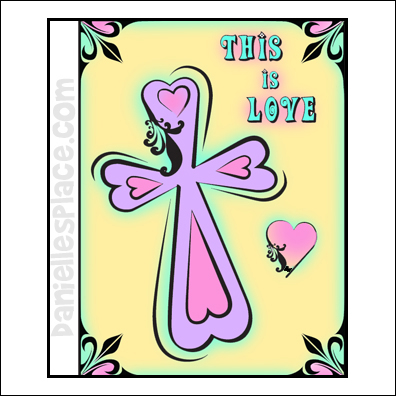
This is a great color sheet to use for your Sunday School class near Valentine's Day!
What you will need:
Paper (Card Stock), Crayons, Markers, or Water Color Paint
How to Make:
1. Before class print out the picture. If you are using water color, print out the picture onto card stock (thick paper)
Member's - Complete Lesson
Instant Digital Download - KJV - Complete Lesson
Instant Digital Download - NIV - Complete Lesson
2. In class have your children color or paint the picture. As they work talk to them about what the Bible has to say about love.
©2013, Digital by Design -* See Copyright Information
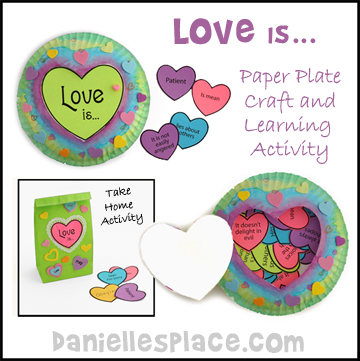
The Love Letter
The following crafts and learning activities come from the Sunday school lesson "The Love Letter" on The Resource Room.
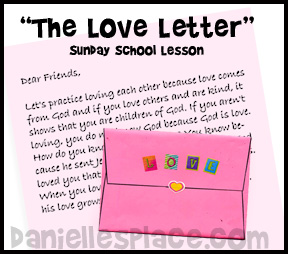
Scripture References:
Memory Verse: 1 John 4:7, "Let us love one another: for love comes from God."
Story Reference: 1 John 4:7-1Other References: 1 Cor. 13:4-7 3
In this lesson children learn that the Bible's message of love is meant for everyone at all times.
©2013, Digital by Design -* See Copyright Information
Discover the Bible Verse
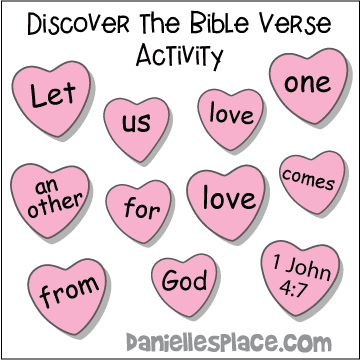
1. Before class cut out eleven hearts from construction paper for every three children in your class.
2. Write one word of the verse and the verse reference on the hearts.
3. As the children arrive hand a set of eleven hearts to every two or three children depending on how large your class is. Encourage them to help each other put the hearts in order to make the memory verse.
4. If they can't figure out the verse, let them look it up in their Bibles.
©2013, Digital by Design -* See Copyright Information
"Match the Candy Heart to the Verse" Game and Bulletin Board Display
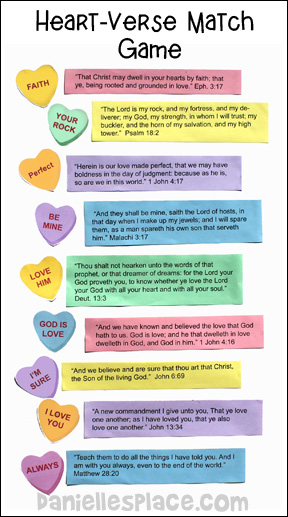
1. Before class print out the heart patterns and the Bible verses onto different colors of paper.
Member's - Complete Lesson
Instant Digital Download - KJV - Complete Lesson
Instant Digital Download - NIV - Complete Lesson
Instant Download this Activity Only - Printable posters below are also included.
2. Cut the hearts out and the verses apart.

3. In class spread out the hearts on a table so the children can see them or tape them to a bulletin board. Assign each child, or group of children, one of the Bible verses. Have them look up the verses, read them and decide which of the hearts go with their verses.
4. Have each group of children read their verse and explain why they picked the heart they picked. Check the bible verse list to see if they are correct.
5. Staple the corresponding Bible verse on the bulletin board and have one of the children tape the matching heart next to the verse.
6. If you don't have time to split the children up into groups, you can give each child a heart and then read a verse and staple it to the bulletin board. If a child thinks he has the matching heart, he can raise his hand. If the heart matches he can tape the heart next to the verse.

New 3-Page Printable Poster with Heartsl
Print out the posters and tape them together. Cut the hearts apart and have your children glue or tape them to the corresponding Bible verse.
©2013, Digital by Design -* See Copyright Information
Candy Heart Bingo

What you will need:
Card Stock (Heavy Paper)
Scissors
Glue
Place Markers such as buttons or chips
Member's - Complete Lesson
Instant Digital Download - KJV - Complete Lesson
Instant Digital Download - NIV - Complete Lesson
In class have your children cut out the heart shapes and glue them to the grid in any order they would like.
They will have one heart left over. When they are done preparing their Bingo cards play the game.
To play have the children take turns picking one of the letters L, O, V, or E and then read one of the Bible verses that go with the hearts and ask your students which heart they think matches the Bible verse. When they have guessed correctly let them place a marker on the heart if they have it on their board under the letter the child picked. Remind them that the matching heart must be under the right letter. If it isn't, they can't put a marker on it.
The child who gets four in a row first wins.
©2013, Digital by Design -* See Copyright Information
Heart Toss Game
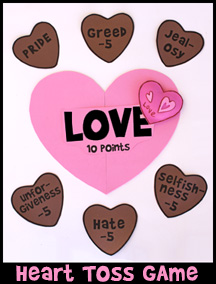
What you will need:
White and Pink Poster Board
Brown and Pink Paper
Paper Glue (Elmer's Rubber Cement)
Pink Craft Foam
Low Temperature Glue Gun
Prepare the Game:
1. Before class cut out a large heart from a piece of poster board and glue it to the center of the poster board.
2. Print out the small hearts onto brown paper and cut them out. Glue them around the pink heart.
3. Print out the Love title and glue it to the center of the large heart.
Member's - Complete Lesson
Instant Digital Download - KJV - Complete Lesson
Instant Digital Download - NIV - Complete Lesson
4. Cut two matching heart shapes from pink craft foam. Glue them together around the edges leaving a one inch opening. Stuff the heart with tissues or crinkled up paper and glue the heart closed.
How to Play:
The object of the game is to get as many points as you can by throwing the heart onto the pink heart in the middle. Break your children up into teams and have them take turning tossing the heart. If the heart lands on the pink heart they get 10 points. If it lands on a brown heart or is touching the brown heart they lose 5 points. If the heart lands on a brown heart, ask the child to read the word on the heart and give an example of how that word doesn't show love. For example, if the word is unforgiveness, the child may say, "If someone calls me a bad name and I don't forgive him, I'm not showing love."
The team with the most points wins.
©2013, Digital by Design -* See Copyright Information
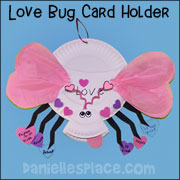
More Valentine/Love Crafts and Activities on Other Pages
Love Is Bible Lesson for Children

"United in Love" Paper Chain Paper Doll Bible Craft
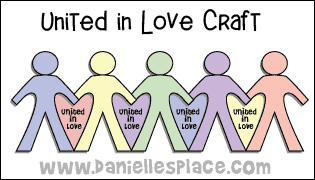
See the Martin Luther King, Jr. Crafts and Learning Activities Page for directions and free patterns.
Just wanted to let you know that your site has been the best investment our Children's Ministry has made toward curriculum. We've tried lots of different types of lesson plans, crafts, etc. . . and daniellesplace.com is still the best! Your rock-solid Bible lessons, fun activities, and really fun crafts make my job so much easier. I don't know how you do it, but I sure am glad that you do! May your 2008 be blessed beyond measure. Heather
Love/Jesus Crafts on Other Pages
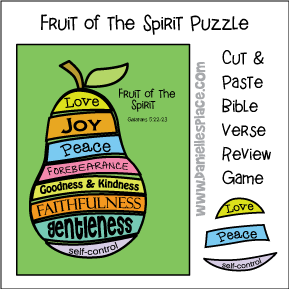
Fruit of the Spirit Sunday School Lesson Series
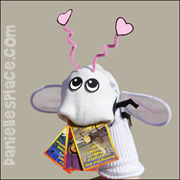
Teach your children what it really means to love using this series of lessons. Each lesson is presented with a caterpillar puppet named Squirmy. Your children will learn from Squirmy worm about growing fruit and growing the fruit of the Spirit. This series includes a fruit bowl Bible verse memory chart, Bible verse cards, bulletin board displays which your children can help produce, and lots of crafts and activities to reinforce the lessons.
A Free Sample Lesson is available on the Sample Lessons Page.
You can also see a complete list of the lessons in this series with lots of examples of the crafts and activities available on the Fruit of the Spirit - Bible Crafts and Activities for Sunday School Page.
©2013, Digital by Design -*See Copyright Information
I have been a member of your site for almost a year. I used to go for the free lessons prior, but decided last year that I wanted more. I absolutely love, love, love your lessons for Bible Themes! Your site really helps me teach the kids about God in such practical and fun ways that I cannot teach a lesson without first consulting your website! Thank you for all the work that you put into each lesson. They are truly amazing and are the biggest blessing for someone like me who doesn't want to just lecture my kids. I cannot stop telling people about your website. I make sure that Carolyn Warvel gets all the credit in my notes home to the parents. I just want to give her a hug. I would love to pass on to Carolyn all the blessings that she has given to me by having such wonderful ideas for Sunday School. Thank you so much! You are incredible! Keep up the great work! Stephanie