David and Goliath Bible Lessson for Children
"David Takes a Dare" Printable Bible Lesson
Memory Verse: "For the battle is the LORD's." 1 Samuel 17:47b KJV
Printable Bible Phrase Cards: Print out the cards onto cardstock, cut them apart, and send one home with each child.
Teaching Concept: God helped David fight the giant and he will help you too.
Member's ![]()
Instand Digital Download - ![]()
Early Arrivals Activity
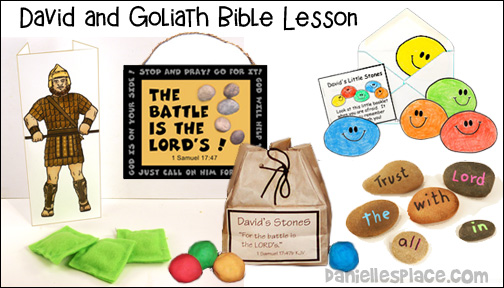
1. Make "The Battle is the LORD's!" Wall Hanging
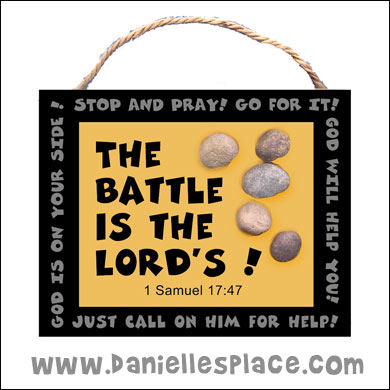
Before class print out the pattern onto pretty colors of cardstock (heavy paper), and cut them out.
Teaching Concept: God helped David fight the giant and he will help you too.
Member's ![]()
Instand Digital Download - ![]()
Bring in some small smooth river rocks. Let your children each pick out five rocks.
As they try to decide which ones they would like, tell them that the person in the story today had to pick out five, smooth stones also. We will find out what he used them for at the end of the story.
When a child has picked five stones that he likes, place a small dab of tacky glue on each stone and let him decide where he would like to place them on his wall hanging. To finish, add a string or yarn to the top of the wall hanging.
NOTE - This craft is for children five or older. Younger children could choke on small stones. Make sure the stones won't fall off the paper; and hand the wall hanging to the children's parents when they show up to pick their children up. Be careful not to leave any small stones behind.
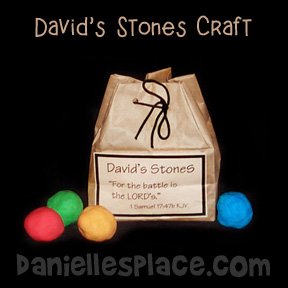
2. Make David's Stones and Bag
What you will need:
Brown Paper Lunch Bags
Paper
String
Glue
Hole Punch
What to do:
1. Fold the top of the bag down towards the inside of the bag 1 1/2". Fold it back three times so that your bag stands about 5 1/2" high. Punch 14 holes in the bag evenly spaced. Punch four in the front, four in the back, and three on each side.
2. Make a sample craft. Cut a length of string and weave it in and out of the holes starting in the front. Cut more string the same length for your students.
3. Print out the bag labels onto brown paper, cut them out, and glue to the front of the bags.
Teaching Concept: God helped David fight the giant and he will help you too.
Member's ![]()
Instand Digital Download - ![]()
4. Make play dough or buy it. You will need red, green, yellow, orange, and blue. To make the dough place a one-pound box of baking soda, one cup of cornstarch, and 1 1/4 cups of cold water in a saucepan. Cook over low heat until the dough looks like mashed potatoes. Remove from the heat. Cover it with a damp cloth until it cools and then store in a plastic bag. This dough gets very hard. It feels a little gritty so have some wet paper towel available for the children.
5. You can also include a little booklet that explains what each color represents. See "David's Little Stones" craft below.
© 2000, Digital by Design, Inc. - See Copyright Information
The Lesson
Preparation: Before class draw a big ugly face on a piece of poster board. Bring in a yardstick or ruler, and measure up nine feet, while standing on a step ladder or something secure, mark off nine feet to show the children how big that is. Tape the face to the wall at nine feet.
Optional: Prepare armor for Goliath. Go to the Armor of God lessons for ideas. If you don't have time to prepare these things, just use anything you can find around your house as a substitute. You can use the top of a garbage can for a shield, a large coat or grocery bag for the coat of armor, a broom for a sword. Or you can bring in a roll of aluminum foil and quickly make the outfit as you talk. Goliath will look silly, but that is okay because he really was silly thinking he was so strong. You will also need a basket with food in it.
Have you ever been dared by someone to do something? Have you ever dared someone to do something? Usually when we dare someone to do something, we are too scared to do it ourselves. (Talk about dares. Let the children share their ideas and experiences. Talk about how it is wrong to dare someone to do something that is dangerous or bad.) It is wrong to dare someone to do something to prove that they aren't scared.
The Bible tells us to treat others as better than ourselves. (Open your Bible to 1 Samuel 17.) Our story today is about someone who gave a dare. He thought he was tough, and he wanted to prove it. He was a big man. As a matter of fact, he was considered a giant. He stood over nine feet tall. (Point to the face of Goliath on the wall.) Goliath was that tall. Yes, Goliath was a big man and he thought he was better and stronger than anyone, and he wanted to prove it.
At this time there was a war going on. The Philistine army was on one hill; Israel's army was on another hill, and they were facing each other. (Break the class up in half by holding your arms straight out in front of you. Tell the children to split up down the middle and face each other. Designate one side the Philistine army and the other the Israelite army. Then pick someone to be Goliath. Pick a child who doesn't mind playing the bad guy and likes attention.)
Goliath wore a bronze helmet to protect his big head. (Quickly make a helmet out of aluminum foil by wrapping the foil around Goliath's head. Or place a hat or helmet you have made on his head.)
He wore bronze coat of armor. (Wrap some more aluminum foil around the child's chest and arms.)
He carried a huge spear in his hand. (Form the aluminum foil into a spear shape and give it to Goliath.)
Goliath must have looked pretty scary. When it was time to fight, Goliath would come out and stand on the hill and yell across to the other hill where the Israelites were camped. He dared someone to come and fight him, but no one on the Israelite side would fight him. (Ask your Goliath to dare the Israelites to come and fight him. Tell the "Israelites" to look scared and shake their heads no.)
Every day for forty days Goliath dared someone in the Israelite army to come and fight him, but no one would do it. They were all too afraid. Three of the men in Israel's army were brothers. (Pick three kids on the Israelite side to be the brothers.) They also had a little brother named David who was still at home taking care of his father's sheep. (Pick someone to be David and have him stand by you.) One day, David's father, let's pretend I'm David's father, asked him to take some food to his brothers. (Pretend to be David's father and ask him to take some food to his brothers. Hand him the basket of food.)
David took the food to his brothers. (Tell "David" to go hand the basket to the brothers.) When David got there, he heard Goliath spouting off as usual, daring someone to come and fight him. (Have "Goliath" dare the army again.) Again, no one would fight Goliath. (The Israelites should shake their heads no again.)
David could see that they were all afraid. But David wasn't afraid; he spoke up and said, "I'll fight Goliath." (Have "David" repeat your words.) David wasn't afraid because he knew that God was with him. He remembered the times that God had helped him before. Once he had helped him fight off a lion that was attacking his sheep. Another time God had helped him pull a lamb from the mouth of a bear.
David went and found five, smooth stones and put them in his bag. Then he took his sling and went up to fight Goliath. (Have David pretend to look for stones.) When Goliath saw David, he started to make fun of him. He said, "How dare you come and fight me with sticks and stones. Do you think I am a dog? Where is your sword?" (Have Goliath repeat your words.) David stood his ground and said to him. "You may think your tough, with your sword and spear, but I have God on my side, and he is stronger than anyone." (Have David repeat the words.) (Tell the children to act out the story as your tell it.) David reached into his bag and pulled out a stone. He put the stone in his sling. He slung the sling around and "plunk"; it hit Goliath right in the middle of the forehead. Goliath fell to the ground; he was as dead as a doornail. (Tell Goliath to pretend like he has been hit with a rock and fall down dead.)
When all the other Philistines saw that Goliath was dead they ran away. (Tell the other Philistines to go back to their seats and sit down. Tell the Israelites to shout "Hooray" and then sit down.)
Conclusion: Goliath thought he was a big, tough man, but he forgot two important things -- God is stronger than anything or anyone, and David had God on his side.
© 2000, Digital by Design, Inc. - See Copyright Information
Prayer
Dear God, thank you for being with us when we are scared. We know that you are stronger than anything or anyone. Help us not to be afraid. Remind us that you are always with us and will help us when we ask for your help. Amen
Craft
1. Make "David's Little Stones" Craft with Printable Book
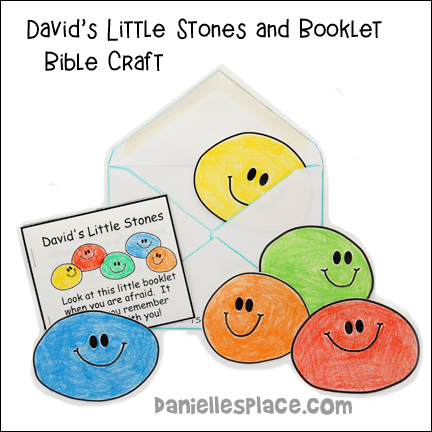
This craft comes with a printable mini booklet that will help children remember that God is with them.
Each colored stone represents a way children can trust in God to help them.
They can color the stone patterns and write Bible verses on the back of the stones, and store them in an envelope.
Teaching Concept: God helped David fight the giant and he will help you too.
Member's ![]()
Instand Digital Download - ![]() - Complete Lesson
- Complete Lesson
Instant Download Pattern - 
Edición en Español Descargas Instantánea:

© 2001, Digital by Design, Inc. - See Copyright Information
2. Make "David's Little Stones" Out of Play Clay
2 Cups Baking Soda
1 Cup Cornstarch
1 1/4 Cup Water
In a medium-size saucepan, stir together all the ingredients. Cook over medium heat, stirring constantly, until it resembles mashed potatoes. Place the dough in a bowl and cover with a damp cloth until it is cool. Store in a plastic bag.
© 2000, Digital by Design, Inc. - See Copyright Information
3. David and Goliath Bible Verse Review Sheet - 1 Samuel 17:37
Children look up the verse and use it to cross out all the word in the verse to reveal what David said.
Teaching Concept: God helped David fight the giant and he will help you too.
Member's ![]()
Instand Digital Download - ![]()
Activities
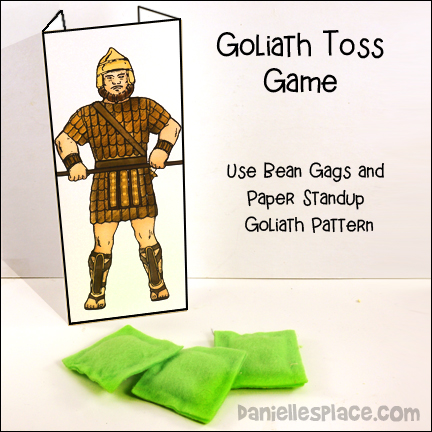
1. David and Goliath Review Toss Game
What you will need:
Card Stock (Heavy Paper)
Bean Bags
How to play:
1. Before class print out the Goliath pattern onto card stock and fold back the two sides so that it stands up.
Teaching Concept: God helped David fight the giant and he will help you too.
Member's ![]()
Instand Digital Download - ![]()
2. In class line the children up in a row and ask each child a question from the lesson.
If the child answers the question correctly, let him or try try to throw a bean bag at Goliath to see if he or she can hit him in the forehead.
If a child doesn't know an answer, give him some clues until he can figure it out or have a friend help him.
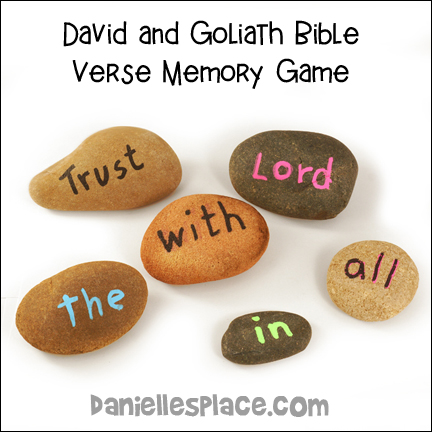
2. Play a Stone Match Game
What you will need:
River Rocks - (Different sizes and shapes)
What to do:
Younger Children:
1. Place dots of different colors on the underside of each rock; make sure you have two dots of each color. Turn all the rocks over so that the dots are hidden. Let the children take turns turning over rocks to see if they can find a match. Make more than one game if you have more than four or five children.
Older Children:
1. Before class write words from the Bible verse on one side of the rocks.
2. In class place all the rocks on a table in the center of the children with the words face down. Have the children takes turns turning over the rocks trying to find the words of the Bible verse in order. If a child finds a word in the correct order, he gets to keep the rock. The child with the most rocks at the end of the game wins.
3. Play a "Duck, Duck, Goose" Type Game
Children sit in a circle. One child walks around the circle tapping each child on the head saying, "David, David, David." When they say "Goliath," "Goliath" chases them around the circle back to Goliath's old spot. Then Goliath starts, "David, David", etc.
4. Sing "Knock Goliath Down"
By Nancy Foss
Sing to the tune of "Did you Ever see a Lassie?"
Did you ever see David,
See David, see David?
Did you ever see David knock Goliath down?
With one throw of a rock,
Goliath fell to the ground.
Did you ever see David knock Goliath down?
© 2000, Digital by Design, Inc. - See Copyright Information
Copyright
Copyright 2000, Carolyn Warvel
Danielle's Place of Crafts and Activities
https://www.daniellesplace.com
All rights reserved. No part of this publication may be reproduced or transmitted in any form or by any means, electronic or mechanical, including photocopying and recording, or by any information or storage retrieval system, except for local church or school use only. This copyright notice must be included on all copies. Requests for permission to copy this material for any other uses should be addressed to Carolyn Warvel, 588 Duran Street, Henderson, NV 89015 or e-mail me at care@daniellesplace.com
Comments
We would love to hear your comments about this lesson. If you have done this lesson with your class we would love to hear how it went, if you changed anything, added anything, what age you taught and was it appropriate. Any comments that would help other teachers would be greatly appreciated and posted here for everyone to read.
I did the lesson on David and Goliath last week in Children's Church. We rolled out paper and drew the giant, Goliath, and taped the picture to the door frame of an opened door. The children stood in line and if they answered the question correctly they got to throw a whiffle ball at the giant. Needless to say this activity was a great hit...no pun intended! The enjoyed the story and to my surprise answered most of the questions correctly. I love the Resource Room. It has brought me great joy teaching the kids and having such fun doing it with all the help from your site. Bev Nicol, Christ United Methodist Church
I teach a Sunday school class with ages ranging between 1 and 4 years. This week, my lesson was on David & Goliath. I used "David's Little Stones" as part of my lesson and craft. I did modify the craft some. Using my computer, I colored the stones and the booklets. I also cut them out prior to class time (most of my children are too young for cutting). As the main part of my craft, I printed a "Shepherd's Bag" onto brown construction paper and cut out two bags for each child. Using a hole punch, I punched holes all the way around the outside of the bags. I provided some thick black string, and during class, my children "sewed" the bags together. We proceeded with the lesson on the stones, and as we discussed each one, we placed the stones inside our bag. I also noticed that during intermission, between Sunday school and Praise & Worship Music, there were a lot of adults reading the little booklets. So this not only ministered to the children, but to the parents as well. I was very pleased Theresa Bostick
I am a Sunday school helper and I teach ages from 2- 5 years old. On Wednesday, August 15th I did the lesson of David and Goliath. The children loved making the booklets and taking their paper stones home. Next time, we will try it with real rocks for them to paint and take home. Thank you so much for the lesson. I enjoyed it as much as the children. Sincerely, Ruth Cutshall
Your sight is the greatest! I used the David's little stones with my Wednesday night sunbeam class. They really enjoyed it and retained so much of the lesson! They were thrilled with their stones.Next time I do it with the next group, I plan to work ahead and make little pouches with drawstrings out of tan or brown cloth. I am going to gather stones and spray paint them with the colors. Then at the end of the class I will send each child home with their own pack of stones and a note to the parents on the lesson and how to use it as a refresher/ Bible study for the weeks to come. Thanks! Narita
I teach at our church's Little Church School for
3-5 year olds on Sunday mornings. I just found your site recently
and am overjoyed to have such a fine resource. Just recently I used
the David and Goliath Lesson Plan with some modifications to great
success. For the craft I printed out the David's little
stones sheets off my computer, cut the pages out and used glue stick
to place each on color-coded card stock cards that were slightly
larger so a border could be seen. I hole-punched all cards and tied
a piece of red yarn to hold the book together. I put a paper clip
through the yarn at the back of the book for later use.
I used light blue felt for stone pouches. I cut 10 inch circles
out of the felt, and with a big needle sewed all around the edges
within 1/4", leaving a five inch end where I started and where
I finished so the ends could be pulled and the pouch, gathered.
I also made some sample slings out of 5 inch brown felt circles,
sewed on both sides to gather edges and make more of a cup shape.
I punched a hole on both sides and tied two-feet pieces of twine
to the sides. We practiced swinging the slings and slinging marshmallows
at a nine-foot high head of Goliath I had drawn on paper and taped
to the wall. We did this after the Bible story and before the craft
just to get the kinks out - the kids got in about 4 lines and each
took turns with the slings.
After the Bible story I had my older helpers take turns reading
a page out the little stones book. When the kids got to their craft
tables, I handed out the open pouch and the booklets. Each child
received a piece of colored Model Magic clay - red, yellow, green,
blue and orange. They proceeded to make their own stones and place
them in the pouch. Then they pulled their pouches closed and we
tied them onto the paper clips on the back of the booklets for safekeeping.
I asked the kids to use crayons to color the stones in the booklets,
also. The kids and the parents were beaming after this program.
Thanks for the fabulous idea upon which I could build. Sincerely,
Susan Stavish
On Wednesday nights we are learning about "Bible Super Heroes". Our featured super hero last night was David. We watched the Veggie Tales Video, "David and the Giant Pickle." After the movie, the children were able to throw Velcro balls at the Goliath I made. I took a nine foot long piece of bulletin board paper, sketched Goliath in pencil, outlined him, and colored him in, then I had it laminated. We adhered Velcro patches to him (On this forehead, shoulder, leg...) Then we hung him up, and the children took turns throwing the Velcro balls at him. Only one child made the Velcro ball stick to the forehead target. He received a small prize out of our "Treasure Chest". Other children were able to hit the lower targets and they received rewards as well. It was a great Hit! Pardon the pun!! I had as much fun as the children. Anne
I have used many of the ideas I have found on your site, but I think that this one had the biggest impact so far. I teach a children's church class of 2-5 year olds, and I assumed most of the children had heard this story before, but even if they had, they were amazed. Before class, I taped a big cardboard Goliath face with jagged ugly teeth to the top of the wall. As I started the story, I explained how tall Goliath was, and the children had a greater understanding because of my example on the wall. I also used a picture book to illustrate the story as I told it. We made the David's little stones craft, which I had precut, and the kids loved having stones of their own. The biggest success was when we played the game "throwing stones at Goliath". I would ask each child a question about the story, and if they answered correctly, they got to throw a marshmallow stone at the face of Goliath. This did get a little messy though, so be prepared with wet wipes. The following week after I taught this lesson, one of my little boys in my class came in to sit down and asked immediately if we were going to throw rocks at the giant again. It may have been a game to them, but at least they retained a little bit of what was taught. Thank you so much for your ideas! Lisa
This week I taught David and Goliath to my 2's and 3 year olds. We have such a short period of Sunday school time; I often break up the ideas into two or three weeks. The children love hearing the story the second time and I find that they get the concept better the second week. This week we made the five little stones and the pouch. I changed the craft a bit for my class. The children got to color each stone, perfect for learning colors. I had precut and punched holes in gold felt and in class, one by one, I "sewed" with them around the circle to make a drawstring pouch for their stones. The students loved the one on one time and the pouch. Thanks for the great ideas. Christy Burdick
I used the "David and Goliath ball toss" it was such a blessing. It was my first day as a Sunday school teacher for third grade girls and needless to say I was done with my lesson
way before the class time was up and so I drew a Goliath on the
board, made a ball and they had the greatest time trying to hit
him in the head. It made all the girls laugh and smile and was a
great icebreaker for me as the new teacher. This web site is so
wonderful. I'm amazed at all the wonderful things you share with
me. You are worth more than your membership fee any day; the patterns
for the crafts are priceless!!!!!! I just wanted to let you know how much the children,
of all ages, enjoyed our first lesson from your web site The younger
ones did "David and Goliath" whereas the older ones started
on the first lesson in the "Armor of God" series. I made
a Goliath height chart to show how tall he was and measured all
of my class (7 to 9 yrs.). They were pretty amazed. At the end of
the lesson we tried to hit the big red spot, which I marked between
his eyes, with marshmallows, as suggested. The older children came
over to join in and, of course, had to be measured too. We had a
lot of fun and can't wait for this week when we do "The Belt
of Truth". Celia
I recently used your David and Goliath lesson. We used the "Throw the Marshmallow at Goliath" activity idea. This was a wonderful way to review the lesson. I drew a 9 foot tall Goliath and the children colored it before we hung it on the wall. Instead of marshmallows I filled round balloons with flour to make our "stones." They are very soft and not sticky like marshmallows. I'm leaving the Goliath up throughout the Armor of God lessons. I used the David and Goliath lesson with my 5-7 year old youth group this week. The children enjoyed the story and they enthusiastically told me what was going to happen before I could finish the story. We used the patterns to make the stones and booklet and discussed the meaning of the different colored stones. Each child decorated an envelope "pouch" for his stones. We punched one hole on each side of the envelope and tied a piece of yarn through the holes so that the "pouch" could be tied around the waist. By the end of our class, the children could tell me the meaning of each colored stone and they were very proud of their stone "pouches". Cindy Morgan
Our class did the first in your series for "Armor Of God". This was a lot of fun. To start the class, I had them use the aluminum foil and decorate a child with armor. There were two teams and they had a lot of fun doing that and used a lot of creativity. Then we used the lesson. The children learned a lot. After it was over we did the games of dressing the paper child in armor if they got a question right. This lesson was just a lot of fun. We plan on using the next one, "The Belt Of Truth". Thanks Christina Penley
I did the lesson on David and Goliath for our after
school kids club (ages 4-13) I took the idea of making a large 9-foot
giant. We hung our 9-foot giant in the chapel where the lesson was.
We used it as a growth chart, and marked where everyone measured
up the giant. We also took their pictures with the Giant with a
Polaroid camera. I have to admit that seeing a 9-foot giant was
pretty amazing and intimidating. We left the giant up in the chapel
for Sunday so the adults could see Goliath. Having the giant during
the lesson really helped the kids visualize what David was up against. The kids loved the 5 stones craft. They made little booklets that
had the meaning of the 5 stones, as well as our memory verse for
the week. To go with the 5 stones craft, we enjoyed David &
Goliath snacks. (Banana cut into 2 pieces, one being larger than
the other; pretzel sticks for arms and legs, peanut butter for glue,
raisins for the face, and a maraschino cherry for Goliath's helmet.
We then used M&Ms (the colors that correlated with the stones
in the 5 stones craft) has David's 5 stones). The kids loved playing
with their food while learning at the same time. Thank you for a
great lesson. We did the lesson several weeks ago, and the kids
still can remember our Giant, and the fact that God is with us no
matter what we face. I am currently writing-compiling a "Building Christian Character" Unit Study for my 3rd-5th-grade class. We are covering different
characteristics each Christian needs in there life. i.e.. Compassion,
gratitude, generosity, etc. We are currently on the characteristic
courage; it's meaning and application. For this I used the story
of David and Goliath.
Of course, I wanted to see if you had any fun crafts for the children.
I loved your "David's Stones" idea. However I knew the
children I teach would have thought the craft to be "babyish" for them. LOL So, I quickly altered your idea for the older children.
So, We painted smooth stones in the colors you suggested coloring
the stones. I then gave each child a Poem that I wrote regarding
the meaning of each colored stone. Here is the poem I wrote:
Five Little Stones
by Ronda Duvall
Red, Blue, Yellow, Orange, and Green,
These five little stones remind me of many things.
Red means stop and pray for courage.
With God on my side never be discouraged.
Blue means it's okay to feel sad.
But, with the right amount of courage, I don't need to get
mad.
Yellow reminds me to slow down and pray.
Thank God for His blessings every day.
Orange, this stone is very bright.
God is with me, there's no need to feel fright.
Green means for me to get up and go,
God shows me that He loves me so.
We just did this lesson this week, and had so much fun with it. We have a Mommy & Me Bible time group. The kids range from 2-5 years old. We have 10 kids, and 8 moms. We combined two activities by coloring the bottom of the marshmallows with markers to be the color of the stones on the coloring page. We talked about David, and the colors of the stones, and let the kids gather their 5 stones. We then took turns throwing the marshmallows at Goliath as we reviewed the colors. The kids loved this activity. It was definitely a blessing! Marika Hobson
Punch holes around the folded edge of a small lunch size paper bag. Weave string through the holes to make a holder for David's stones. Kirstin
Last Sunday I taught your David and Goliath lesson. The 2 - 5 yr. olds had a blast! We sat down and I told them what we were doing, though it was pretty obvious from the 8 foot giant on the wall (could only do 8 feet tall as hit the ceiling)! Then we sang, Only A Boy Named David and talked about David and about the giant. Then I read the story in the Bible and we discussed it as we went. Started with David as a shepherd and I related that to them being shepherds last time (Lost Sheep lesson). We talked about our fears and then did the memory verse -The battle is the Lord's. Karyn Henley has a song called Great Big God that works well with this lesson.
Then we went to table and made the little stone books. I used the poem about the colors and made the cover brown with title and author and then next page I made was the first part of poem and then each page after was a stone color. We went through the booklet while they laced the books together. Then I passed out brown lunch sacks and we made the pouches for carrying their rocks. We laced the top closed and then used yarn to tie the sacks around their waists. I passed out pre painted rocks to go in their bag and, of course, we discussed the rules of safety with the rocks. When they finished they could go to the drawing of the giant on the wall and I took their picture by the giant. Then they got two tries to hit the giant in the forehead with ping pong balls (our rocks). I had six balls all together so I would take a picture of the child, let them try to hit giant and then find their balls while next child had their picture and so on. Can get done faster. My husband had the ones waiting sitting on the floor nearby so they could watch and he used a boy stamp and a girl stamp and stamped their hands. We told them that this stamp on their hands would remind them today that we don't have to be scared because God is always ready to help us. After that we had a snack and ate rainbow colored fish snacks and talked about the colors. Then when they were done with snack and had their things in the trash they got to have another try at Goliath until time to go.
This week I will send the pictures I took of each child to them on a postcard and remind them what we learned. Parents came up to me later in the hall and said their child was bubbling over their pouch and rocks and getting to hit Goliath. Thanks for all the wonderful ideas! What a blessing you are to teachers!You make our job so much easier! Lara
I did this lesson and wanted to do the craft where you paint rocks different colors and make the bag to put them in. I wanted them to be smooth rocks so I bought river rocks from Wal- Mart but when I went to paint them the paint rubbed right off. So I put Primer on them first. This made the paint look kind of marble colored when the kids painted them. Heather
I taught David and Goliath to my 2-8 year-old Sunday School Class. I used the David's Little Stones activity with my class. The kids really liked making the little book. I expanded on it a little bit and let the kids make a little bag with stones in it to take home as well. I bought the glass stones in the appropriate colors (I found them at Wal-Mart) and I also found a little bag for them to put the stones in. The bag was actually a little sachet that I found in the baby shower section at Wal-Mart. The kids loved this lesson! Tina Russell
I wanted to let you know how much I am enjoying your site and how helpful it has been for my lessons in treasure time. For the lesson David and Goliath I thought of a cute bowling game for the kids to use, to give a little different spin on things. I use the pattern for the giant soldier from the story, Shadrach, Meshach, and Abednego. I printed the pattern from the large file, colored him, and than taped him to the head of a small child-size bowling pin. I made six in all. Each child had their own bowling pin. I gave the kids a small plastic ball and they played a game trying to knock over Goliath. The younger kids, 2 - 3, had a fun time with this. It got out a lot of energy and yet it still tied into the lesson. For the older children, 4 - 5, we did the whole bowling set with just one Goliath at the head pin. I tried to make it so they would all have fun and be challenged. If you don't have bowling pins for children you can use empty clean, two-liter bottles for this game as well. This ideas was sent in by Pamela Holloway.
My children church group has been studying on the armour of God. We started first with the lesson on David and Goliath. We did as many of the activities that were for the lesson. I think the one that the children enjoyed the most was shooting marshmallows at the giant poster of Goliath. I believe that I got that activity from the comments section. Then we had a lesson on the whole armour. Now we are studying each piece separately. The kids are from ages 8-13 and sometimes we have a few smaller ones join us. The kids have really enjoyed the lessons so far. Thanks for giving us such good lessons. Denise Schumann
We had fun with this lesson as with all the others. The children loved making the stone books and the larger stones were put in a specially designed envelope.
In the beginning of class we had fun making a huge Goliath. I let each child draw a different part of him, one child drew the head, one child drew an arm, one chid drew a leg and so on, when we finished all goliaths
Parts we put him together a bit like a puzzle he was a strange looking fellow, we all had a great laugh and had fun answering all the questions. We didn't throw marshmallows but crumpled up pieces of paper. Thank you for another great lesson. My primary kids loved it. From Rosi
We studied David and Goliath and used your lesson plans for David takes a Dare. The children loved acting out the Bible Lesson. We have a very tall teenage boy who helped us and played Goliath. We dressed Goliath with tinfoil. The children had a blast. We also did the The Battle is the Lords craft. This was very well received by all the children. Next week we will start the armor and we decided to Trace all the childrens bodies on white butcher paper than they put faces and clothes on themselves. We hung them all around the room. Each week when they make a piece of armor they will tack it to their self portraits. Anyways thank you again so much. I also want to thank you for having the verses in King James. That is our preference and it made it a lot easier to print out the verse cards. Lord Bless you and Keep you. Alicia
David and Goliath is always a favorite story, regardless of the age of the kids. As children's director at First Baptist Church in New London, Missouri, I find it's sometimes challenging to present a lesson that appeals to the kindergarteners while challenging the sixth graders. We recently used your David and Goliath lesson with great results. I enjoyed the "Five Little Stones" poem that Ronda Duvall submitted and decided to use her creativity as a springboard for our project. Instead of painting stones, we decorated sugar cookies with pieces of fruit. I wrote the following poem to explain each step of the process. Connie Melloway
Remembering Gods Love
Start with a cookie round and sweet.
Add cream cheese icing to this great treat.
Then comes morsels…oh, so nutritious
Each with a message and also delicious.
Strawberries are red and blueberries blue.
Yellow pineapples & oranges, too.
Green grapes add the finishing touches
To our mini pizzas, pretty and luscious.
Now read the next verses and you will know
How God cares for you and loves you so.
Red, Blue, Yellow, Orange, and Green,
Five little colors remind me of things.
Red means STOP! Pray for Gods power.
He's Lord of my life and my strong tower.
Blue tells me some days Ill feel sad.
But with Gods help, Ill soon be glad.
Yellow reminds me to slow down and pray.
Thank you God, for blessings each day.
The color orange brings smiles to each face.
God leads me to win lifes race.
Green tells me to get up and go
Tell others how he loves them so.

The lessons on this page can be found on The Resource Room a subscription site designed specifically for Sunday School teachers and childrens ministry. Join the Resource Room today! You will receive online access to complete, easy to prepare, bible lessons, new craft ideas and patterns, outreach ideas to help you grow your Sunday school class, church bulletin board ideas and much more.
Copyright Notice
The craft patterns, ideas, songs, lessons, etc. on this web site are copyrighted.
You may not publish a copy of them on any other web site.
You may publish a picture of a finished project you made from this site (not the directions and patterns) on another web site as long as you state where you got the project and include a link back to the project on this web site for the directions and patterns.
It is illegal to copy material from this web site without permission and publish it any where on the web even if you include the copyright notice and author's name.
If you would like to publish something from this web site on your site email us (see link above) for permission.
All rights reserved. While many of the crafts on this site are free, they are still copyrighted. They may not be reproduced or transmitted in any form or by any means, electronic or mechanical, except for use in your local church, school, home, library, and other organizations. It is illegal to copy any part of this craft and place it on another web site, bulletin board, or personal web site. To request permission to copy this material for any other use than personal use contact me by e-mail.
For more Sample Sunday school lessons go to the Sample Sunday School Lessons Page.
For free Sunday school lessons go to the Free Sunday School Lessons for Children Page.