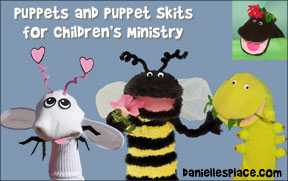
Puppet Crafts for Kids
How to Make Puppets: Sock Puppets, Canvas Puppets, Paper Bag Puppets, Stick Puppets, Marionettes, and Hand Puppets, Bent Spoon Puppets and Puppets from Cups
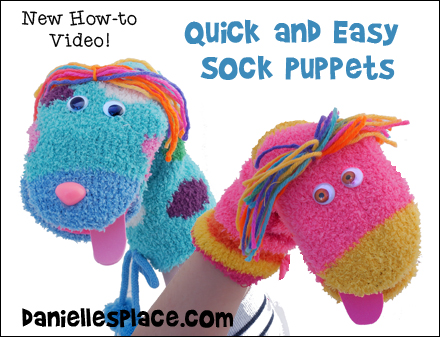
How to Make Sock Puppets
Easy to Make Sock Puppets - These puppets are so cheap and easy to make. You can add different features to make an endless array of puppets. Save your old socks and socks with no mates or look for used socks and accessories in second hand stores. (Directions also available in Spanish.)
What you will need:
Socks
Pink or Red Felt Squares
Cardboard from Cereal Box or Thicker Card Board
Chalk or Marker
Scissors
Paper
Google Eyes
Pink Craft Foam for the Tongue
How to Make Puppets from Socks:
Watch a video on how to make the sock muppets and read the directions:
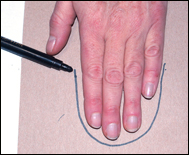
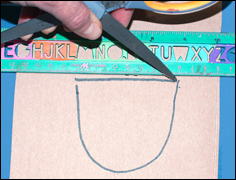
1. To make the mouth piece, place your hand on a piece of cardboard and draw a curved shape around your fingers down to the end of your fingers or just below your knuckles. (Make pointy mouthpieces for animals with pointy noses such as snakes and wolves.) Draw a straight line to connect the path. Fold the cardboard in half at the straight line, and cut out the pattern so it is double.
2. Insert the folded mouthpiece into the sock so that the curved ends are facing the toe end of the sock.
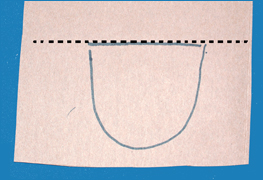
Place your hand in the sock as shown in Picture A so that it is comfortable. Mark on the sock with chalk 1/2" beyond the end of the mouthpiece. Cut off the end of the sock where marked.
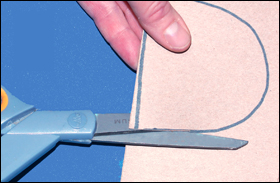
3. Remove your hand and flatten out the sock so that the heal of the sock is on top. Cut away the extra sock material around the rounded part of the cardboard mouthpiece one-half inch from the edge. See Picture B.
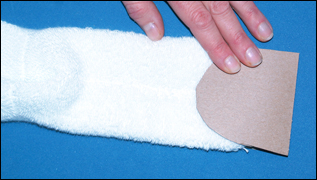
4. Fold open the toe end of the sock and the cardboard mouthpiece. The mouthpiece should be laying on top of the sock with the top toe end of the sock folded up.

Place a drop of hot melt glue in the center of the lower edge of the mouthpiece. Shown in Picture C to the right. Pull the edge of the sock material over the edge of the cardboard piece and press it in place being careful not to burn yourself.
Place another dot of glue on the top edge of the mouthpiece and pull the edge of the sock over the mouthpiece and press down. Shown in Picture C.

5. Place glue all the way around the edge of the mouthpiece a little bit at a time pulling the sock material over the mouthpiece of pressing it down as you go until you have the material glued all the way around the cardboard mouthpiece. See Picture D.
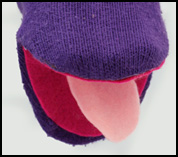
6. Cut another mouthpiece from pink or red felt for the mouth.
Cut it to fit over the cardboard mouthpiece and cover the edge just a little. Open up the mouth and glue it down.
Cut out a tongue piece and glue it inside the mouth.
To add other features stuff the sock puppet with scrap material to make the puppet firm. Glue on ears, eyes, teeth, and other features.
©2007, Digital by Design, Inc. - See Copyright Information
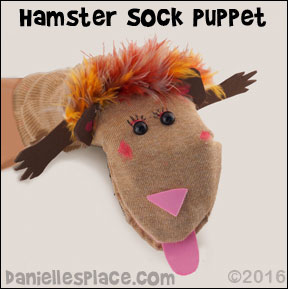

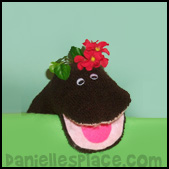
Eleven-year-old Cassie enjoyed making this hamster sock puppet, and especially making up puppet skits for the puppet when it was finished. This was the first time she made a sock puppet and she needed some help.
Adults should always supervise children when using glue guns or other potentially harmful craft equipment.
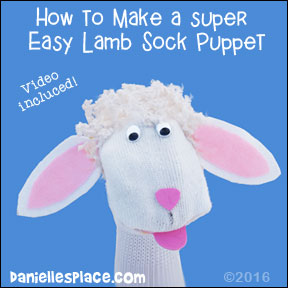
Quick and Easy Sheep or Lamb Sock Puppet
This sock puppet is easier to make than the full mouth sock puppet above, but the mouth doesn't have as much movement so it is harder to make it look like it is talking, and doesn't show quite as much emotion as the full-mouth puppets.
What you will need:
A White Sock
Pink Craft Foam for the Tongue
White Bernat Pipsqueak Yarn, White
Cardboard from Cereal Box or Thicker Cardboard
Chalk or Marker
Google Eyes
Low Temp Mini Glue Gun with Glue Sticks
Sharp Scissors
How to Make the Lamb or Sheep Sock Puppet:
Watch the video and read the instructions below:
card-board folded in half.
6. Glue the mouth piece to the sock with a low temperature glue gun.
7. Turn the sock right-side out.
8. Cut a inside mouth shape from pink felt. Place it in the mouth to see if it fits. Trim it down if it doesn't fit all the way in the mouth. Glue the piece to the inside of the mouth.
9. Put your hand in the sock and mark with a piece of chalk where you wan the eyes and nose.
10. Glue on the eyes and nose.
11. Cut out ear shapes from white felt and then cut the same shape from pink felt only make them a little smaller. Glue the pink smaller pieces to the white ear pieces. Place some glue at the bottom of each ear and pinch to make a fold at the bottom of the ear. Stuff the sock with newspaper or a rag and then glue the ears to the sock.
12. Cut pieces of yarn and glue them around the top of the head, ears, and neck of the puppet. Remove the rag.
©2016, Digital by Design, Inc. - See Copyright Information
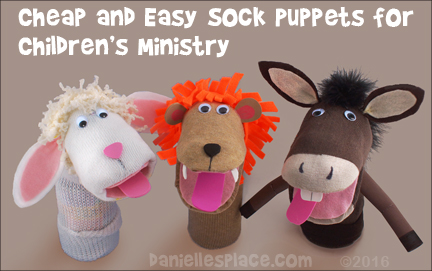
All three of these puppets were made basically the same with a little variation. They all cost less than $5.00 to make and used basic craft supplies including: sock, felt, craft foam, googly eyes, and a low temperature glue gun. They each took less than half an hour to make.
To see how to make these first watch the Video above to see how simple they are to make.
Then see direction for the specific puppet:
Sheep Puppet - See the directions above for the sheep sock puppet craft.
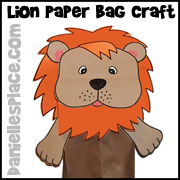
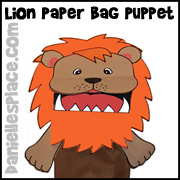
Lion Puppet - The lion puppet was made using the general sock puppet directions except we added a mane made from orange felt. Cut long strips of orange felt about two inches wide. Cut slits all the way down one side to make the hairs. Then stuff the puppet with rags or newspaper and glue the orange felt around the neck of the puppet
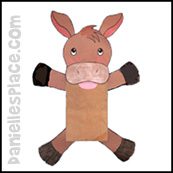
Donkey Puppet - The donkey puppet was made using the same technique. A man's sock with a light-colored heal and toe was used. The donkey's hair was made by gluing a feather boa on the top of the head and down the back. The legs were made out of rolled up, brown craft foam.
Danielle Johnson made this adorable sheep sock puppet. She drew ears and a sheep face onto paper and then taped them onto a white sock.

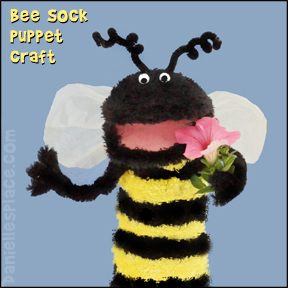
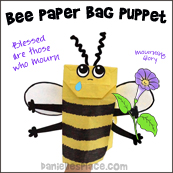
Bee Sock Puppet
This puppet looks complicated, but it was so easy to make. It is just a black sock cut open at the toe with a cardboard mouth glued into opening. The rest of the features were just glued on. It took less than twenty minutes to make and cost less than three dollars!
What you will need:
One Black and One Yellow Sock (I found these for less than $2.00 at Wal-Mart)
Chenille Stems - Thin stems for the antennae and the plush ones for the arms and hands if you can find them. (I found some at Hobby Lobby)
While Plastic Grocery Bag
Low Temp Mini Glue Gun with Glue Sticks
Sharp Scissors
Cardboard from a Cereal Box or other Similar Cardboard
How to Make the Bee Sock Puppet
1. Follow the easy to make sock puppets directions above using a black sock. Instead of gluing the felt on after gluing the edges of the mouth on, I glued the felt to the cardboard mouth and then glued the edges of the sock over the felt.
2. Stuff the puppet with plastic grocery bags or anything you can find to make it plump. Cut 2" strips from the yellow sock and glue them around the bee puppet's body using a low temperature glue gun.
3. Poke a Chenille stem through the sock at the top of the head and bring it back up through the sock again centering the Chenille stem on the head. Wrap the ends of the Chenille stems around a pencil to make the loops.
4. Bend two more Chenille stems into arms shapes and glue them to the sides of the puppet.
5. To make the wings cut a rectangle shape from the plastic grocery bag. Scrunch the center of the rectangle together and tie it with a twister or string to secure. Cut both sides into wing shapes and glue it to the back of the bee.
6. To finish glue on googly eyes and remove the stuffing.
©2014, Digital by Design, Inc. - See Copyright Information
Snake Sock Puppet

What you will need:
Sock with Texture
Pink Felt Squares
Cardboard from Cereal Box or Thicker Cardboard to Make the Mouth
Chalk
Scissors, Eyes, Permanent Markers
How to Make the Snake Sock Puppet:
1. Follow the directions above to make the sock puppet except cut the mouth shape longer and blunt at the end instead of rounded so it looks more like a snake.
2. Cut a tongue from felt or other red material and glue inside the mouth.
3. Draw on two dots for the nose with a permanent marker.
©2015, Digital by Design, Inc. - See Copyright Information
How to Make an Orange Sock Puppet

What you will need:
Orange Baseball Sock (Buy from a sporting goods store), Hot Melt Glue Gun
Black and Orange Felt Squares
Cardboard from a Cereal Box or Thicker Cardboard
Chalk
Scissors and Paper, Pipe Cleaners, Black Eyes or Buttons
How to make the Orange Sock Puppet:
1. Follow the directions Above to make the puppet.
2. To make the arms roll up a pieces of orange felt and glue them closed. Stick pipe cleaners inside the arms so they are bendable. Cut fingers at one end of the arms and glue the other end to the puppet.
3. Have fun with your new puppet and make your own videos.
©2007, Digital by Design, Inc. - See Copyright Information
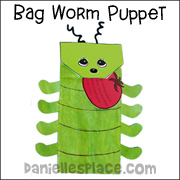
Caterpillar or Worm Sock Puppet
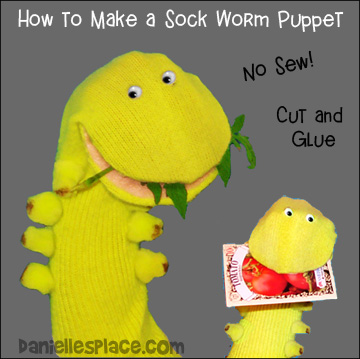
Follow the directions above for how to make sock puppets, above.
Cut eight or more one-inch pompoms into rectangle shapes.
Glue them to the body of the caterpillar. I used a brown Sharpie (permanent ink marker) to make the tips of the feet brown.
©2007, Digital by Design, Inc. - See Copyright Information
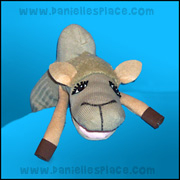
Camel Puppet
Easy Camel Sock Puppet
What you will need:
Pair of Men's Socks (tan),
Low Temperature Glue Gun
Pink or Tan Felt Squares
Tan Fake Fur
Black and White Fun Foam
Cardboard from a Cereal Box or Thicker Cardboard
Chalk
Scissors and Paper
Googly Eyes
Fiberfill
How to make:
1. Cut one of the socks as shown in the diagram at the right. Cut along the upper toe seam line so that the lower jaw of the camel is much smaller than the upper jaw.
2. Print out the mout pattern and cut it out using cardboard, above. Fold the mouthpiece in half. Score the cardboard on the center line and fold it in half.
3. Insert the folded cardboard mouthpiece into the sock so that the curved ends are facing the toe end of the sock. If it is too big, cut the piece smaller to fit so that it doesn't stretch the sock too much. Cut the mouthpiece smaller if it stretches the material too much.
4. Remove your hand and flatten out the sock so that the heal of the sock is on top. Cut away the extra sock material around the rounded parts of the cardboard mouthpiece 1/2" from the edge. See Picture B.
5. Fold open the toe end of the sock and the cardboard mouthpiece. The mouthpiece should be laying on top of the sock with the top toe end of the sock folded up. See Picture C. Place a drop of hot melt glue in the center of the lower edge of the mouthpiece. Shown in picture C with an X. Pull the edge of the sock material over the edge of the cardboard piece and press it in place being careful not to burn yourself. See Picture D. Place another dot of glue on the top edge of the mouthpiece and pull the edge of the sock over the mouthpiece and press down. Place glue all the way around the edge of the mouthpiece a little bit at a time pulling the sock material over the mouthpiece of pressing it down as you go.

6. Cut another mouthpiece from pink or red felt for the mouth. Cut it to fit over the cardboard mouthpiece and cover the edge just a little. Glue it down. Cut out a tongue piece and glue it inside the mouth. You may also want to add teeth cut from white fun foam.
7. To add other features stuff the sock puppet with scrap material to make the puppet firm. Cut ears from tan felt. Cut the eyes from white fun foam and draw in the iris using a black permanent marker. Cut the eyelashes from black fun foam. Cut little slits for the lashes and then pull ever other lash out so that the lashes are more separated. Glue on the eyes, eyelashes and ears.
8. Use a black permanent marker to draw on the nose.
9. Cut the toe off the end of the other sock and stuff with fiberfill stuffing. Glue it onto the back of the camel.
10. Cut out some tan fabric such as tan fake fur or a tan fuzzy sock and glue it around the front of the ears back to the hump.
11. To make the legs, cut pieces of tan felt 6" x 4" and roll up the pieces and glue along the edge. To make the hooves, cut pieces of black fun foam 1" x 4.5". Roll the pieces around the bottom of the legs and glue on.
2008, Digital by Design, Inc. - See Copyright Information
Turtle Sock Puppet
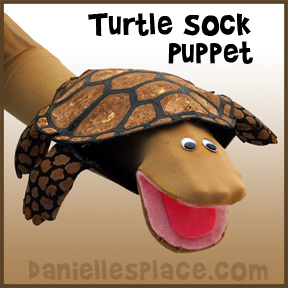
Turtle sock puppet made from a brown sock and brown craft foam.
Member's ![]()
Use the directions "How to Make Sock Puppets" for the head of the turtle, above.
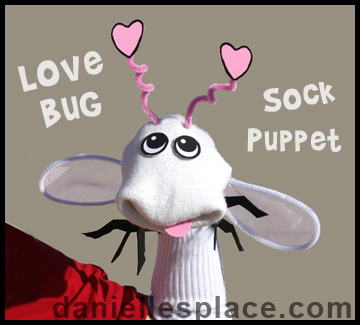
Love Bug Sock Puppet
What you will need:
A Man's Large White Sock
Pink and Black Craft Foam
Pink and White Pipe Cleaners
Card Stock
White Material for the Wings
How to make the Love Bug Sock Puppet:
1. A pattern for the eyes and legs are available to members only.
Member's ![]()
2. Use the sock puppet directions above to make the mouth for this puppet, above.
3. Draw eyes on craft foam or card board, cut them out, and glue them to the head. Punch tiny holes above the eyes and insert the pipe cleaner through one hole and back up through the other hole. Fold the ends of the pipe cleaner up and bend them around a pencil. Glue hearts to the end of the pipe cleaner as shown in the picture.
4. To make the wings bend pipe cleaners so the ends meet and glue the ends together with hot melt glue. Spread the wing material out flat on a newspaper. Place glue all around the pipe cleaner wing shape and press the wing shape down on top of the material. Lift up the wing so it doesn't stick to the newspaper. When the glue is dry, cut around the edge of the wing. Glue the wings to the back of the puppet as shown in the picture.
5. Cut legs from black craft foam or black poster board. Glue the legs to the front of the bug puppet. Cut a tongue from pink craft foam and glue it inside the mouth.
2008, Digital by Design, Inc. - See Copyright Information
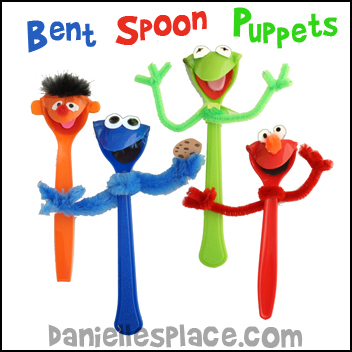
How to Make Bent Spoon Puppets
What you will need:
Plastic Spoons (The Cheaper the Better)
Low Temp Mini Glue Gun or Two-sided Tape, and Elmer's Tacky Glue
Utility Lighter with Long Handle
Chenille Stems (Pipe Cleaners)
Wiggle Eyes
Feather Boas
Pompoms
Craft Foam
How to Make the Bent Spoon Puppets
1. Hold a plastic spoon in your left hand (if you are right-handed) so that it is parallel to the table with the scooped side facing down.
2. Hold the lighter with your right hand underneath the spoon moving it back and forth across the middle of the scoop where you want it to bend. *Do not hold the lighter too close to the spoon because it could catch fire. You only want to heat it up. (This part of the craft is for adults only. Children should not use lighters.) When the spoon starts to melt and bend remove the lighter and bend the head of the spoon down so that it almost meets the handle. Hold it in place for about ten seconds until the plastic hardens.
3. Wrap Chenille Stems around the tops of the handles to make the arms.
4. Cut craft foam into mouth and ear shapes and glue them to the spoon with a low temperature glue gun.
5. Glue on wiggle eyes and a pompom for the nose.
"Great craft for elementary aged kids. However I used a candle to bend the spoons. . . With a candle you can keep your finger on the tip of the spoon and begin to bend it as soon as it gets soft. Much more control over the finished product too!" Olga
2014, Digital by Design, Inc. - See Copyright Information
Cup Puppets and Cup Marionette Puppets on other Pages

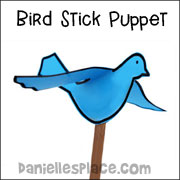
Also See the Stick Puppets Page
Paper Bag Puppets on Other Pages
Felted Lion Finger Puppet
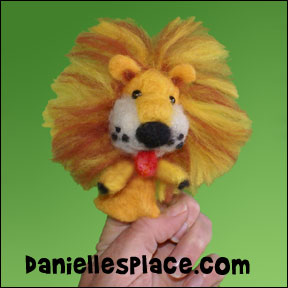
This lion finger puppet was made from wool roving (unspun wool) using wet felting and needle felting techniques. Wool is wound into ball and tube shapes and then poked repeatedly with a felting needle to condense the wool and sculpt it into the desired shape.
You can find directions for this craft and more on the Yarn and Wool Craft Page.
2008, Digital by Design, Inc. - See Copyright Information
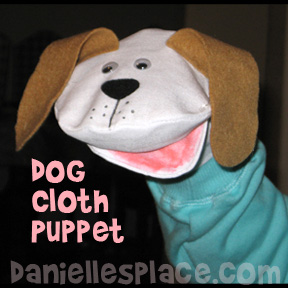
Canvas Dog Puppet Craft for Kids
What you will need:
Green and Pink Acrylic Paint
Cardboard from a Box
Red and White Fun Foam
How to Make the Dog Puppet:
1. Cut out nose shapes from black felt, ear shapes from different colors of felt, and tongue shapes from pink felt. Color the inside of the mouth pink with a marker or crayon, glue on the nose, ears, and eyes. (You may want to do this with a hot melt glue gun.) Then color the puppet with markers. You can also add spots, whiskers, etc.
©2008, Digital by Design, Inc. - See Copyright Information
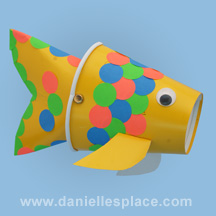
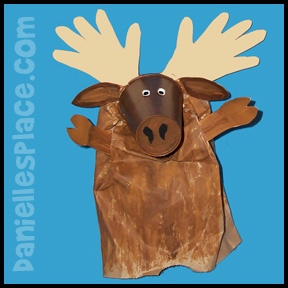
Moose Puppet Made from a Paper Cup and Brown Lunch Bag
What you will need:
Brown Lunch Bag
9 oz. Paper Cup
Tan Card Stock
Glue, Brown Paint, and Scissors
How to make:
1. Paint the outside of the paper cup brown. While it is drying cut out two ear shapes and legs from card stock (thick paper) and paint them brown also.
2. Trace your hands onto card stock and cut them out to make antlers. Fold the tips of the ears and glue the folded edge onto the inside rim of the glass. Do the same thing for the antlers.
3. Open up a paper bag and place your hand inside. Squeeze the bottom of the paper bag into the paper cup, flattening it out inside the cup as much as possible. Remove the bag and place glue all around the inside of the paper cup. Put the bag back into the cup and press it around the sides. When it is dry paint the bag to match the face. To finish, glue on the arms, legs, and eyes.
©2007, Digital by Design, Inc. - See Copyright Information
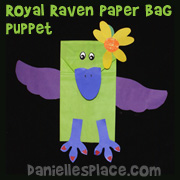
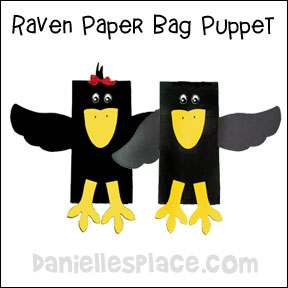
Jack and Jill Paper Bag Black Bird Puppets
These puppets can also be used as raven puppets for the story of the ravens feeding Elijah. They would make a great craft to go along with the lesson.
What you will need:
Lunch Bag
Black Acrylic Paint
Paper
Tape or Glue
Yellow and Black Construction Paper
Red Ribbon
How to make:
1. Paint your bag black with acrylic paint and let it dry.
2. Print out the body patterns and cut them out. Cut the wings and hair from black construction paper. Cut the beak and legs from yellow construction paper.
Member's ![]()
Free ![]()
3. Glue the eyes and the beak onto the bottom of the bag as shown. Glue or tape the hair onto the back of the bag for the Jill puppet. Tie a piece of red ribbon into a bow and glue it onto the hair.
4. Glue or tape the wings onto the sides of the bags and glue the legs to the top of the bag as shown.
5. Use your puppets to act out the rhyme below.
Two Little Blackbirds
Two little blackbirds
Sitting on a hill.
One named Jack
One named Jill
Fly away, Jack
Fly away, Jill
Come back, Jack
Come back, Jill
©2003, Digital by Design, Inc. - See Copyright Information
Puppet Crafts on Other Pages

Puppets Craft and Puppet Skits for Sunday School
Puppets to make and use for Puppet skits and for craft for Sunday school including sock puppets, paper bag puppets, stick puppets, paper cup puppets, and spoon puppets.
Puppet Skits for Sunday School and Children's Ministry
Puppet skits that go along with Sunday school lessons.