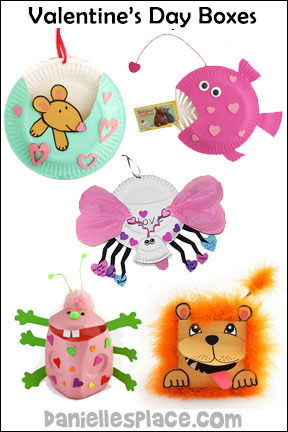
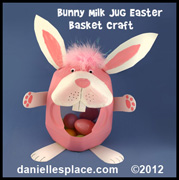
Milk Jug Crafts Kids Can Make
How to Make Crafts Made from Milk Jugs - Recycled Crafts Including: Milk Jug Airplane, Milk Jug Sock Monster Sock Caddy, Milk Jug Totem Pole, Milk Jug Crafts
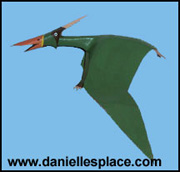
Milk Jug Airplane Craft for Kids
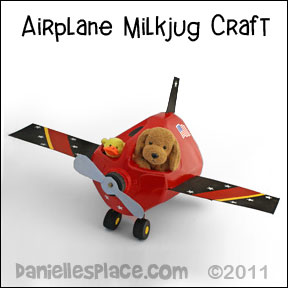
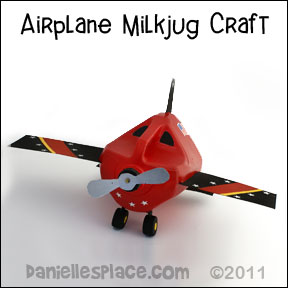
For directions on how to build this airplane go to the Transportation Crafts and Learning Activities Page.
© 2011, Digital by Design, Inc. - See Copyright Information
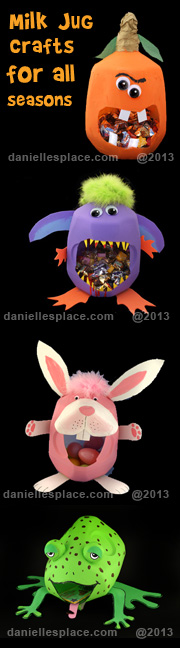
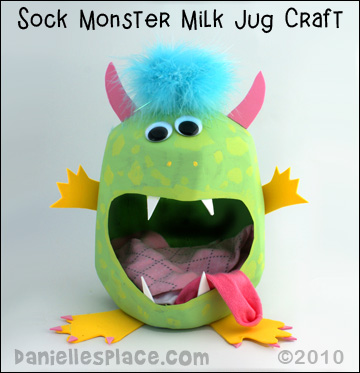
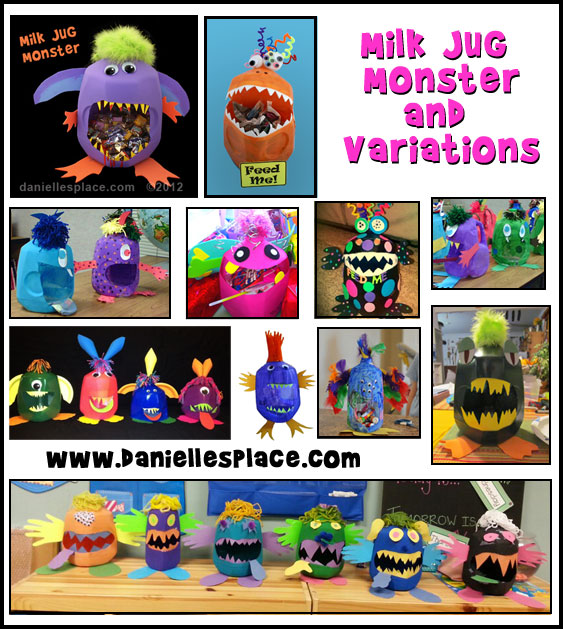
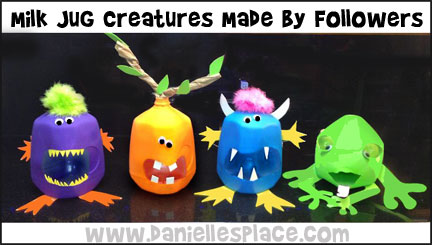
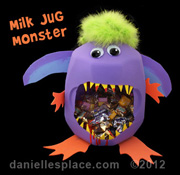
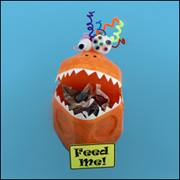
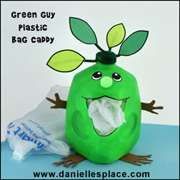
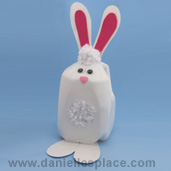
Milk Jug Sock Monster Sock Caddy Craft for Kids
These cute little sock monsters are great for storing your missing socks and things you pull out of pockets before washing clothes.
What you will need:
Empty Plastic Milk Mug
Sharp Scissors
Valspar Plastic Primer Spray Paint or Krylon Clear Plastic Primer Paint - If you are using the Acrylic Patio Paint
Krylon Plum Spray Paint - used with primer or other spray paint made for plastic
How to Make the Milk Jug Monster:
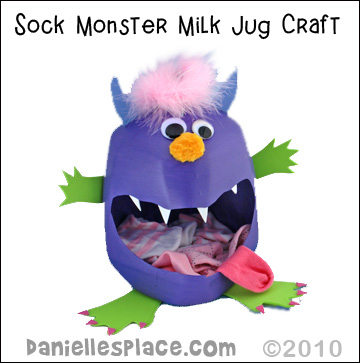
1. To remove the label fill the jug up with hot water and let it sit for a minute. This will loosen the glue. Carefully pull off the label. Do not get the label wet before trying to remove it or it will just disintegrate and you will have a hard time getting it off. Once the label is remove you can wash and dry the plastic milk jug. To remove the inked numbers on the jug rub a dry erase marker over the numbers until they smear and then wipe them off with a paper towel.
2. Cut a mouth shape in the jug on the two sides opposite the handle of the jug for the mouth.
3. Spray the jug with plastic primer paint and then paint it with the acrylic patio paint or spray paint it with spray paint made for plastic. Spray paint works best because the craft foam sticks better to the spray paint than the acrylic paint.
4. Glue a piece of feather boa to the lid of the jug for hair.
5. Cut feet, arms, teeth and horns from craft foam and glue to the jug as shown.
6. To finish glue on googly eyes.
© 2010, Digital by Design, Inc. - See Copyright Information
Milk Jug Totem Pole Craft for Kids
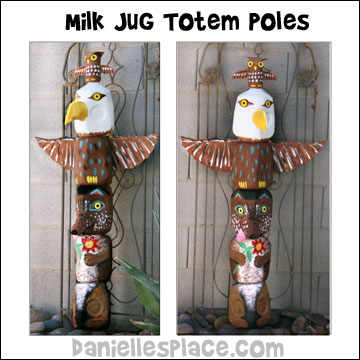
What you will need:
Plastic Milk Jugs and other Plastic Bottles
Scissors
A Pole or Stake (optional)
How to make:
1. Wash out and let your milk jugs and other bottles dry.
2. Search the Internet for pictures of totem poles and decide what creatures you would like to put on your totem pole. Draw sketches of the animals or people you would like to include and the order in which you would like them to be on the totem pole.
3. Make each creature separately and then glue them all together on top of each other. Do not paint the jugs where you want to glue because the glue will pull the paint from the milk jugs.
4. Cut a hole in the bottom of each jug about four inches in diameter. Place the hole over the top of another jug and glue them together with hot melt glue.
5. Use craft foam to form beaks, wings, and snouts. Glue the foam shapes to the milk jugs with a low temp. glue gun and then paint the jugs with acrylic paint.
6. To place your totem outside drive a stake into the ground where you would like the totem pole, and slide the totem pole over the stake through the holes and tops of the milk jugs. Or you can place your totem next to a fence or pole and tie it to the fence using the handles of the jugs and rope.
© 2010, Digital by Design, Inc. - See Copyright Information
Use these books for inspiration when making your own milk jug totem pole!


Milk Jug Caps Checker Board Game Kids Can Make
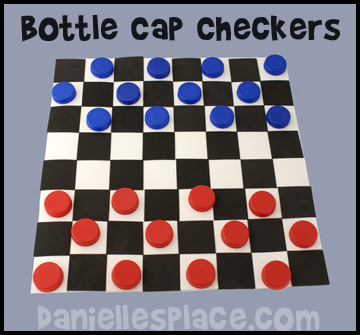
What you will need:
Two Different Colors of Bottle Caps from Plastic Milk Jugs - Twelve of Each Color
Craft Foam - Two Different Colors
Cardboard or Foam Core Board
How to Make the Checker Board:
1. Cut a piece of foam core or cardboard 16" x 16".
2. Cut pieces of foam core into two inch pieces using a paper cutter or Exacto Knife and a ruler.
3. Glue the foam pieces onto the board as shown in the picture with tacky glue. If you don't have craft foam, you can just draw a checker board onto the piece of cardboard.
4. Place the bottle caps on the board so the tops are up. When one of the caps are kinged turn the bottle cup upside down.
5. Print out directions on how to play checkers from the Internet.
© 2013, Digital by Design, Inc. - See Copyright Information
Milk Jug Crafts on Other Pages:


© 2010, Digital by Design, Inc. - See Copyright Information